
Windows Server VM
This guide is maintained for Ruk-Com PaaS. Screens and options may vary by platform version and account permissions.
Confirm the environment, region and account permissions, and back up current settings before changing a production system.
The platform integrates support for virtual machines (VMs), which allows it to offer Windows Server hosting. In this guide, we’ll show how to create a Windows VM server and explain VM hosting specifics compared to the regular containers used on the platform.
Note: The availability and version of Windows VMs (e.g., Windows Server 2019 or 2022) on the platform depend on the settings of the particular service hosting provider.
Creating Windows VM
- Click the New Environment button at the top of the dashboard to open the topology wizard. Expand the VPS section to locate the Windows server (the VM label helps separate the option from containers).
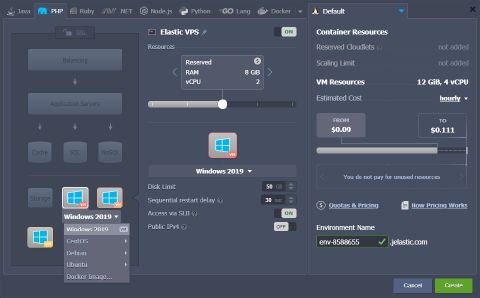 2. Only fixed resources are available for virtual machines, so when a VM is selected, the wizard’s central part is adjusted. Here, you can choose from several predefined plans using the slider. Hover over the price icon to view all the available tariffs for the VM.
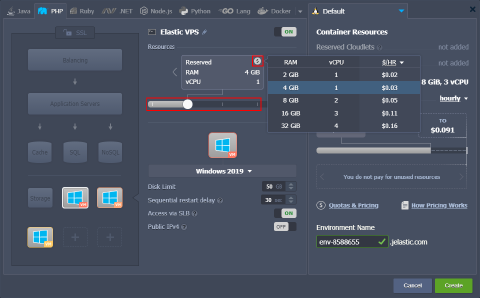 Also, note that the horizontal scaling and IPv6 options are not available for virtual machines.
- If a VM is added to the topology, an additional VM Resources line appears on the right side of the wizard (just below the cloudlets information for containers).
The cost of the VM Resources is always fixed regardless of the actual consumption of the VMs. Click Create to proceed with environment creation.
Managing Windows VM
- VMs are highlighted with a dedicated VM label and custom icon in the Usage column (as the cloudlet-shaped one is not suitable).
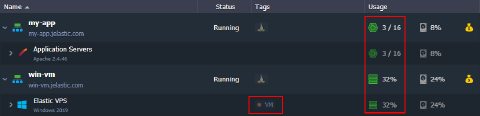
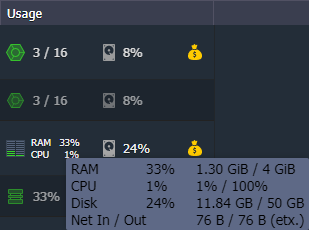
Tip: You can hover over the Usage column for a comprehensive overview of the current consumption or refer to the node Statistics for detailed analysis.
- Some node function icons for VMs are a bit different from those for containers. The following options are available:
- Add-Ons - installs available pluggable modules (e.g., Env Start/Stop Scheduler)
- Restart Node(s) - restarts a VM
- Statistics - shows real-time and historical VM resource consumption
- Remote Desktop - connects via RDP using the web client and resets RDP password
- Additionally - lists additional options, like node info

Note: The clone and migration options are automatically disabled in the dashboard for environments with VMs.
 If you need assistance performing these operations with a VM, please contact your hosting provider’s support team.
Let’s look over the available options in detail.
- Statistics are collected in the same way as for containers. However, CPU is measured in % for VMs (instead of MHz).
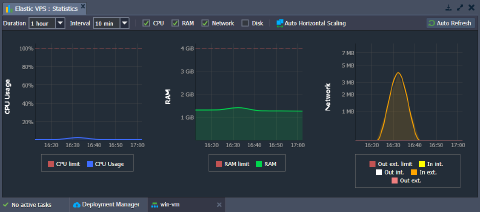 4. All the actual configurations and application management are performed via RDP. Use the appropriate Remote Desktop menu to:
- Open in Browser - connects to the Windows Server over RDP using the Guacamole web client, which allows you to manage the server directly in a browser
- Reset RDP Password - resets and resends the password of the Windows Administrator user
- Info - displays a short instruction on remote desktop connection via a local RDP client
- RDP link - shows a link for connection via a local RDP client
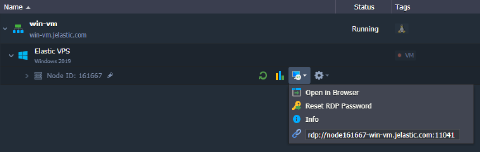 5. In addition to the built-in web client, you can connect using any preferred local RDP application. Connect to a VM based on its entry point:
- If it is created without an external IP, an endpoint is created automatically and can be used for RDP connection
 * If a public IP is attached, you can use it directly as the VM host
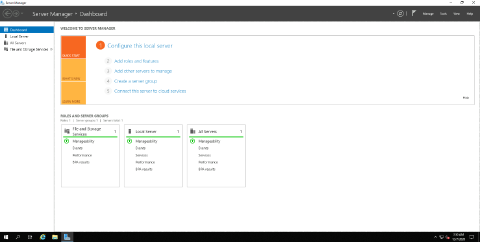 Use the administrator credentials from the email to authenticate and start managing your Windows Server.
- The vCPU and Memory for VMs are billed under one tariff, while Disk, Network, and Options are billed separately, same as with containers.
That’s all you need to manage Windows VMs on the platform. Refer to the official Microsoft documentation for information on server management itself.