
File Synchronization in Cluster
This guide is maintained for Ruk-Com PaaS. Screens and options may vary by platform version and account permissions.
Confirm the environment, region and account permissions, and back up current settings before changing a production system.
File Synchronization Between Several Application Servers in a Cluster

As incoming traffic to your project grows, you need to improve your app performance to keep up with it. Some room of capacities for elastic extension is automatically provisioned in confines of a set server vertical scaling limit, but eventually you most likely will face the need to enlarge a number of its nodes (i.e., to scale it horizontally) upon your service popularity rises.
For lots of the most widely used apps (like WordPress, Drupal, Joomla, Liferay, Redmine and similar ones) such distribution across multiple web server instances becomes a real problem, as usually all user-provisioned content is saved only on a node that has processed the corresponding file upload request.
To help you in getting rid of such content being out-of-sync upon building clustered solution for your application, the platform provides a special File Synchronization add-on, intended to keep the uploaded files set similar across multiple web-server instances. Herewith, synchronization could be applied not just in confines of one environment (i.e., for a single horizontally scaled node) but even across application servers in two separate environments, regardless of whether they run the same stack and/or application or different ones.
So, follow the guide below to dive into implementation specifics of this solution and to discover how it actually works in practice with the next steps:
- Install Example WordPress Application
- Test File Upload Without Synchronization
- Apply File Synchronization
- Check Sync Logs
File Synchronization Add-on Implementation
The File Sync solution is provided as a single-click add-on, implemented with a bundle of lsyncd daemon and cron utility. Herewith, being wisely coupled with inotify, lsyncd initiates file synchronization only when any actual changes are detected on the system. Such realization notably offloads CPU in comparison to the regular sync calls and keeps your data up-to-date all the time, which makes this solution simultaneously simple to use, powerful, and affordable.
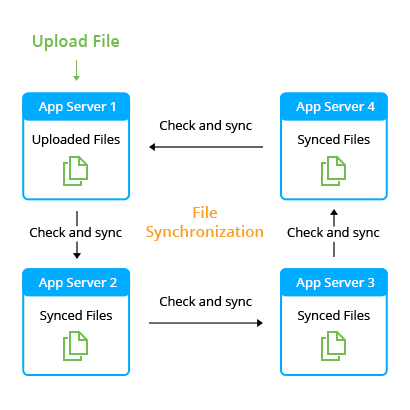 The File Sync add-on can be installed on top of any platform-managed application server stack (i.e., except for Docker containers). Before the appliance, you will be asked to select the folder to synchronize. In this way, you are able to sync only the part of your app server’s file system that actually requires this. Thus, only changes within the selected directory (on any of specified application server instances) will trigger the synchronization.
Now, let’s see how to put all of this into action step-by-step.
Install Application
In our example, we will use the WordPress application, deployed to an environment with two NGINX-PHP application servers.
Tip: The instruction below is fully appropriate for other similar applications (Drupal, Joomla, Liferay, Redmine and so on) based on any supported programming language - Java, PHP, Ruby, etc.
- You can install your WordPress application manually or locate the appropriate one-click package in Marketplace to deploy it automatically.
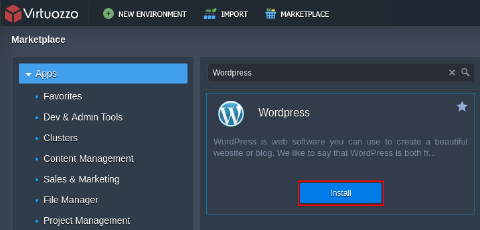 Click Install and provide the required details, such as Environment, Display Name (alias) and Region (if several regions are available).
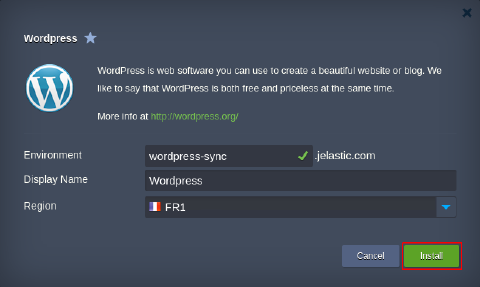 Confirm the installation and wait a minute for a message with your admin data to be shown (the same information will be simultaneously sent to you via email).
- Click Change environment topology and use the + button within the Horizontal Scaling section to add one more app server node and, this way, to create a cluster.
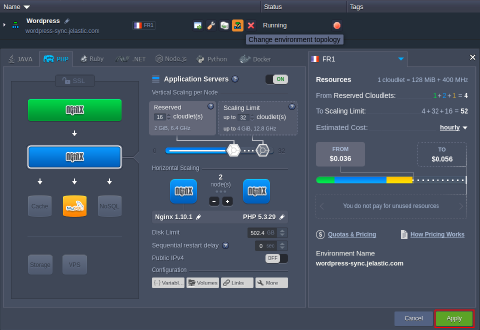 When finished, click Apply.
Tip: By using instructions in our documentation, you can easily add extra app servers, enable high availability or even configure a clustered solution.
In our case, we have simply added one more app server to the environment but you can use a more complex scenario by setting the clustered solution for your WordPress application
Test File Upload Without Synchronization
At this point, let’s check how the file upload is processed without synchronization.
- Access the Wordpress admin panel by adding the /wp-login.php suffix to your environment domain name and Log In using credentials you’ve received via email.
 2. Once logged in, make some custom changes (e.g., upload images or other files, edit themes, add pages, etc.).
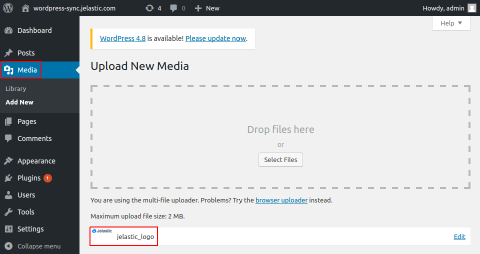 As an example, we’ve uploaded one image to the Media library.
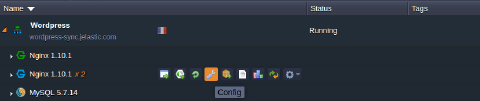
- Now, return to the platform dashboard and click Config next to the app server layer.
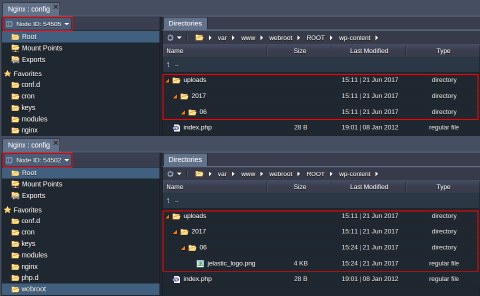
 4. Navigate to the webroot (click from Favorites) > ROOT > wp-content directory and compare its content within both nodes.
Note: The directory with uploaded files depends on the application you are running. Here is the list of such folders for some widely-used applications:
- WordPress - webroot/ROOT/wp-content
- Drupal - webroot/ROOT/sites
- Joomla - webroot/ROOT/images
- Liferay - webroot/home/liferay/data
As you can see, one of the app server instances (Node ID 54502 in our example) contains the newly added file in the uploads directory, whilst another one (with 54505 identifier) does not have it yet.
So, to implement content synchronization inside our cluster, let’s apply the File Synchronization add-on.
- Locate and Install the File Synchronization add-on within the platform Marketplace.
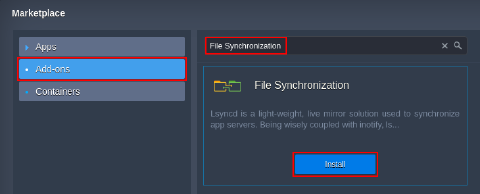 2. In the opened dialog box you need to define some additional sync parameters.
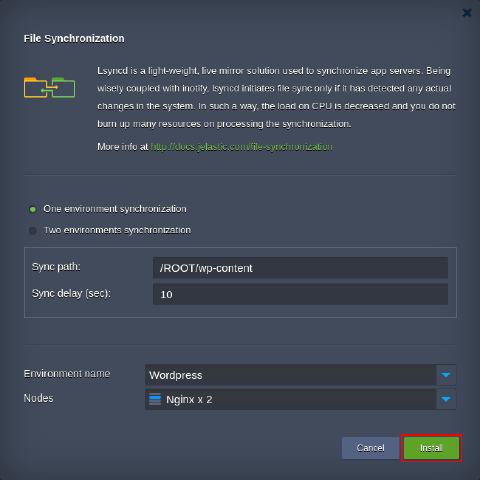 Here, specify whether file synchronization should run within One environment (as in our example) or between Two different environments (see the related dedicated options in the table below),. Apart of that, provide the following details:
- Sync path - path to a folder (relatively to the webroot directory) that should be synchronized on a chosen below (within the Nodes field) server, e.g., /ROOT/wp-content
- Sync delay (sec) - synchronization delay, stated in seconds
- Environment name - to select the required environment from the list of available ones
- Nodes - the app server layer is fetched automatically upon selecting an environment
When you are finished, click Install.
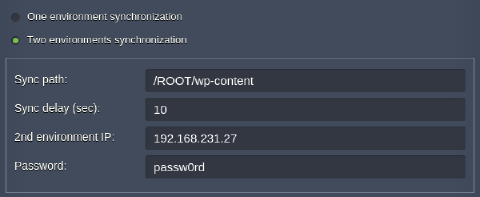
Tip: In order to implement synchronization between two different environments, the add-on should be installed to web-servers in both of them (selecting another environment within the appropriate drop-down list each time) with the chosen Two environments synchronization option. Here, the following additional parameters should be specified:
- 2nd environment IP - address of any application server node within the second environment (you can use internal IP for the case both environments are run on the same Platform and hardware region; otherwise, external IP address is required)
- Password - optional box to set a password on synchronization (should be stated the same on both instances)
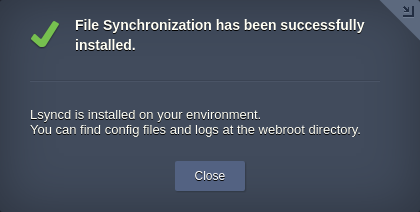
- When installation is completed, you’ll see a confirmation message.
 4. At this point, you can check the uploaded file’s presence within both nodes.
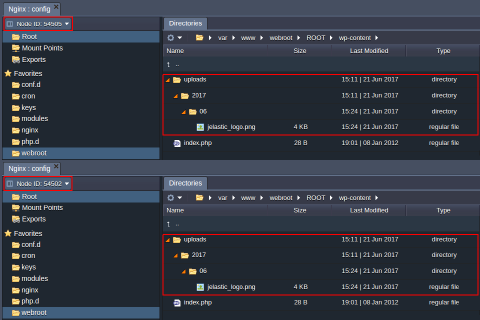
Tip: If you change the environment topology by adding more app servers, the add-on will apply the corresponding file synchronization to the new nodes automatically, with no manual adjustment needed.
Note: If there are mount points in the synchronized directory, you need to add them to exceptions. Go to the
for pid in $(ps aux | grep 'rsync\|lsyncd' | awk '!/grep/{print $2}'); do kill -9 $pid; done
It’s that easy! File synchronization will be automatically performed every time you add or change anything in your WordPress (or any other application you maintain) so that data on your servers will always be identical.
Check Logs
The synchronization process can be monitored via log files that are located within the webroot/lsyncd/var/log web-server directory.
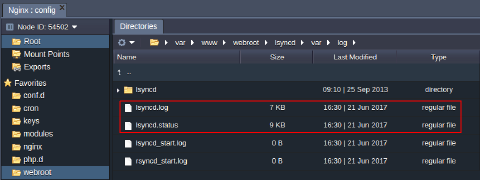 The most important information and status of synchronization can be viewed in the lsyncd.log and lsyncd.status files.
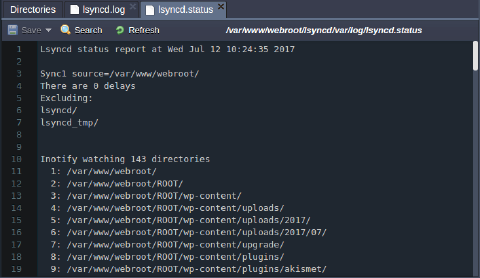 Hopefully, this instruction was helpful for you.