
Creating a Database Server
This guide is maintained for Ruk-Com PaaS. Screens and options may vary by platform version and account permissions.
Confirm the environment, region and account permissions, and back up current settings before changing a production system.
Objective
This guide explains how to use Creating a Database Server on Ruk-Com Cloud PaaS, with ordered procedures and practical verification points.
Before you begin
- Sign in with an account permitted to manage the relevant environment.
- Confirm the target environment, region and resources before saving changes.
- Create a backup or rollback plan before changing a production system.
Ruk-Com Cloud provides a scalable and efficient database server management suite that is easy to install and operate. The process of creating a new database is quite simple and only takes a few minutes to create a Database Server.
1. Open the Topology wizard by clicking on New environment (to set up a new Env) or select the Change environment topology button (to add a database to an existing Env).

2. Then select whether you want to use SQL or NoSQL type. The wizard will appear to select the desired Database and Version.
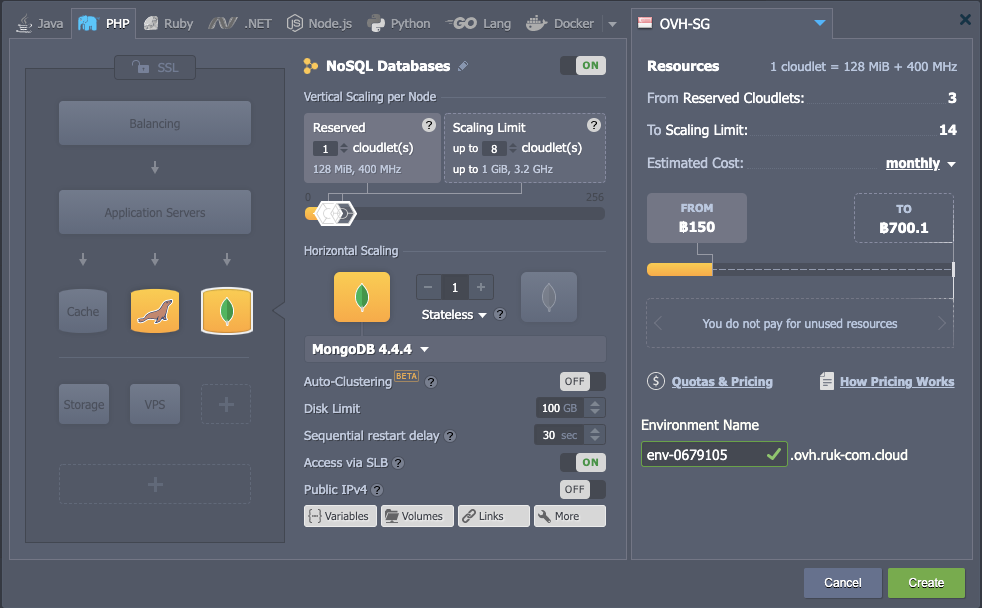
Click on the list to select a supported database management system.
- for SQL- MySQL 5.x, MariaDB 5.x / 10.x, PostgreSQL 9.x, PerconaDB 5.x, MSSQL 2012
- For NoSQL- MongoDB 2.x / 3.x, CouchDB 1.x, Redis 2.x / 3.x, Neo4j 1.x / 2.x / 3.x, Cassandra 2.x / 3.x, OrientDB 1/ 2
Ruk-Com Cloud will develop and update the list ofdatabase serverIf there is always a new version, we will test and update it within 45 days after the new version comes out.
Once the database server has been created, you will receive an email notification with details (URL link, login and password) for accessing the database management panel.
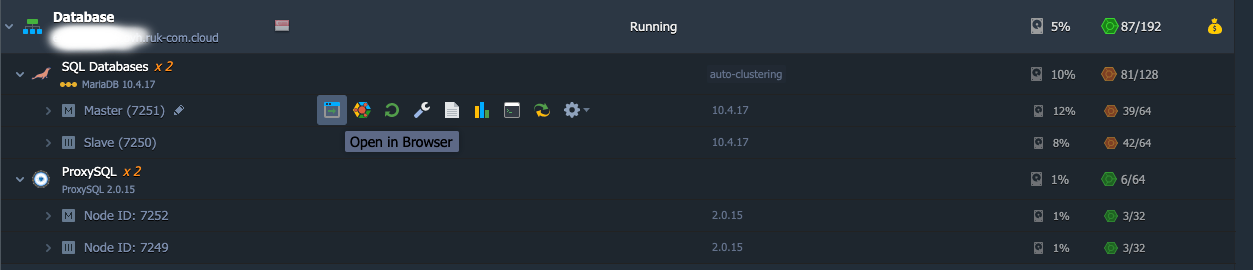
3. To open the database management panel for the admin, press the Open in Browser button next to the database node in the dashboard. (or manually write the system management panel URLmanually)
Various usage information and passwords will be automatically sent to Email after the Node is created (in case you can't find it, you may have to check the Junk tank of the Email box).
Additional information
- For Containers that do not havePublic IP addressIn the admin console, https:// is used by default.
- If using an MSSQL database, use the built-inMicrosoft SQL Server Management Studiofor management
When the database is ready You can connect the application to the database.Connect your application to DB
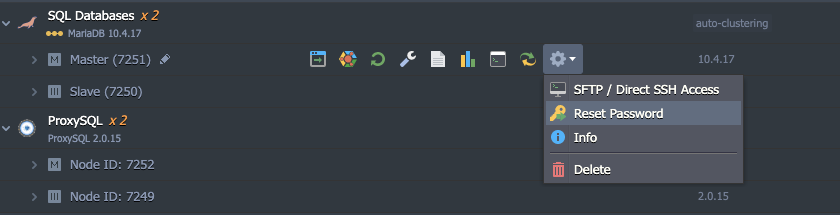
Resetting the database password
To reset the password for the Database node, click the Additional button next to the dashboard. A new password will be randomly generated and sent via email again.
URL panel for the database in the admin section

The admin panel URL for Database servers in Ruk-Com Cloud consists of the following sections.
node{node_id}-{environment_name}.{hoster_domain}
where
- {node_id} - ID of the target database container. that can be located on the dashboard (e.g. 7251 for MySQL)
- {environment-name} – The name of the environment you added the server to (e.g. env-1234567)
- {hoster_domain} – Domain name of each region.
Note: in eachDatacenter RegionThe hoster_domain value for each region is different.