
Encryption in Transit Add-On
This guide is maintained for Ruk-Com PaaS. Screens and options may vary by platform version and account permissions.
Confirm the environment, region and account permissions, and back up current settings before changing a production system.
The Ruk-Com-certified Redis database is provided with a built-in add-on that implements “encryption in transit”. The functionality ensures data protection with SSL/TLS encrypted connection while it moves between servers. After the add-on installation, support for a secure connection is configured on a separate port 6380, while maintaining the default port 6379 to accept unencrypted connections for backward compatibility (if needed, it can be disabled via settings).
Add-On Installation
The add-on can be installed on top of the Redis nodes only.
- In the platform dashboard, go to the Add-Ons section of the appropriate Redis database layer, and click Install for the Redis Encrypted Connection solution.
Tip: The add-on is also available from the Marketplace and can be imported from the appropriate GitHub repository.
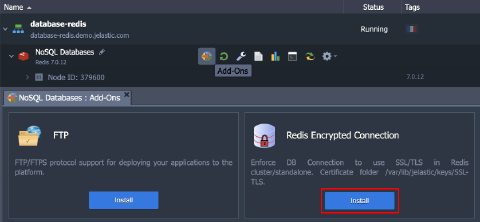 2. Within the opened installation window, select the target Environment and Node Group(s) where the add-on will be installed.
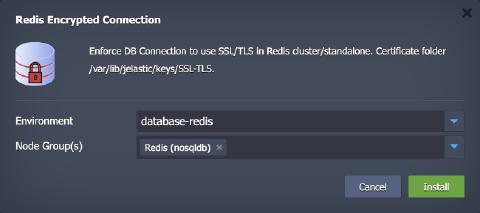 Click Install to continue.
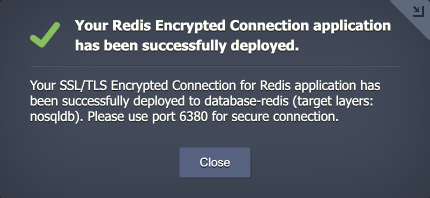
- In a minute, your environment will be configured.
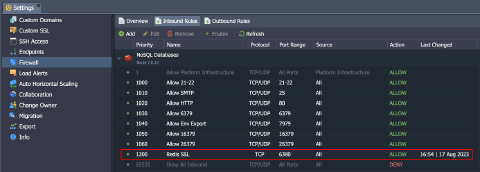
Note: Port 6380 is used for secure connection by default and is automatically added to the firewall rules during the add-on installation.
You can find generated SSL certificates under the /var/lib/Ruk-Com PaaS/keys/SSL-TLS folder.
Add-On Specifics
Below you can learn about certificates generation processes and specifics:
- Add-on pre-installs Redli – a humane Go-based alternative to the official redis-cli utility.
- Certificates are generated with the /usr/local/sbin/selfcertgen utility.
- Certificates are self-signed and issued for the hostname of the particular node. It means that each node has a set of own certificates, and you must use the ones corresponding to the accessed node for authentication.
- Due to Redis specifics, the alternative hostname is added when creating the server certificate:
Copy
echo "subjectAltName = @alt_names

[alt_names]
IP.1 = ${ALTNAME}" > /tmp/altname.ext
RANDFILE=/tmp/.random openssl x509 -req -in ${CERT_DIR}/server-req.pem -days 3650 -CA ${ROOT_CERT} -CAkey ${ROOT_KEY} -set_serial 01 -extfile /tmp/altname.ext > ${CERT_DIR}/server.crt
- Certificates are stored within the /var/lib/Ruk-Com PaaS/keys/SSL-TLS folder (accessible via the keys shortcut in the file manager). Two subfolders are present:
- server – server certificates are used to provide the TLS encryption of connection to the Redis database
- client – downloadable client certificates can be used to authenticate client connection to the database server
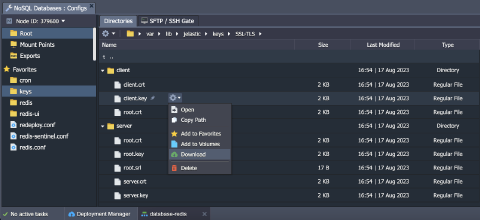 Redis configurations:
All the add-on configurations are provided via a separate /etc/redis.conf configuration file (also added to the Favorites list in the file manager).
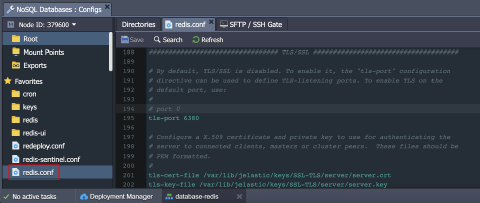 Below, you can check a list of the most common SSL-related settings:
- tls-port - specifies the port which is used for SSL connection (6380).
- port – sets a port that can accept unencrypted connections (6379).
Tip: Both values are intentionally kept separate by default to ensure backward compatibility. If you want to disable the unencrypted connection completely, set the port directive to 0.
- tls-cert-file, tls-key-file, tls-ca-cert-file – directives specify paths to server-side SSL certificates
- tls-auth-clients – configures if clients (including replica servers) on a TLS port are required to authenticate using valid client-side certificates. Set to “optional” by default - if provided, client certificates are accepted and must be valid (but they are not required).
- tls-replication and tls-cluster - can be enabled if needed to support TLS interconnection in the Redis cluster
Add-On Configuration
After the installation, the add-on can be found under the Add-Ons tab for the appropriate layer.
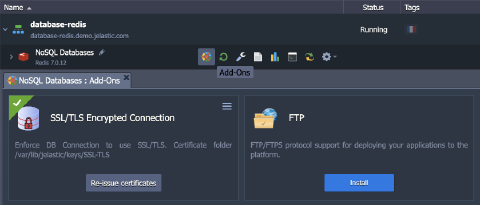 Here you can click the Re-issue certificates button to generate SSL certificates for secure connection anew.
If no longer needed, remove the add-on from the layer by choosing the Uninstall option in the add-on menu in the top-right corner.
Secure Connection to Redis
For secure connection (we’ll use the redis-cli utility as an example), specify the command with the following options:
Tip: You can store the database password in the dedicated REDISCLI_AUTH variable to avoid exposing it in the command line:
Copy
export REDISCLI_AUTH={password}
Copy
redis-cli -p 6380 --tls --cacert /var/lib/jelastic/keys/SSL-TLS/client/root.crt {command}
 You can execute any preferred {command} or omit it to connect to the database in the interactive mode.
If the server requires authentication using a client-side certificate, you can specify a certificate and a corresponding private key using --cert and --key parameters.
Copy
redis-cli -p 6380 --tls --cert /var/lib/jelastic/keys/SSL-TLS/client/client.crt --key /var/lib/jelastic/keys/SSL-TLS/client/client.key --cacert /var/lib/jelastic/keys/SSL-TLS/client/root.crt {command}
 For external connection, the client needs to upload the certificate files (client.crt, client.key, root.crt) to their computer/container/VM and use the -h option to specify a remote hostname or an IP address.
SSL Configuration Examples
- forcing SSL connection (for standalone nodes)
Enforce TLS encrypted connection and completely disable the non-secure connection for clients.
-
Go to the /etc/redis.conf configuration file and change the “port” directive to 0. It will disable unencrypted connections.
-
Next, change the “tls-port” option to the default Redis port 6379 in the same file.
-
If you want to make the usage of client certificates (for auth and mutual TLS) obligatory, set the “tls-auth-clients” directive to “yes”.
-
Go to the firewall settings and remove the rule for port 6380, as it is no longer needed.
-
Lastly, restart the Redis container to apply the changes.
Now, Redis service is available only through the SSL connection on port 6379.
- cluster/sentinel interconnection through SSL
Redis cluster interconnections are kept plain (non-secure) by default. It ensures backward compatibility with the already existing clusters. However, if you want to enable interconnection encryption, follow the steps below:
Note: The automatic and manual scaling can work incorrectly after the changes due to being designed for plain non-SSL connections.
-
If you are using the clustered solution, ensure that the “tls-cluster” directive in the /etc/redis.conf file is set to “yes” (uncomment the option).
-
If you are using the sentinel replication, uncomment the “tls-replication” option as well (should be the “yes” value).
-
The “tls-auth-clients” directive should be kept as “optional” (default value).
-
The default cluster configuration uses port 6379 for the cluster interconnection, so you should either change the “tls-port” directive to 6379 or change the cluster/replication port to 6380.
-
Restart the Redis cluster to apply the changes.
- multi-regional cluster SSL interconnection
When working with the multi-regional Redis cluster, the same root certificate must be used on all the nodes of all the environments for successful interconnection between nodes through the TLS.
-
Install the SSL add-on on the first environment of the multi-regional cluster.
-
Copy /var/lib/Ruk-Com PaaS/keys/SSL-TLS/server/root.crt and /var/lib/Ruk-Com PaaS/keys/SSL-TLS/server/root.crt to the /var/lib/Ruk-Com PaaS/keys/SSL-TLS/ directories on all the nodes of the second and third environments.
-
Now install the SSL add-on on these environments as usual – new root certificates will not be generated this way.