
Connecting Java to MongoDB
This guide is maintained for Ruk-Com PaaS. Screens and options may vary by platform version and account permissions.
Confirm the environment, region and account permissions, and back up current settings before changing a production system.
Objective
This guide explains how to use Connecting Java to MongoDB on Ruk-Com Cloud PaaS, with ordered procedures and practical verification points.
Before you begin
- Sign in with an account permitted to manage the relevant environment.
- Confirm the target environment, region and resources before saving changes.
- Create a backup or rollback plan before changing a production system.
MongoDBIt is one of the most popular NoSQL databases that can be easily deployed within Ruk-Com Cloud. In this guide we will show you how to connect this instance to your app and perform simple operations.
Creating the environment
1. Log in to your Ruk-Com Cloud account.
2.Creating the environmentWith a MongoDB instance (available in the NoSQL section), the application server required for app installation can be in the same environment or in a separate environment. (For example, we added Tomcat 10):
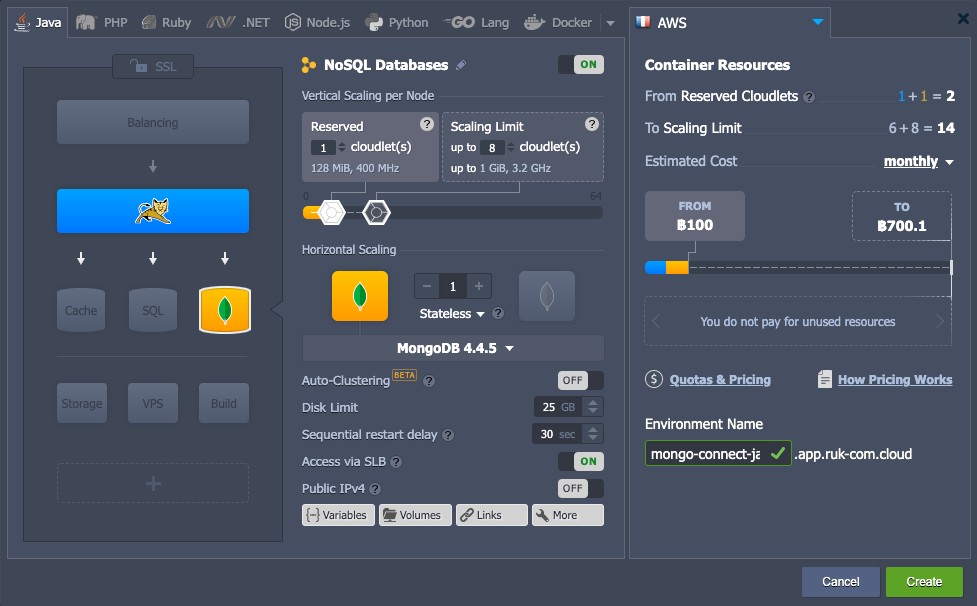
ClickCreateAnd wait a moment for your Environment to appear on the dashboard.
MongoDB configuration
1. Check your email inbox. An email will come with the database details.
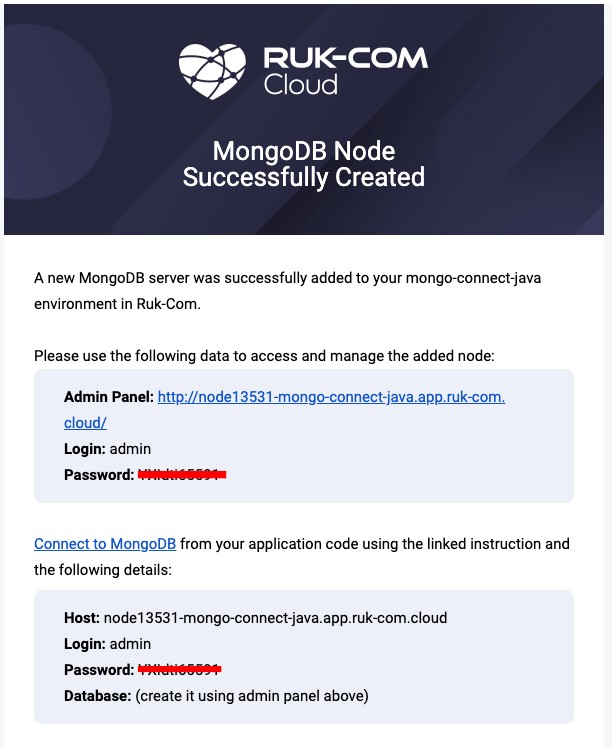
2. Click the Open in browser button for the MongoDB node within your dashboard or use the access URL from your email to access the admin database panel.
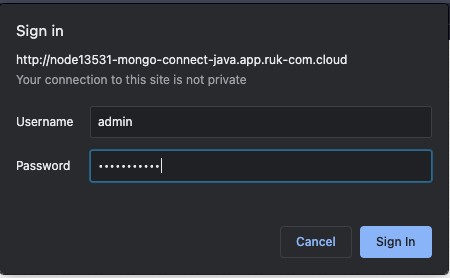
Log in using the information from the email address above.
3. Create a new database by entering information in the top right field and then pressing the Create Database button.
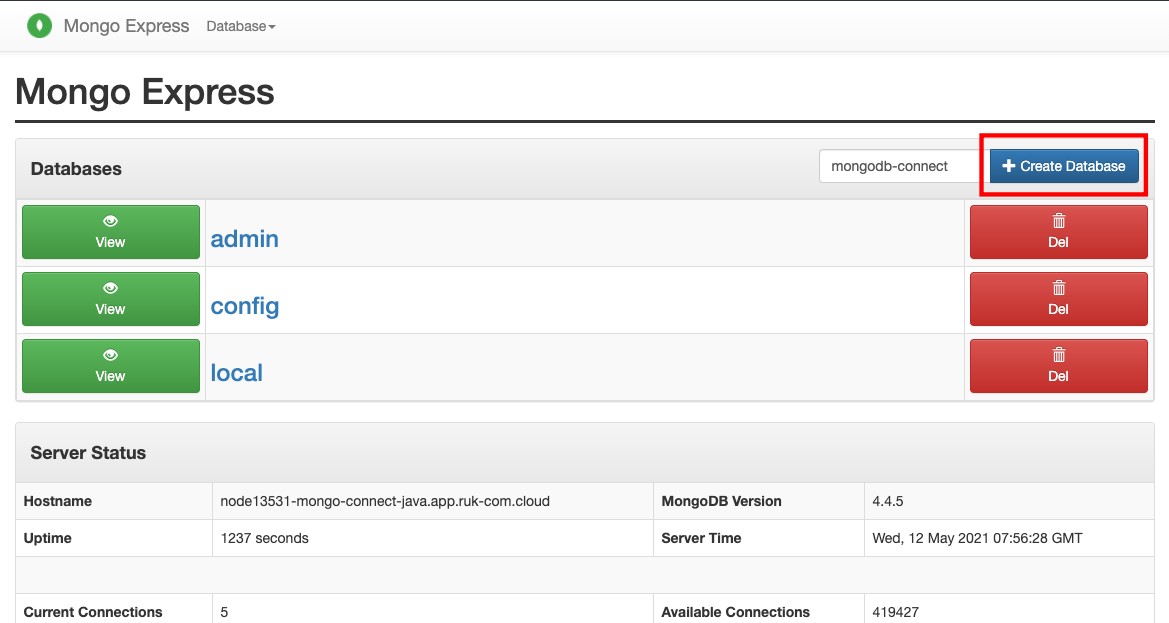
4. You then need to create a user for this database - go to the Web SSH instance of Mongodb and log in to mongodb using the command
mongo -u 'admin' -p '[ใส่รหัสผ่านในตรงนี้]'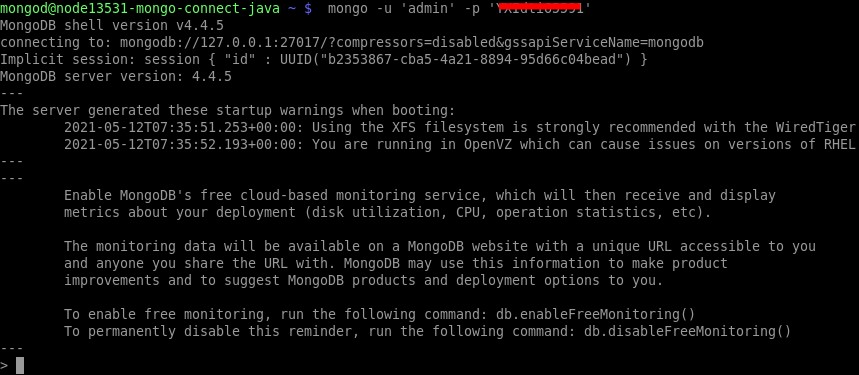
5. After that, select the database using the command
use adminThen type the following command:
db.createUser({ user: "user_name", pwd: "password", roles:[{ role: "readWrite", db: "db_name"}]})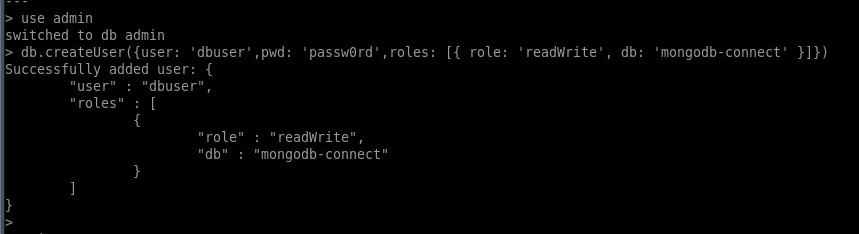
where:
- user_name – The desired name of your new database user.
- password - Password for the user.
- db_name - The name of the database to which the newly created user will have read/write rights.
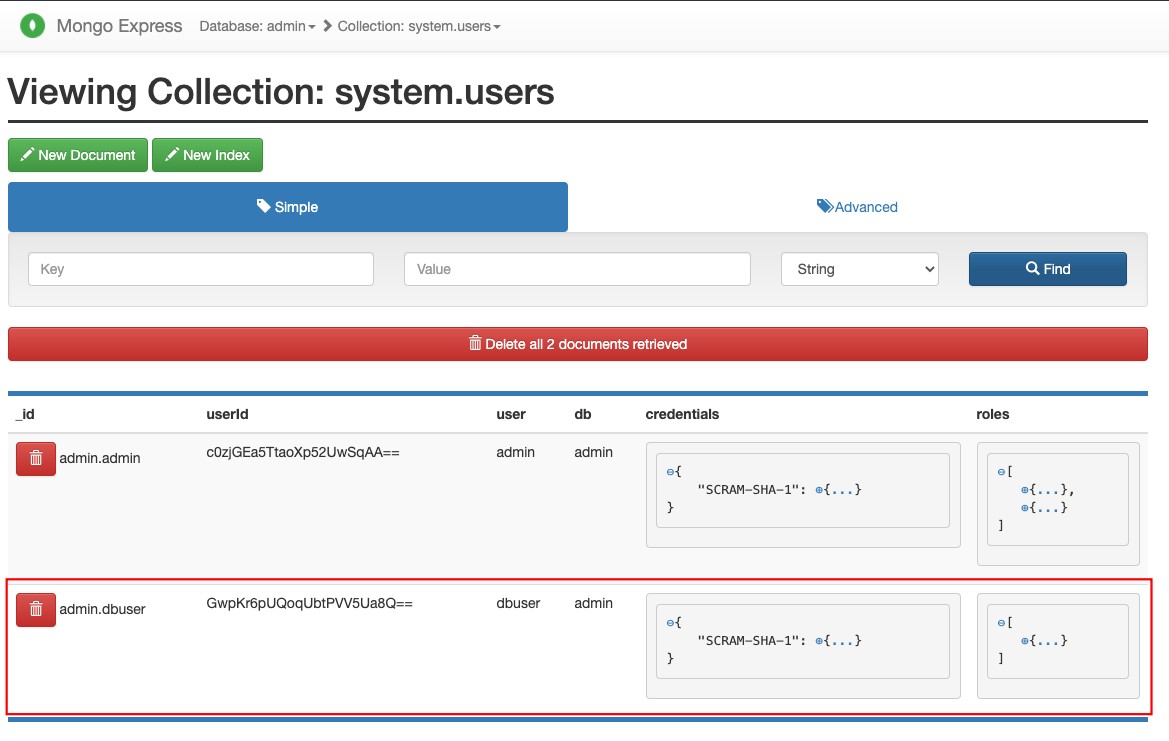
5. Now go back to the dashboard. You can see that a user has been created.
Note:
You can specify all required connection information directly in your code. (Application) In the given example we put these settings in the file which is read by our test application. (presented in the next instructions section)
Click the Config button next to the server application in the relevant Environment. (In our case, it's Tomcat 10)
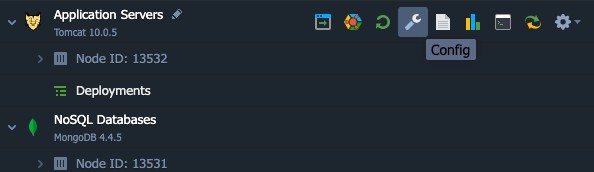
In the open tab, create a file.mydb.cfgnew file within the home directory and specify the following
host={db_access_url}
dbname={db_name}
user={user_name}
password={password}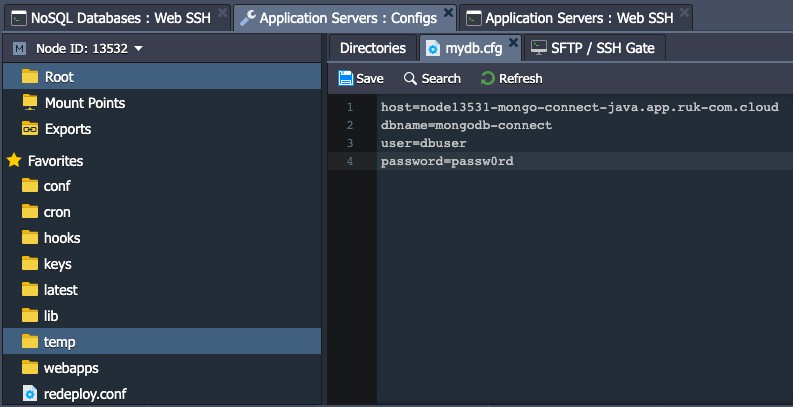
where
- {db_access_url} - Link to the admin database panel. (Search in the relevant email address or click Open in browser next to MongoDB node and copy it from the address bar) without the https:// part
- {db_name} - Name of the created database. (In our case, it's mongodb-connect)
- {user_name} – Database username. that you assigned to this database (in our case, dbuser)
- {password} – Password of the corresponding user.
Don't forget to save changes.
Deploying the application
1. You can now deploy the project to the prepared Env.
Example Here is the code of our application which is intended to test the connection to a MongoDB node.
MongoManager.java :
package example;
import com.mongodb.*;
import com.mongodb.client.MongoDatabase;
import org.bson.Document;

import java.io.FileInputStream;
import java.io.IOException;
import java.util.Arrays;
import java.util.Date;
import java.util.Properties;

public class MongoManager {

    static String host, dbname, user, password;

    public void addData(int repeats) {
        try {

            Properties prop = new Properties();
            prop.load(new FileInputStream(System.getProperty("user.home") + "/mydb.cfg"));

            host = prop.getProperty("host").toString();
            dbname = prop.getProperty("dbname").toString();
            user = prop.getProperty("user").toString();
            password = prop.getProperty("password").toString();

            System.out.println("host: " + host + "\ndbname: " + dbname + "\nuser: " + user + "\npassword: " + password);

            MongoCredential credential = MongoCredential.createCredential(user, dbname, password.toCharArray());
            MongoClient mongoClient = new MongoClient(new ServerAddress(host), Arrays.asList(credential));

            MongoDatabase db = mongoClient.getDatabase(dbname);

            try {
                db.getCollection("mycollection");
            } catch (Exception e) {
                db.createCollection("mycollection", null);
                System.out.println("Repeats: " + repeats);
                for (int i = 1; i <= repeats; i++) {
                    Document document = new Document("data", new Date());
                    db.getCollection("mycollection").insertOne(document);
                    System.out.println("INFO: row added " + document);
                }
            } finally {
                mongoClient.close();
            }
        } catch (IOException ex) {
        }
    }
}
2. Applications can be deployed using Ruk-Com.Deployment Manager(with local /URL file as source) or Maven (for deploying from GIT / SVN)
For testing, you can try using the project.mongoclient.warOur available connectors already have the appropriate connector drivers. (or download link # sources and customize as desired)
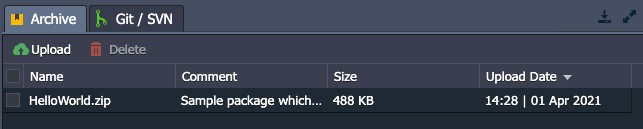
Note:
To connect your project to the MongoDB database, the library must be uploaded.mongo-java-driver.jarappropriate to the folder webapps/{app_context}/WEB-INF/lib of your app server with the deployed application
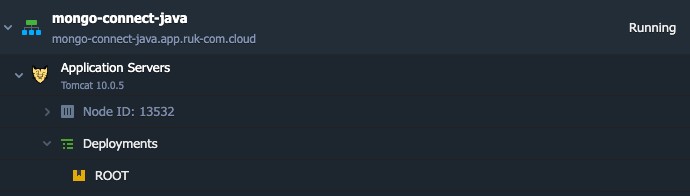
3. As a result, you will get an Environment similar to the Environment below:
Check connection
1. Click Open in Browser next to Env with our sample app deployed. A new window will open showing the MongoDB Manager form.
Type the desired number of rows. (for adding to the relevant database) into the appropriate field and click the Insert rows button.
2. Wait a moment until the page stops updating and return to the MongoDB admin panel.
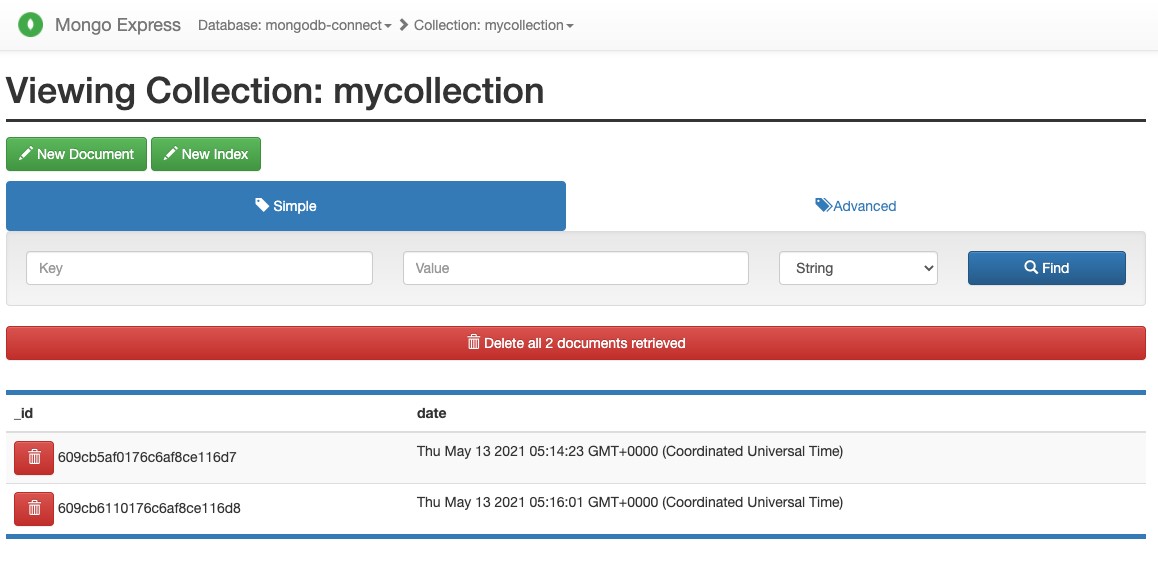
go to database mongodb-connect and check the new collection mycollection inside which should contain the number of records specified above.
As you can see, everything works fine as the application can connect to our database. The admin panel can now be used to perform other required operations on your database in the same way.
Things you should know
Ruk-Com's documentation also includes a supplementary guide for MongoDB server, which may be useful for familiar and experienced users:
- Set link # Master-Slave Replication to optimize database performance and access to the data it contains.
- Ensure data security by adjustingBackups SchedulingThis helps prevent data loss and allows for data recovery in the event of an unexpected server failure.
- Learn how to createRemoteAccessGo to database To acquire the ability to work with appropriate client applications. Although it is not necessary to login to our dashboard.
- Read the manualDump Import/ExportDump to find a way to manually back up your data within the Dump file, then restore it from a previously created Dump if necessary.