
Creating an SSL connection to the PostgreSQL Server database
This guide is maintained for Ruk-Com PaaS. Screens and options may vary by platform version and account permissions.
Confirm the environment, region and account permissions, and back up current settings before changing a production system.
Objective
This guide explains how to use Creating an SSL connection to the PostgreSQL Server database on Ruk-Com Cloud PaaS, with ordered procedures and practical verification points.
Before you begin
- Sign in with an account permitted to manage the relevant environment.
- Confirm the target environment, region and resources before saving changes.
- Create a backup or rollback plan before changing a production system.
When trying to keep data in a PostgreSQL database secure, the first thing to do is encrypt the entire connection to protect the authentication credentials (username/password). This guide is intended to help you create a secure SSL connection to your PostgreSQL container hosted on the Ruk-Com Cloud.

Below we will explorePostgreSQL Server customizationappropriate settings required for SSL activation and certificate generation. Then we will create and add a certificate for the link # machine.clientand finally will createconnectionthat is secure with our server through the pgAdmin tool. Let's go ahead and take a look.
PostgreSQL Server configuration
Obviously for this lesson we will be using an Environment with a PostgreSQL database inside which you can link #createEasily if you haven't done it before.
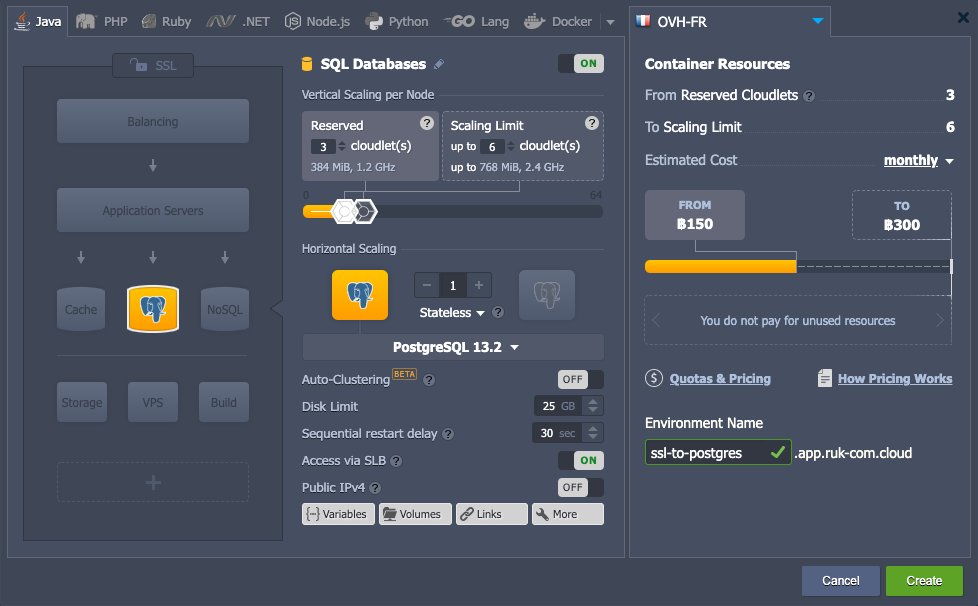
Tip:In case you have never performed a similar operation before, you need to know these points.
- createSSH keypair
- addpublic SSH keyyour dashboard
- Access your accountVia SSH protocol
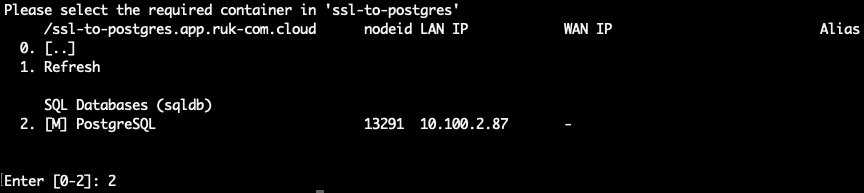
2. Now to be able to work with SSL, you need to add the following 3 files to the server directory./var/lib/pgsql/data
- server.key - private key
- server.crt - server certificate
- root.crt – trusted root certificate
Tips :
- We will not go into detail about command parameters here. But if you want to know more Just see the link # Self-Signed Custom SSL page in our documentation or check out the official link # OpenSSL website for a complete list of available actions.
- You can also use the link # certificate.custom SSLas described below. (Follow the Create a Custom SSL Certificate section of the linked instructions to get that information.) In the latter case, you can skip the creation step and jump to link #.6th stepof this command directly
Go to the mentioned folder and proceed with the steps below.
3. First, let's create the first file - private key:
- Execute the following command:
cd /var/lib/pgsql/data
openssl genrsa -des3 -out server.key 1024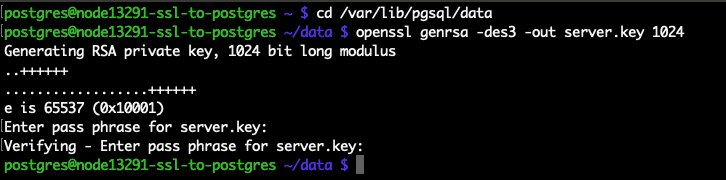
During server.key generation you will be asked for a pass phrase – enter and confirm to complete the generation.
- Now to continue working with this key it is necessary to delete the password that you added earlier. Execute the following command:
openssl rsa -in server.key -out server.key
Enter your passphase code again to confirm again.
- Set the appropriate permissions and ownership rights for your private key file with the next command:
chmod 400 server.key
chown postgres.postgres server.key
4. Now the server certificate must be generated according to your server.key file like so:
openssl req -new -key server.key -days 3650 -out server.crt -x509 -subj '/C=US/ST=Nontaburi/L=Nontaburi/O=RukCom/CN=mysite.com/[email protected]'
Note:Here is the required information for the parameter -subjIf this certificate is used with Production:
5. Since we are going to sign the certificate ourselves. The generated server certificate can then be used as a trusted root certificate as well. So just make a copy with the appropriate name:
cp server.crt root.crt
Now that you have all three certificate files, you can proceed to configure the PostgreSQL database, which is required to enable and use SSL.
6. Open the filepg_hba.confwhich are in the same folder to edit with the desired terminal editor (for example, vim) or directly through the dashboard.
Replace the default content with the following line:
# TYPE  DATABASE    USER        CIDR-ADDRESS          METHOD
# "local" is for Unix domain socket connections only
local   all         all                               trust
# IPv4 local connections:
host    all         all         127.0.0.1/32          trust
# IPv4 remote connections for authenticated users
hostssl all         webadmin    0.0.0.0/0             md5 clientcert=1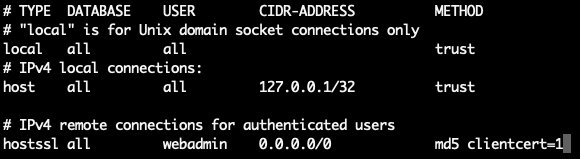
Tips: In case you are going to be working with a database other than the default webadmin user, change the appropriate value within the last line of the file to the desired name. Note that in this case you must use the same username for all additional commands. (We will specify the required location)
7. To complete the configuration, you must apply additional changes to the file.postgresql.confGo to the ecurity and Authentication section. (around line 80) and enable SSL by removing the comment and changing the value to “on”. Additionally, add the parameterssl_ca_fileNew below:
ssl = on
ssl_ca_file = 'root.crt'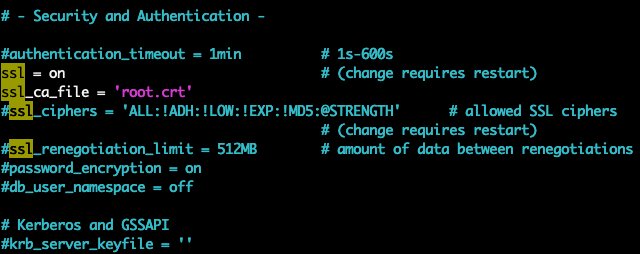
Don't forget to save your edits.
8. Finally, restart your PostgreSQL container to apply the new settings:
sudo service postgresql restart
Client Certificates
Now let's create an additional SSL certificate file for the client instance to support a secure connection on both ends.
1. Return to the terminal window with the SSH connection to the PostgreSQL server. Once inside, create a private key for the client. For example, in the /tmp directory:
openssl genrsa -des3 -out /tmp/postgresql.key 1024
openssl rsa -in /tmp/postgresql.key -out /tmp/postgresql.key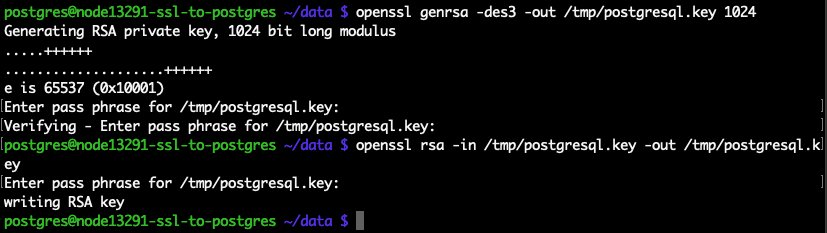
2. Then create an SSL certificate for the PostgreSQL database user (by default webadmin) and sign the file.root.crtour trusted servers
openssl genrsa -des3 -out /tmp/postgresql.key 1024
openssl rsa -in /tmp/postgresql.key -out /tmp/postgresql.key
Note:
- While the general information for the subj parameter can be changed to your personal information here, the Common Name (/CN=) must be equal to the database username that you set during initial certificate creation in the server configuration file. (in our case it is webadmin)
- The root.crt and server.key files should be in the same folder the 2nd command was run. Otherwise, the full path should be specified.

3. After creating the files - postgresql.key, postgresql.crt, root.crt, these files need to be moved to the.postgresql folder on your client machine. (You can use an FTP add-on or just copy and paste the content file into it.)
Tips: If such a directory doesn't already exist, create it with mkdir ~/.postgresql or similar command according to your operating system.
Additionally, if necessary, you can set read key permissions only for the owner with the command chmod 0400 ~/.postgresql/postgresql.key To achieve more safety
Tips: Don't forget to later delete the key from the tmp directory on your database server.
Create a connection through PgAdmin
Finally, after the server and client configuration is finished, you You are now ready to create a connection. In our case, the pgAdmin 4 tool will be used as an example, so this application should be installed. (or other desired applications) in advance
1. To connect to the database server via SSL, you must connect the link # public IP or link # endpoint for the PostgreSQL database container.
We will consider the latter case – access the Environment settings, switch to the Endpoints section and Add a new endpoint with the button of the same name in the top window.
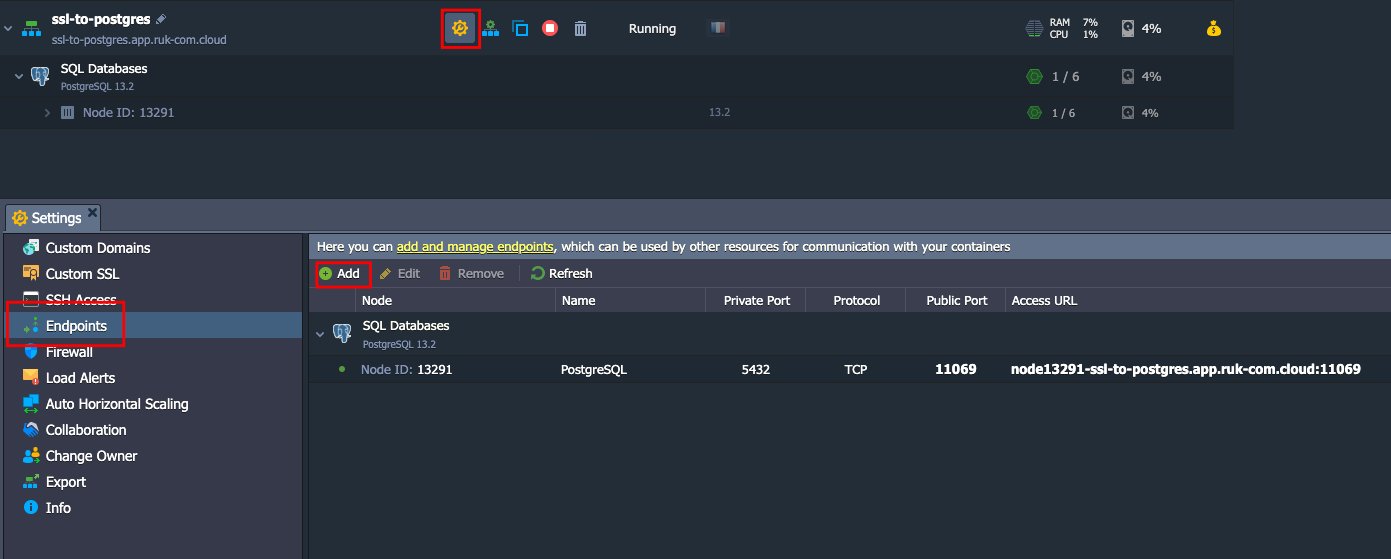
2. Now once you have the access point, run the pgAdmin 4 client and select Create Server.

3. Select the Connection tab and enter hostname and port information.
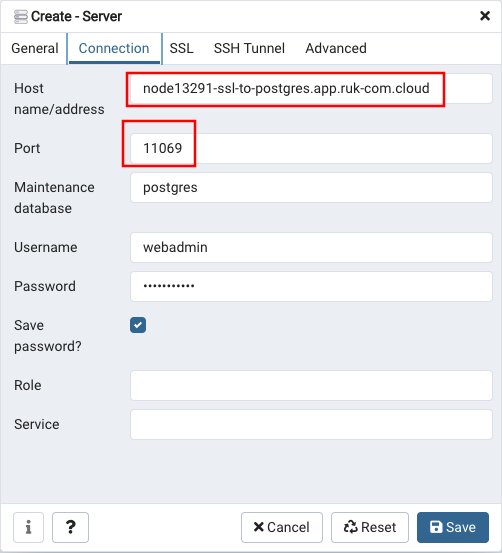
4. Select the SSL tab and select SSL Mode as Require. When finished, press Save.
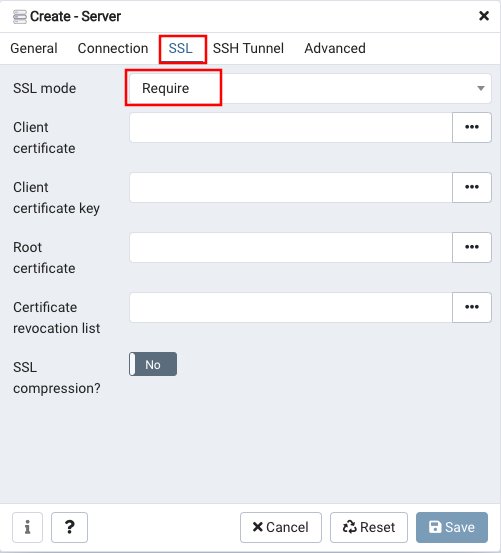
You can now connect your application to the database (use the instructionsConnect to databaseas an example) and enable SSL configuration for your project to encrypt your data while retrieving/transferring it.
If you face any issues while configuring your SSL connection, please don't hesitate to ask for help from our technical experts at Stackoverflow