
Integrating Ruk-Com PaaS with IntelliJ IDEA: The Java IDE for Professional Developers
This guide is maintained for Ruk-Com PaaS. Screens and options may vary by platform version and account permissions.
Confirm the environment, region and account permissions, and back up current settings before changing a production system.
Objective
This guide explains how to use Integrating Ruk-Com PaaS with IntelliJ IDEA: The Java IDE for Professional Developers on Ruk-Com Cloud PaaS, with ordered procedures and practical verification points.
Before you begin
- Sign in with an account permitted to manage the relevant environment.
- Confirm the target environment, region and resources before saving changes.
- Create a backup or rollback plan before changing a production system.

IntelliJ IDEAIt's a code-centric IDE focused on developer productivity. The editor has a deep understanding of your code and codebase guidelines, giving you great advice when you need it and ready to help shape your code.
There are two types of Java IDE:
- UltimateIt is a full-featured commercial IDE with a suite of tools that integrates with the most important and modern technologies and frameworks. This is necessary for effective web and Java EE development.
- CommunityIt is an open-source IDE for JVM and Android development.
Tips:If you want to learn more about the features and differences between Ultimate vs Community, you can take a look atIDA documents
IntelliJ IDEA has many plug-ins and supports Ruk-Com PaaS plug-ins specifically (IDEA version 107.105 or higher is supported on bothUltimateandCommunity) If you want to use the Ruk-Com PaaS plugin for IntelliJ IDEA, you can do so in minutes with the short video below.
If you want to read more details. You can read instructions below on how to use Ruk-Com PaaS integration with IntelliJ IDEA. Here are the steps:
- Installing the Ruk-Com PaaS plugin
- Accessing Ruk-Com PaaS from IDEA
- Deploying applications to the Cloud
- Working with environments and log files
- Creating a Web Project
Installing the Ruk-Com PaaS IntelliJ IDEA plugin
To install the Ruk-Com PaaS plugin, start the IDEA program, go toSettings > Pluginsand click the buttonBrowse repositories
On the Settings page, select Install Plugin.Ruk-Com PaaS Cloud Platform Integrationand restart your IDEA.
Accessing Ruk-Com PaaS from IDEA
Accessing Ruk-Com PaaS from IDEA toSettings > Ruk-Com PaaSEnter your account information (email & password) and select a provider from the list.
Note:Accounts with two-factor authentication enabled should use a token to access the IDE plug-in instead of a password.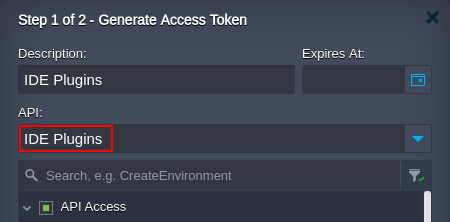
Deploying applications to the Cloud
After successfully installing the plugin You'll see the Ruk-Com PaaS logo in the main IDE toolbar or in the pop-up menu in the tool window.ProjectsClick this button to deploy your Java web project with Ruk-Com PaaS.
In the window that opens, select the appropriate archive file extension (such as.ear,.jar or.war), then specify the Context, select the destination environment from the list and press Confirm.
The selected project will be displayed in the Ruk-Com PaaS tool window in the IDE. Click the deploy button for the plug-in to run the build of the artifact and deploy it with Ruk-Com PaaS.
Working with environments and log files
The Ruk-Com PaaS tools window in IDEA lists your current environment. You can zoom in to see the nodes added and the applications deployed.
Context menu allows you to manage your environment (Stop/Start, Restart/Refresh) and deploy projects (Destroy, Open in browser or Refresh).
If you want to view the container log file Click on the destination node and select the Get logs option. Select the file you want and click View log (or double-click the desired file).
You can view other log files available to the destination node.
Creating a Web Project in IDEA
You can create an IDEA project and deploy the environment directly with the following steps:
1. SelectJava Moduleto create a new project Fill in all the fields and clickNext
Select the desired technology such asWeb ApplicationSince your project should use this framework, clickFinish
When the project is created, the initial artifact is created as a WAR package with executable and static files.
Tips:Viewing existing artifacts in your project Can be viewed atFile > Project structure > ArtifactsSelect an artifact from the list to view its structure and more detailed information.
3. Select the desired artifact and check the box.build on makeThis currently allows creating an artifact each time after creating a project.
4. To deploy to the server, create a new artifact EAR, JAR or WAR with the option enabled.Build on make
5. When you're done configuring your project and writing code, click the button.Make Project
In this section, the artifact is created and ready for deployment, which you can run as described in the previous section.
6. To begin executing your project, right-click ROOT and selectOpen in browserat the menu
Your application will open in a new browser tab.
This way you can build your Java applications through IntelliJ IDEA in both Ultimate or Community types and deploy them to the Cloud in one place without disrupting the development process.