
Connecting Java to MariaDB/MySQL
This guide is maintained for Ruk-Com PaaS. Screens and options may vary by platform version and account permissions.
Confirm the environment, region and account permissions, and back up current settings before changing a production system.
Objective
This guide explains how to use Connecting Java to MariaDB/MySQL on Ruk-Com Cloud PaaS, with ordered procedures and practical verification points.
Before you begin
- Sign in with an account permitted to manage the relevant environment.
- Confirm the target environment, region and resources before saving changes.
- Create a backup or rollback plan before changing a production system.
MariaDB and MySQL are very popular open source databases. that is used by developers all over the world In this help, we will show you how to connect your Java application to the following databases, standalone servers, andclustered solution
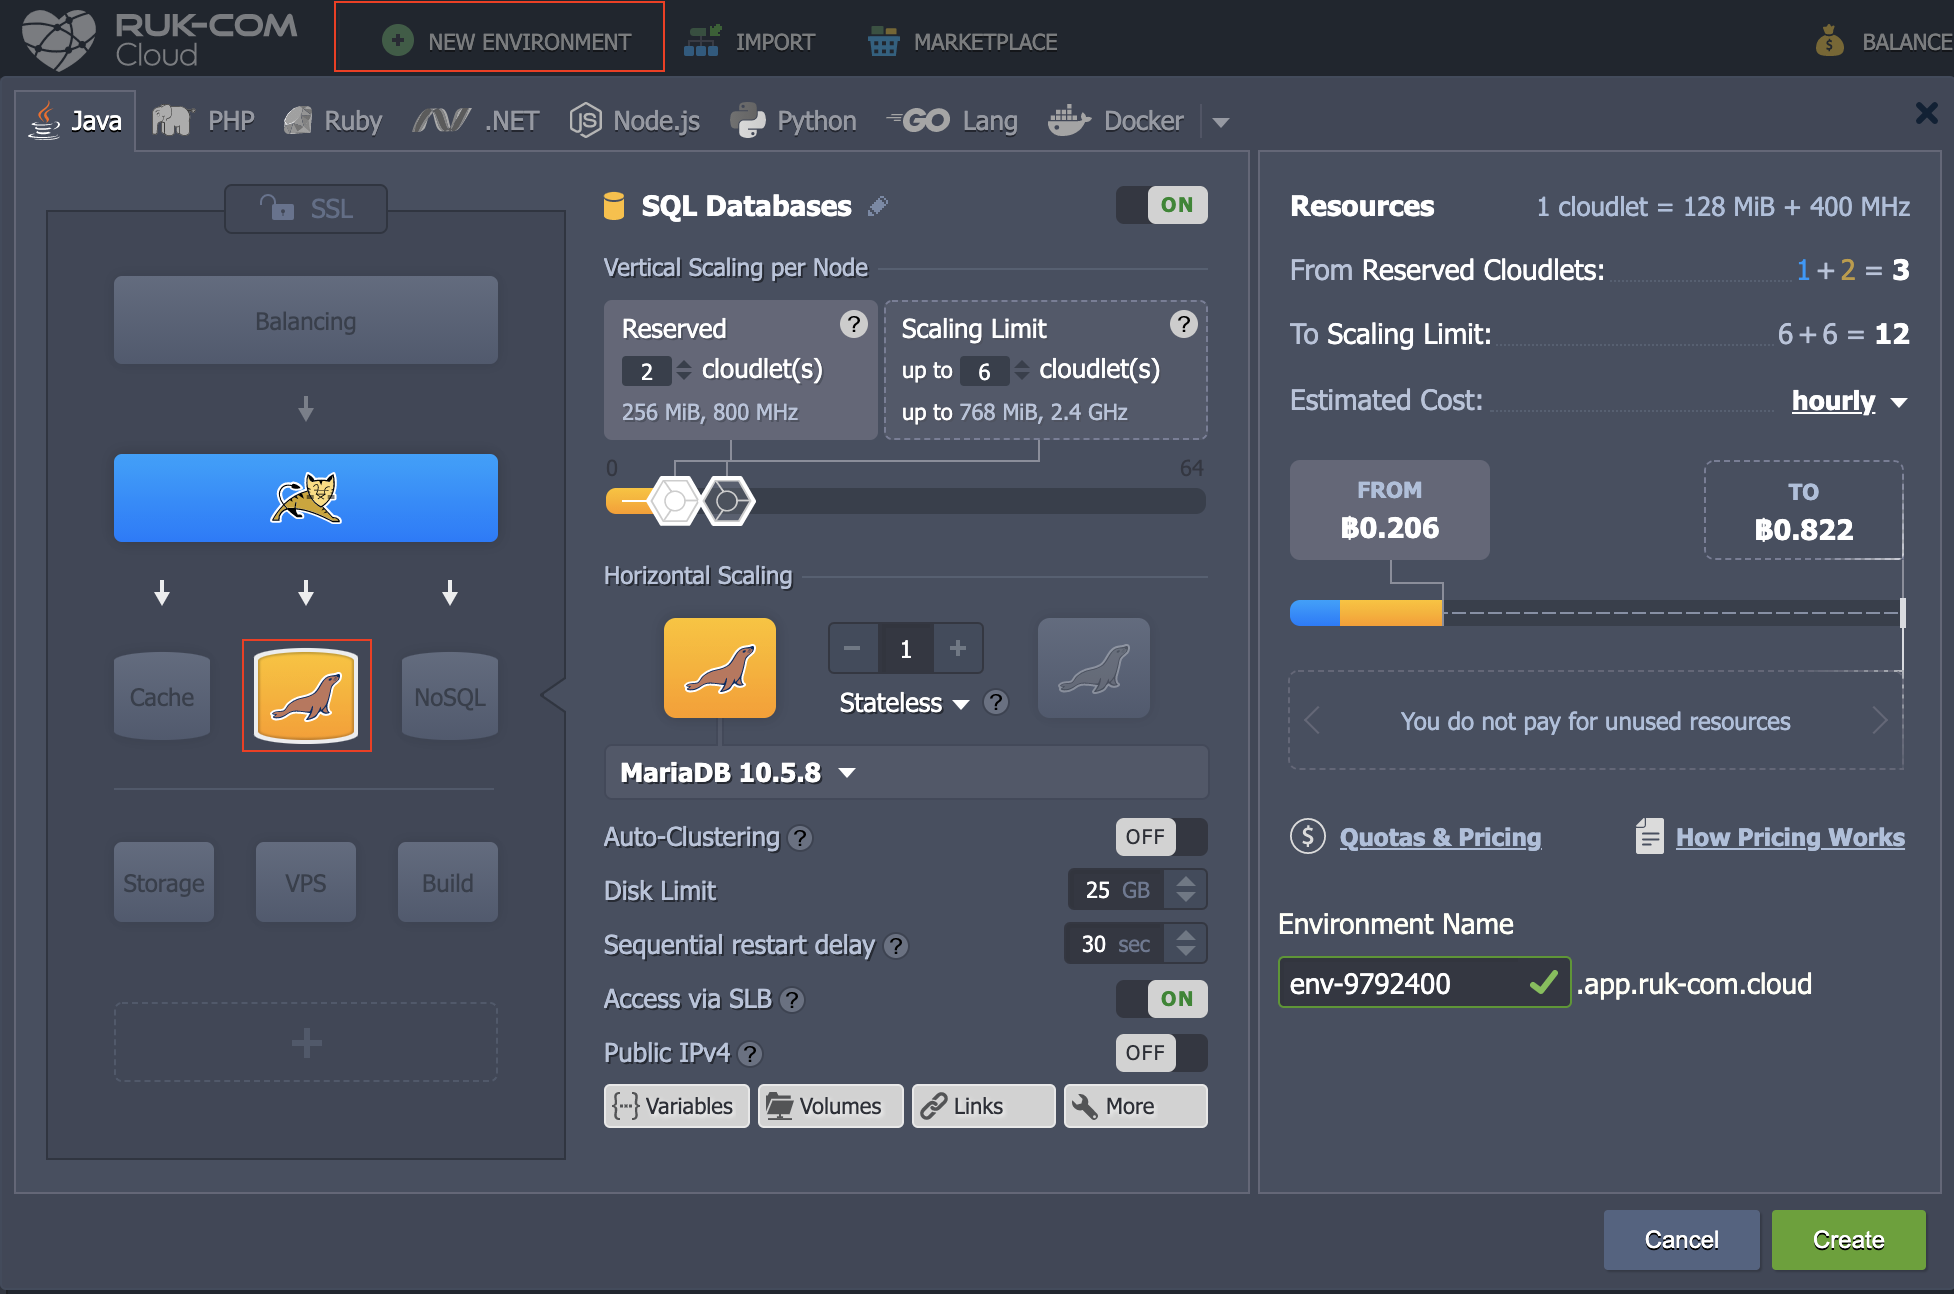
- Log in with your Ruk-Com account and create an Env.create an environmentWith the MariaDB (or MySQL) database server (available in the SQL wizard)
- For standalone database servers
- For Auto-Clustering solution
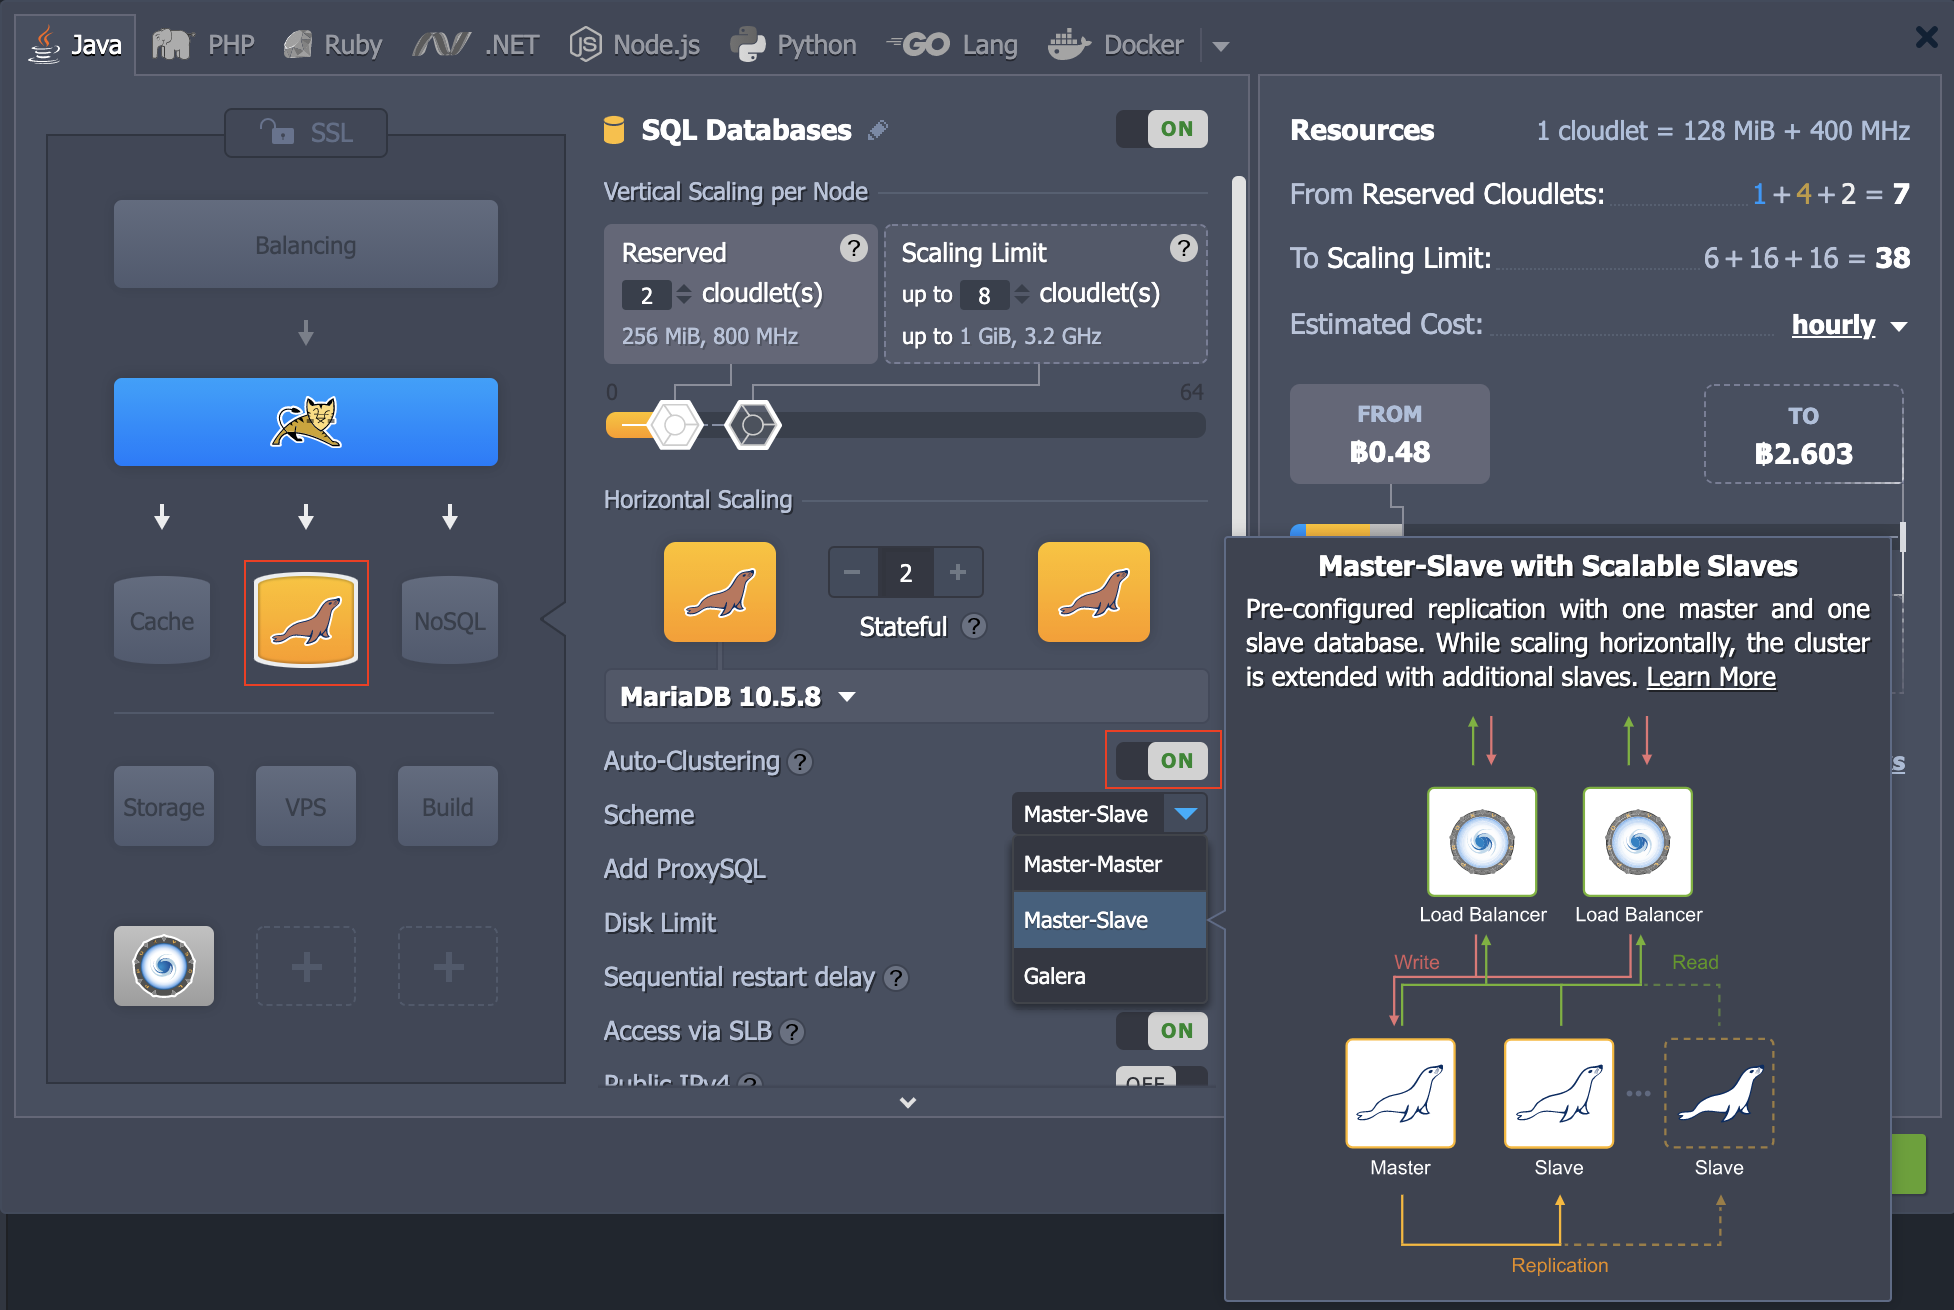
We've also added Tomcat Node to provide an example of connecting to a database from an application server.
- Check your email – there should be a message with admin details for creating the MariaDB (or MySQL) server. In the case of a database cluster, we recommend connecting through a proxy loadbalancer.
- Switch to the dashboard and click the Open in Browser button for the MariaDB/MySQL node.
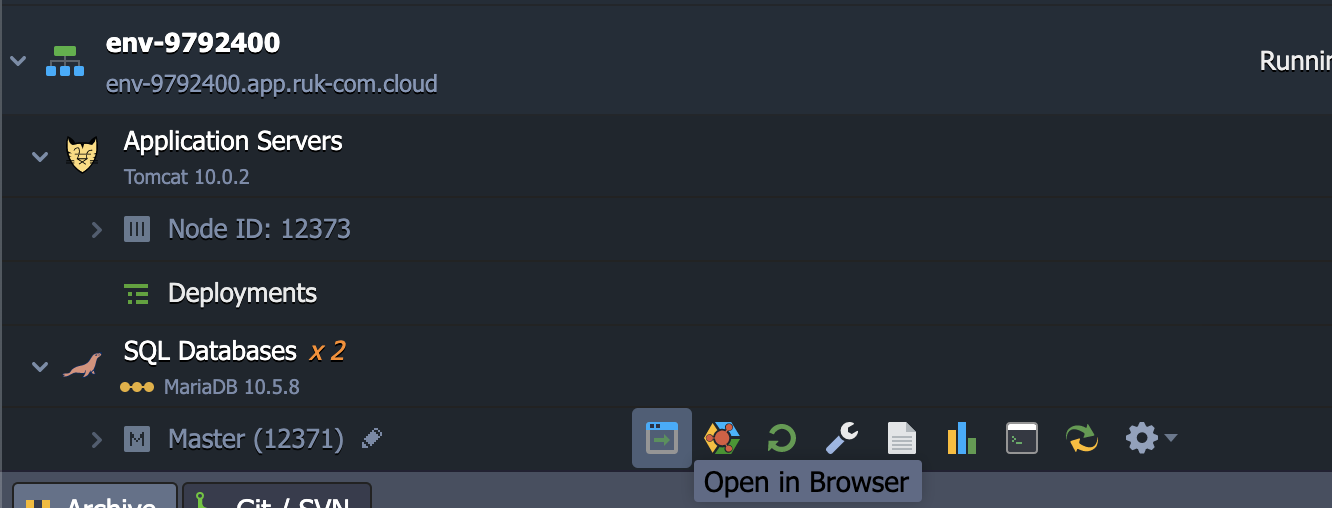
If you have a clustered solution, click Open in Browser next to the master database node (M symbol).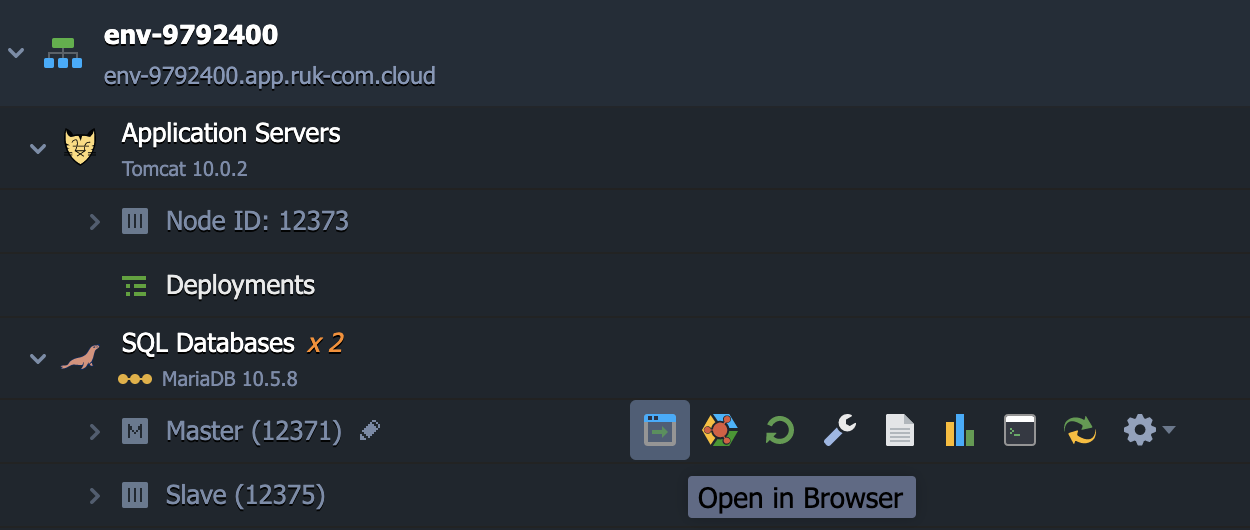
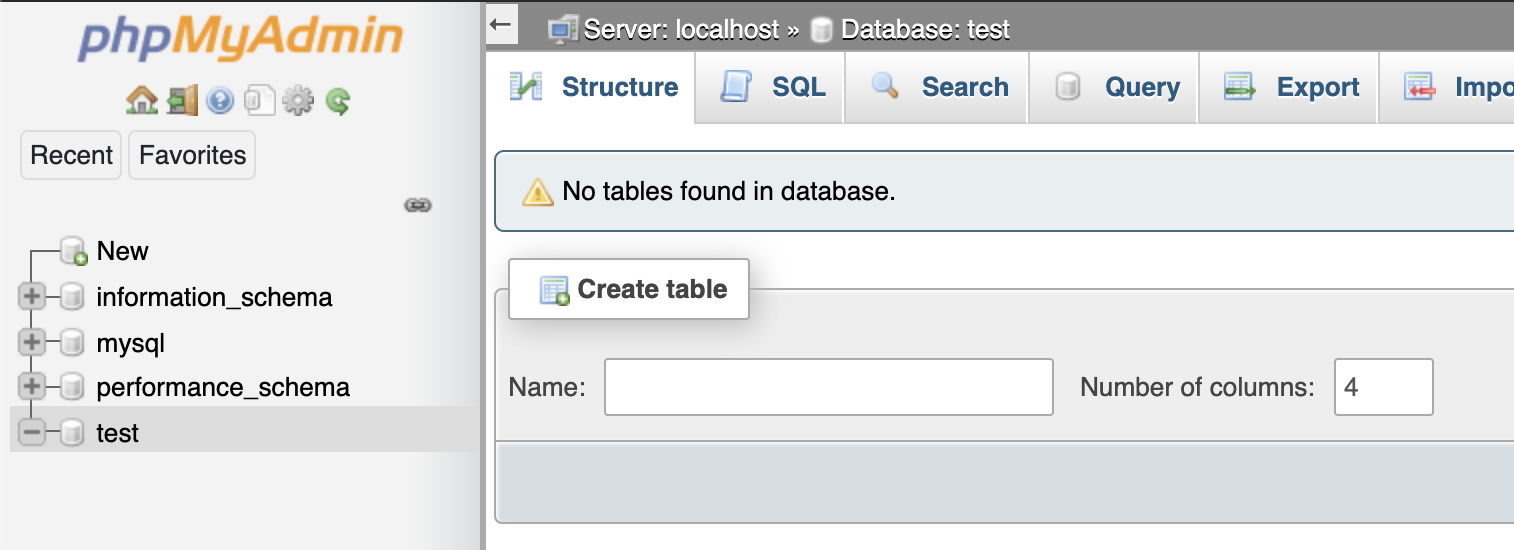
Log in to open the admin panel using the details received from the email above. - Use an existing database (e.g. test) or create a new one.
- Return to the dashboard and press the Config button next to the application server (in our case Tomcat) to access it.configuration file manager

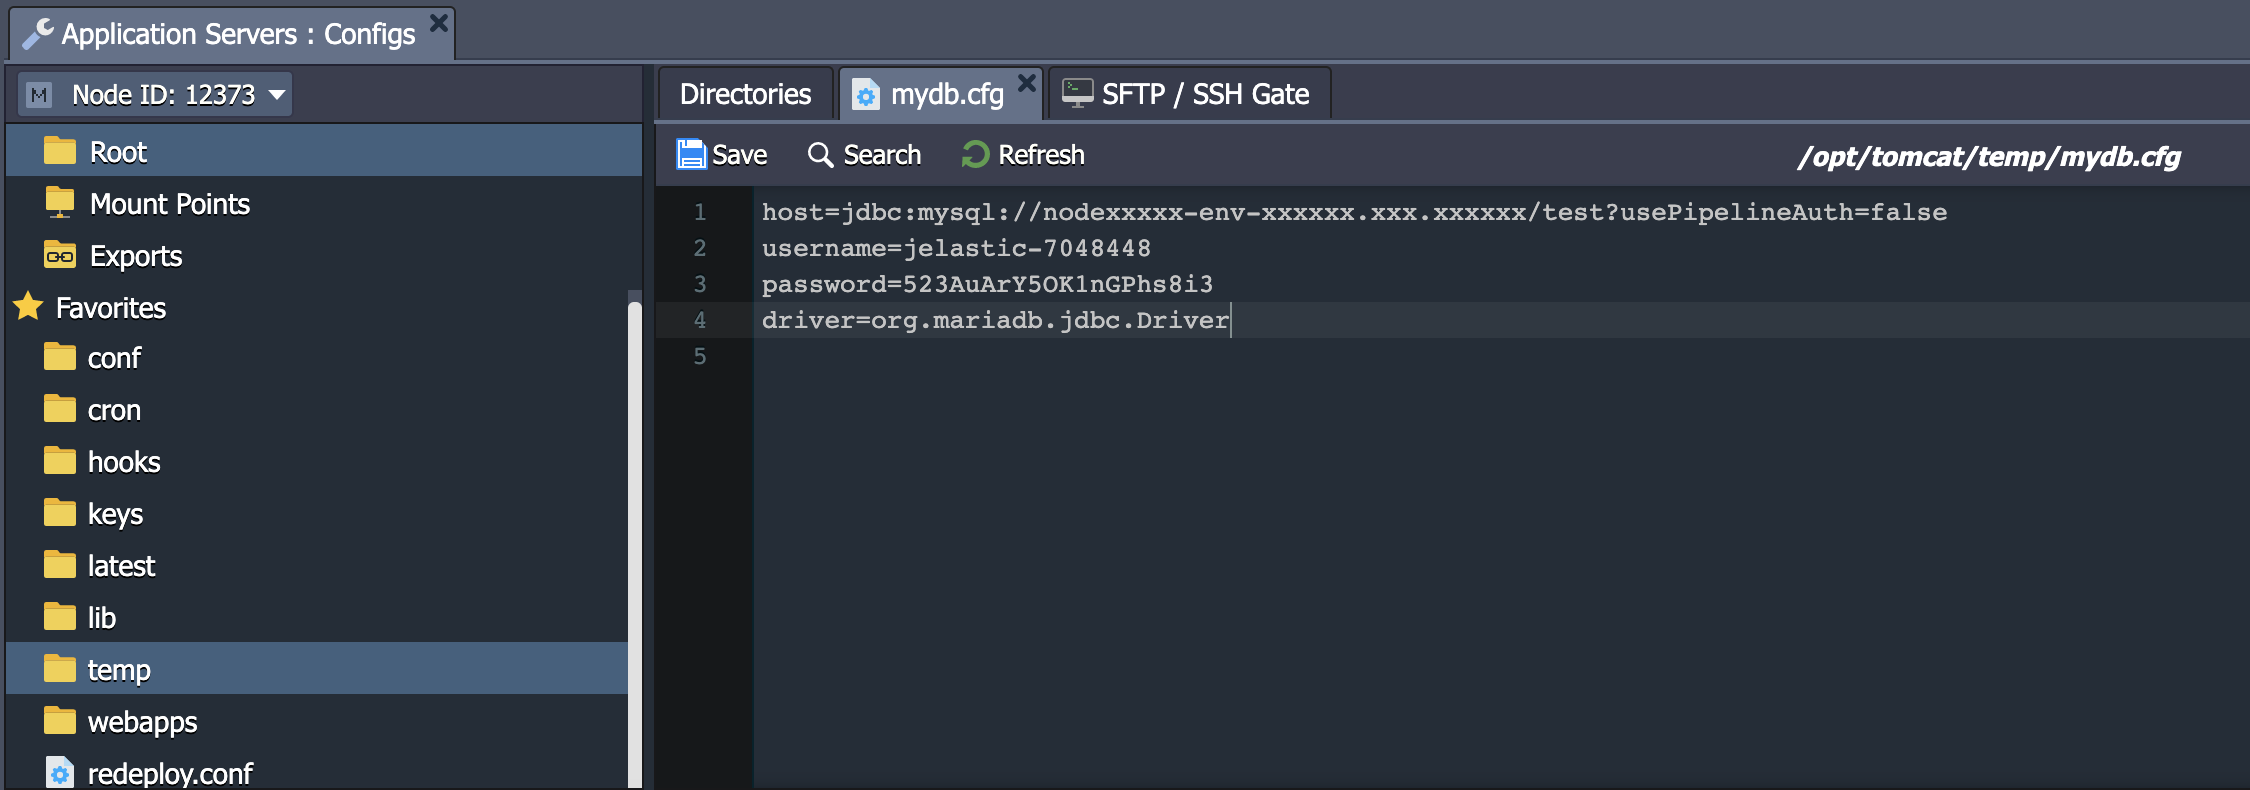
- go to folder /opt/tomcat/temp Create a new file mydb.cfg.
For a standalone database connection, add the following to the mydb.cfg file.
host=jdbc:mysql://{host}/{db_name}
username={user}
password={password}
driver=com.mysql.jdbc.Driver
All necessary information can be found in the email. MariaDB/MySQL node
- {host} – link to the database node without the protocol section
- {db_name} - database name (in our case the name is test )
- {user} and {password} - Database administrator's information. (for use It is recommended to create a dedicated account with appropriate access rights)
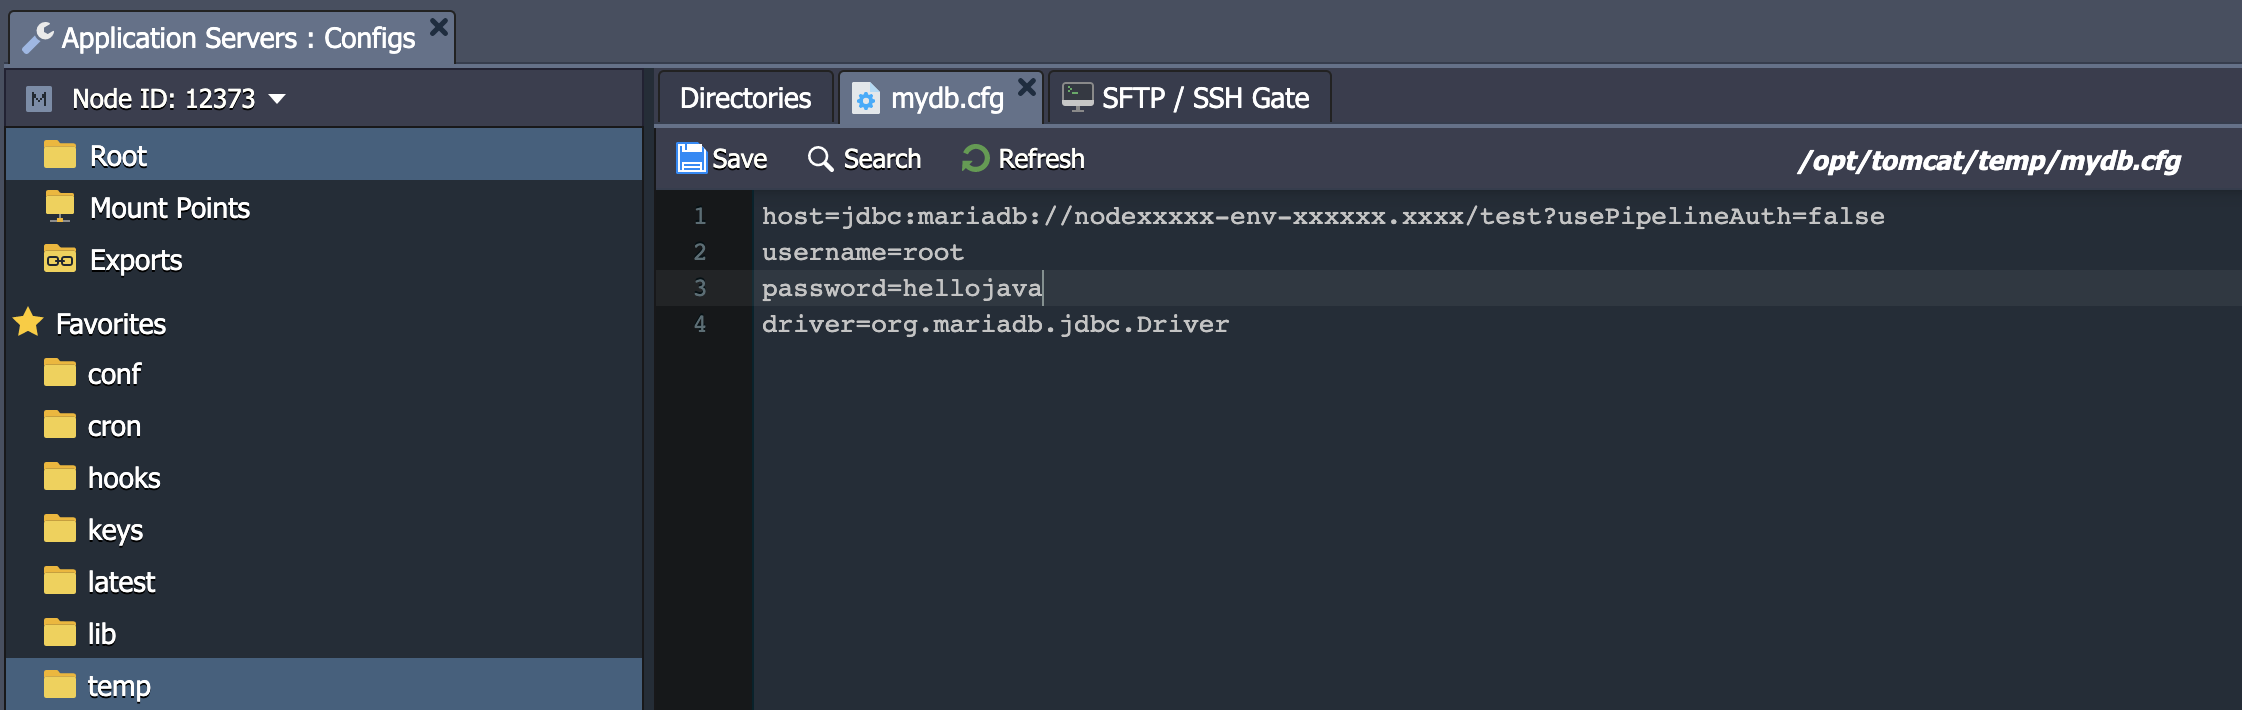
For connecting to a cluster, the ProxySQL load balancer uses an entry point and each database type has its own connector. So add the following information to the mydb.cfg file.
For MariaDB:
host=jdbc:mariadb://{hostname}/{db_name}?usePipelineAuth=false
username={user}
password={password}
driver=org.mariadb.jdbc.Driver- {hostname} – link to the DB cluster load balancer (e.g. ProxySQL layer)
- {db_name} - The name of the database. We use the name test in the first step.
- usePipelineAuth – If different queries are enabled, executed using a pipeline (all queries are sent, only all results are read), this allows faster connection establishment. This value should be set to False, as this functionality cannot be used with ProxySQL in a cluster.
- {user} and {password} - Database details will be received via email.
For MySQL:
host=jdbc:mysql://{host}/{db_name}
username={user}
password={password}
driver=com.mysql.jdbc.Driver- {hostname} - link to the DB cluster load balancer (e.g. ProxySQL layer)
- {db_name} – Name of the database. (In this case we use the name test )
- {user} and {password} – Database administrator information. (for use It is recommended to create a dedicated account with appropriate access rights)
This way all connection settings are saved in a single file. which will later be read by the application.
- For further deployment and connectivity We will use a sample application as follows.
package connection;

import java.io.IOException;
import java.sql.Connection;
import java.sql.DriverManager;
import java.sql.SQLException;
import java.sql.Statement;
import java.text.SimpleDateFormat;
import java.util.Date;
import java.util.Properties;
import java.util.logging.Level;
import java.util.logging.Logger;

public class DbManager {

    public String date = new SimpleDateFormat("dd-MM-yyyy-HH-mm").format(new Date());
    private final String createTable = "CREATE TABLE `" + date + "` (id INT, data VARCHAR(100));";
    private static final int LoginTimeout = 10;

    public DbManager() {
    }

    public Connection createConnection() throws IOException, ClassNotFoundException, SQLException {
        Properties prop = new Properties();
        System.out.println("\n\n=======================\nJDBC Connector Test " + date);
        System.out.println("User home directory: " + System.getProperty("user.home"));
        String host;
        String username;
        String password;
        String driver;
        try {
            prop.load(new java.io.FileInputStream(System.getProperty("user.home") + "/mydb.cfg"));

            host = prop.getProperty("host").toString();
            username = prop.getProperty("username").toString();
            password = prop.getProperty("password").toString();
            driver = prop.getProperty("driver").toString();
        } catch (IOException e) {
            System.out.println("Unable to find mydb.cfg in " + System.getProperty("user.home") + "\n Please make sure that configuration file created in this folder.");

            host = "Unknown HOST";
            username = "Unknown USER";
            password = "Unknown PASSWORD";
            driver = "Unknown DRIVER";
        }

        System.out.println("host: " + host + "\nusername: " + username + "\npassword: " + password + "\ndriver: " + driver);

        Class.forName(driver);
        System.out.println("--------------------------");
        System.out.println("DRIVER: " + driver);
        System.out.println("Set Login Timeout: " + LoginTimeout);
        DriverManager.setLoginTimeout(LoginTimeout);
        Connection connection = DriverManager.getConnection(host, username, password);
        System.out.println("CONNECTION: " + connection);

        return connection;
    }

    public String runSqlStatement() {
        String result = "";
        try {
            Statement statement = createConnection().createStatement();
            System.out.println("SQL query: " + createTable);
            statement.execute(createTable);
        } catch (IOException | ClassNotFoundException ex) {
            Logger.getLogger(DbManager.class.getName()).log(Level.SEVERE, null, ex);
            System.out.println("Exception occurred: " + ex);
            result = ex.getMessage();
        } catch (SQLException ex) {
            ex.printStackTrace();
            result = ex.getMessage();
        }
        return result;
    }
}- DeployGo to our sample application on your Tomcat server using the following link.
https://bit.ly/31LSfUQ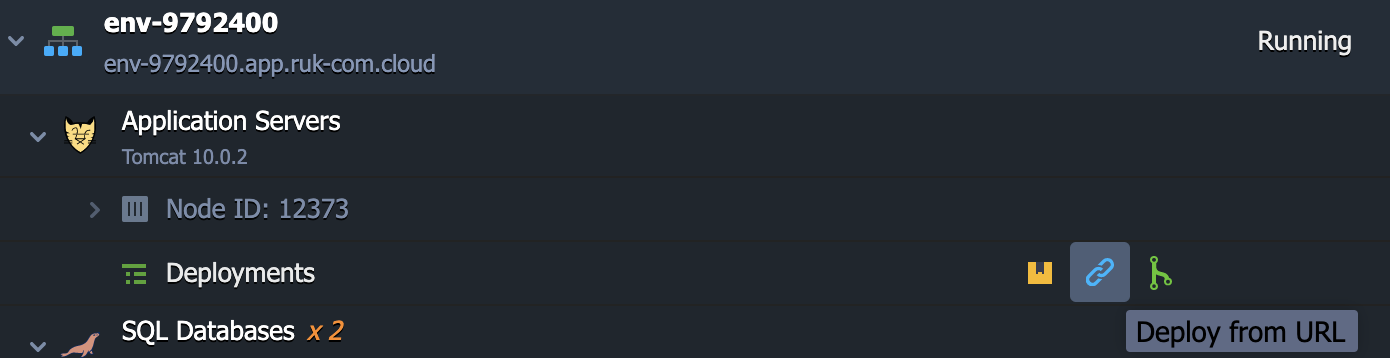
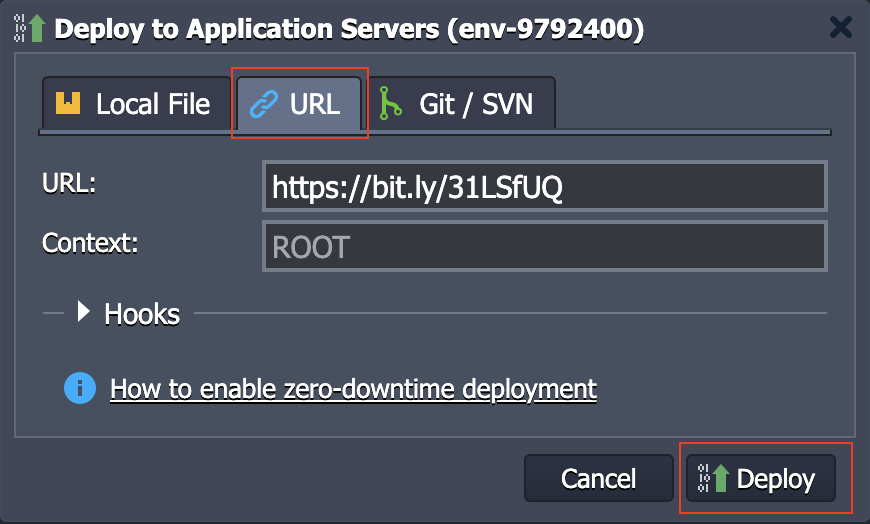
Note:
- Our sample application has a jdbc connector for database access. MariaDB/MySQL finished However, to connect your project You need to upload it to a folder. webapps/{app_context}/WEB-INF/lib on the server application manually
- Don't forget to restart the application server to change mydb.cfg by pressing the Restart Node button.
- When you're finished making adjustments, press Open in Browser in the window that pops up or next to your server application.
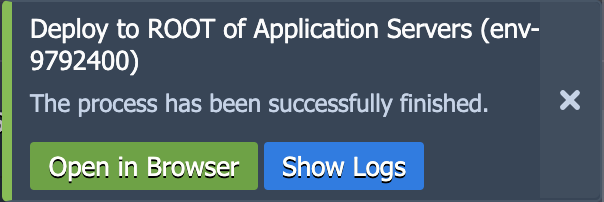
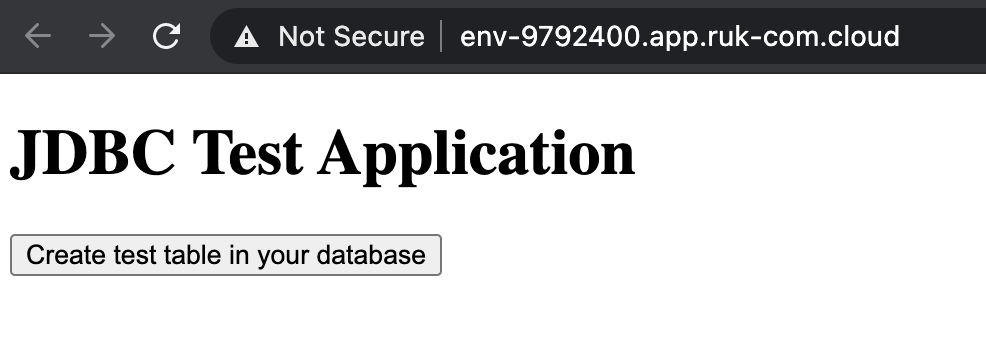
- In the open tab, press the button.Create test table in your database
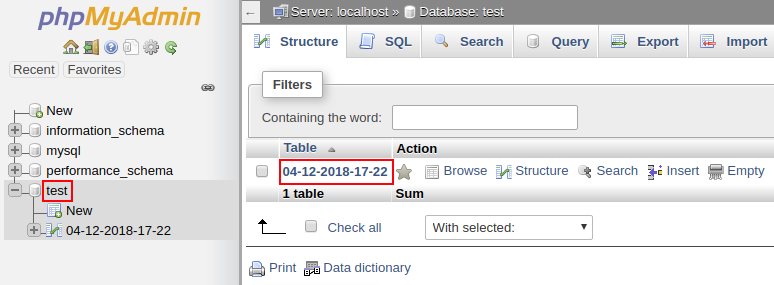
- Now, to make sure everything works as normal. Go back to the phpMyAdmin panel and go to the database named test.
Things you should know
Ruk-Com PaaS allows you to expand server functionality. MariaDB/MySQL This can be done by following the appropriate instructions in our documentation.
- Set the desired database replication type with the featureAuto-Clusteringembedded to achieve increased database performance and prevent data loss.
- adjustBackups SchedulingTo ensure safety of the data in your database in the event of an unexpected server crash.
- See instructions forRemote Accessand learn how to access a database remotely using the MySQL desktop client.
- Use the manualDump Files Import/ExportTo find out how you can manually back up and restore your data from where it was previously created,
watchDatabase connection stringsTo get more information on how to set up connections to different types of databases,