
JDBC Connection Pool
This guide is maintained for Ruk-Com PaaS. Screens and options may vary by platform version and account permissions.
Confirm the environment, region and account permissions, and back up current settings before changing a production system.
Connection pooling in JDBC (Java Database Connectivity) is an optimization feature, which caches database connections. Such implementation allows to reuse them, rather than spawning and closing one for each request, namely:
- without JDBC connection pool - opens connections to database services as required and closes when the page is done processing a particular request
- with JDBC connection pool - maintains open connections in a pool, so if a page requires access to the database, it just uses an existing connection (a new one is established only if no pooled connections are available)
Configuring JDBC pool connection for your application server can reduce delays and resource consumption compared to servicing each individual request. In such a way enhancing the performance of a database (especially for requests made to a dynamic database-driven applications).
Herewith, both GlassFish and Payara Java application servers provide a native support of the connection pooling mechanism to enhance a database access. Follow the simple steps below to configure JDBC connection pool:
Create Environment
-
Log into your PaaS account.
-
Click the New Environment button.
 3. In the topology wizard, switch to the Java tab, pick GlassFish or Payara as your application server and add the required database (as an example, we use GlassFish and MySQL pair). Next, set the resource limits for your containers and type any preferred environment name.
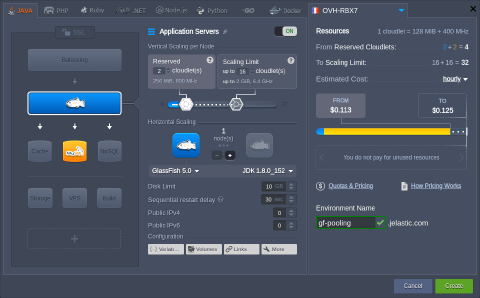 Click Create, wait for a few minutes to get your new environment and proceed to creating JDBC connection pool.
Prepare Database
- Click the Open in Browser button for your MySQL node.
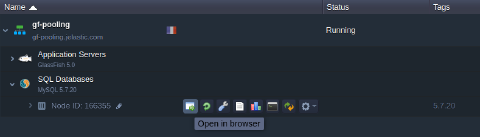 Use the received email with database credentials to login into the opened phpMyAdmin panel.
- Once inside, switch to the User accounts tab and click on the Add user account link. Within the opened form, specify all of the required data and tick the Create database with same name and grant all privileges option.
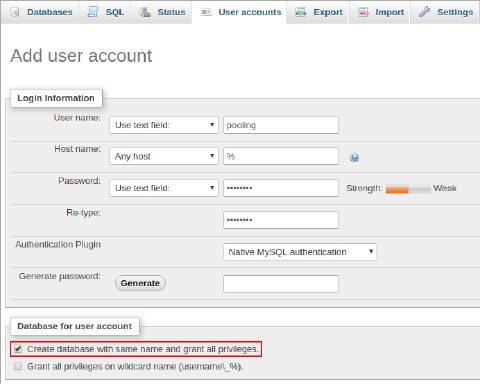 Click Go at the bottom of the page to initiate addition of a database and user for connection pooling.
Configure Application Server
- The JDBC MySQL connector is provided by default with the stack (located in the /opt/glassfish/glassfish/domains/domain1/lib directory on your GlassFish server or /opt/payara/glassfish/domains/domain1/lib on Payara), so you don’t need to upload one manually.
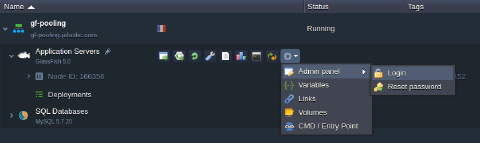
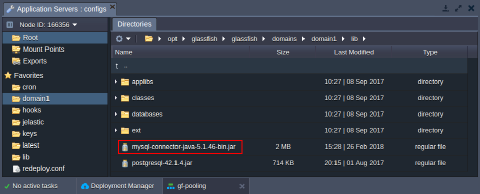 2. Login to the GlassFish (or Payara) Admin panel, using credentials from the appropriate email.
 3. Navigate to the Resources > JDBC > JDBC Connection Pools section and click the New button on the tools panel. Within the appeared form, fill in the following fields:
- Pool Name - type any prefered name
- Resource Type - select the javax.sql.DataSource item from the drop-down list
- Database Driver Vendor - choose the MySQL option
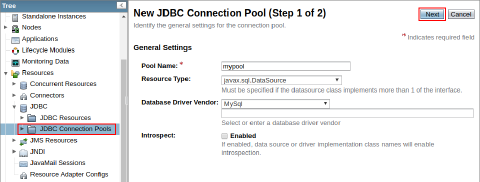 Click the Next button to continue.
- Find and modify the following Additional Properties:
- User - provides your database login (pooling in our case)
- ServerName - specifies your database host without the protocol (e.g., node.example.ruk-com.cloud)
- Port - sets port number to 3306
- DatabaseName - provides your database name (pooling in our case)
- Password - stores a password for the specified user
- URL and Url - sets a JDBC connection string in the jdbc:mysql://{db_host}:3306/ format; the {db_host} placeholder can be substituted with either node hostname (node.example.ruk-com.cloud) or IP address (192.168.2.57)
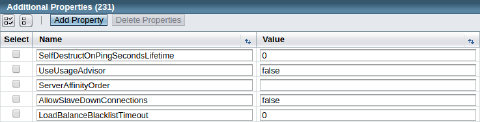 After these properties are specified, click Finish.
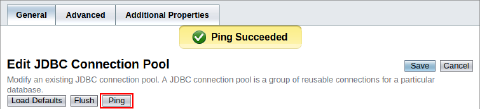
- In order to verify accessibility, select your just created connection pool and click the Ping button. If everything is OK, you should see the Ping Succeeded pop-up message.
 6. Go to the Resources > JDBC > JDBC Resources section and click the New button to create JDBC resources for pooling. Within the opened window, provide any desired JNDI Name and choose your Pool Name from the drop-down list.
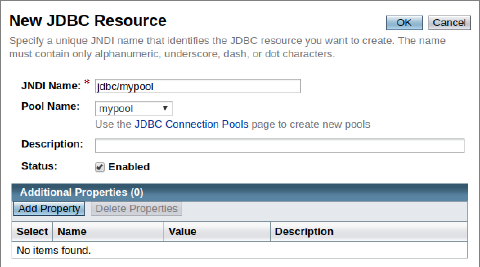 Confirm resources creation with the OK button at the top.
Connect from Java Code
Put the following strings into the Java class of your application code:
java Copy
InitialContext ctx = new InitialContext();
DataSource ds = (DataSource)ctx.lookup("{resources}");
Connection conn = ds.getConnection();
Here, substitute the {resources} placeholder with the your JNDI name from the previous section (i.e., jdbc/mypool in our case).
Now, you can deploy your Java application to the platform and enjoy the benefits of GlassFish and Payara Micro connection pooling!