
Security of App with NGINX Balancer
This guide is maintained for Ruk-Com PaaS. Screens and options may vary by platform version and account permissions.
Confirm the environment, region and account permissions, and back up current settings before changing a production system.
Objective
This guide explains how to use Security of App with NGINX Balancer on Ruk-Com Cloud PaaS, with ordered procedures and practical verification points.
Before you begin
- Sign in with an account permitted to manage the relevant environment.
- Confirm the target environment, region and resources before saving changes.
- Create a backup or rollback plan before changing a production system.

As the amount of information shared over the internet increases every year, so does the use of the web as a tool for doing business. Protecting websites and web applications has thus become one of the important cybersecurity issues. The obvious response to this is to use a multitude of prevention tools. But before rushing to integrate complex and/or expensive protection solutions, Let's first consider a few common security methods.
Because sometimes the most basic security measures are the most effective. Therefore, in this guide we will show you how to set up a few simple protection mechanisms, which are available for applications that use NGINX balancer as front-end and any subscription that does not require additional costs.
Basically a serverNGINX load balancerIt is intended to perform intelligent request distribution between multiple application server nodes, thus ensuring high system availability and reliability. As a result, it can be used for processing HTTP and TCP traffic (details can be found in the documentation).HTTP Load BalancingandTCP Load Balancing)
Load balancing nodeThey are automatically added to Env if you acquire more than 1 application server node, and nodes can also be added manually even with just one server. To do this, simply select the Balancing wizard block above the selected server application in the window.Environment Topology
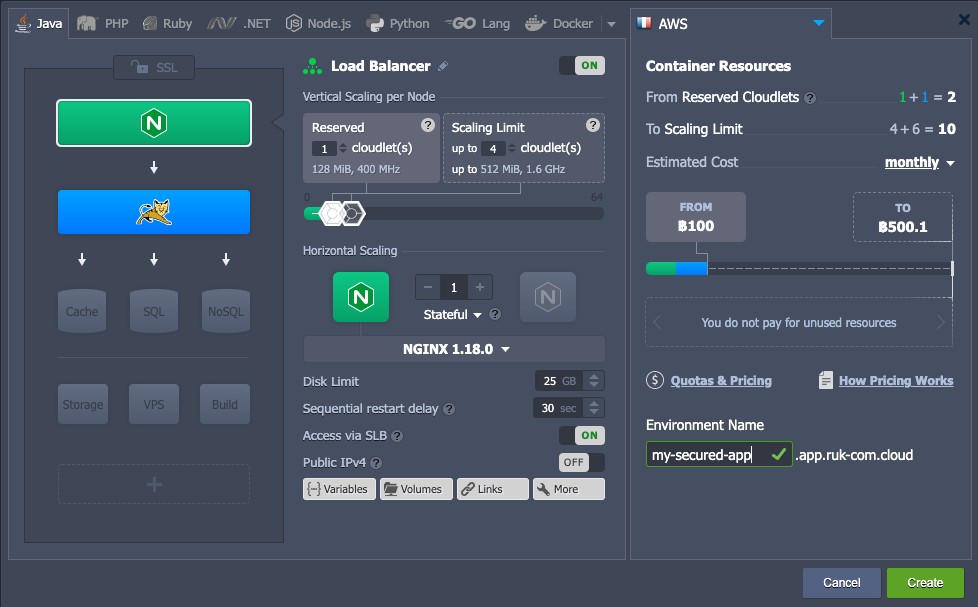
Once the Environment is ready, you can proceed to configure your desired protection method using the instructions below.
- AuthenticationMake access to the application password protected.
- IP Address DenyMechanisms are used to prohibit access to applications from specific IPs.
We’ll also pay the attention to the way ofcombiningthe abovementioned methods for being used simultaneously. So, let’s find out how to implement this to your environment. Here we go!
We will also focus on the methods.combiningThe above methods are to be used simultaneously. So let's take a look at how to implement this into your Env. Let's take a look.
Authentication
Authentication is a simple but effective way to restrict access to applications and ensure that unauthorized entities cannot cause any harm. In this example we will show you how to set up username/password protection.
1. Obviously, password data cannot be stored in an open format. Therefore, it is necessary to protect yourself. For that you need to create a hash of the required username and password. By using the htpasswd tool or one of the similar online services. (For example:https://www.web2generators.com/apache-tools/htpasswd-generator)
2. Save the character sequence you obtained and return to the Ruk-Com Cloud dashboard with your Environment specified, then click the Config button for the node.NGINX balancer
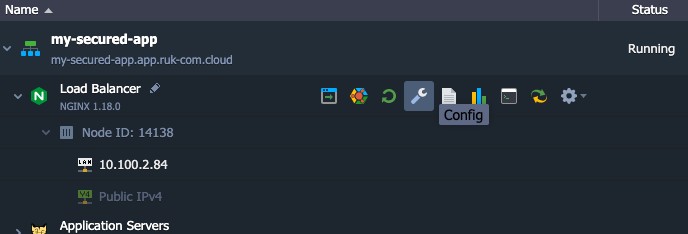
3. You will see a tab.Configuration ManagerIt opens, which you need to create.New file(using the button of the same name on the tools panel) within the folderconf.dSet the name you want. But it is compulsory to use last name..htpasswd(such aspassword.htpasswd)
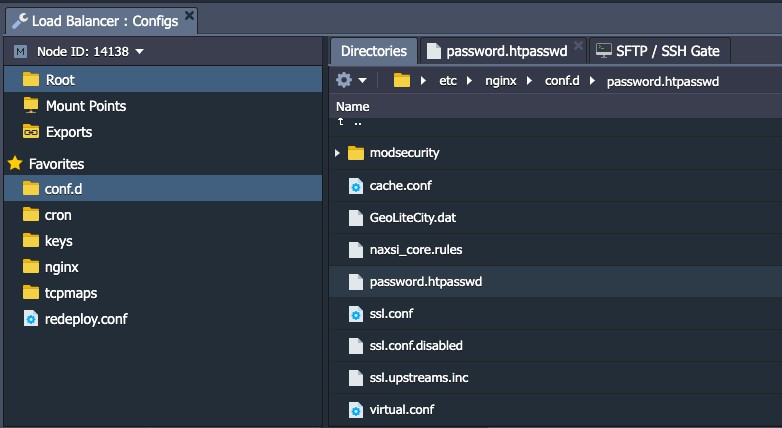
4. After finishing, paste the hash (hash) you received in the first instruction step into the content of the file. Remember that you can add as many accounts as you want. (Remember to paste every account next to a new line)
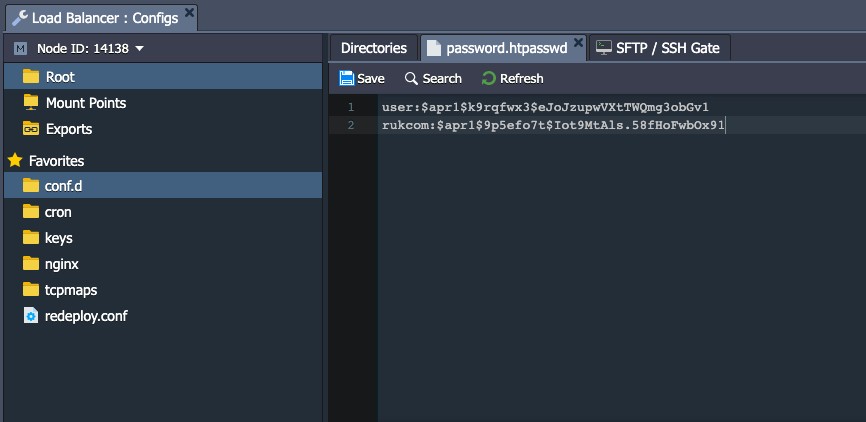
SaveChange when all settings are complete.
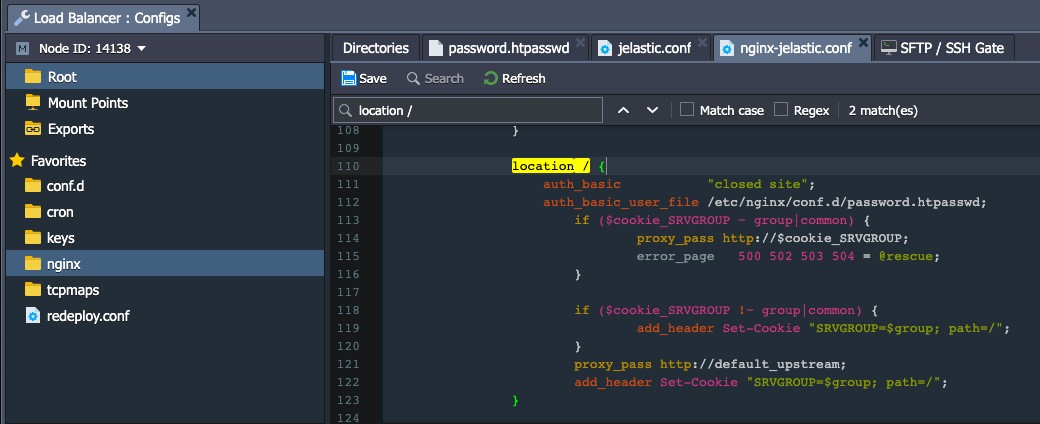
5. Then select the file.nginx-Ruk-Com PaaS.confInside the conf folder and locate the block in the first server section, paste the following line to enable authentication. (authentication) and use appropriate access rules:
auth_basic           "closed site";
auth_basic_user_file /etc/nginx/conf.d/{htpasswd_file}; where{htpasswd_file}- Filename where you enter the hash with password. (in our case it is file password.htpasswd)
Note:
Normally we recommend editing the nginx.conf configuration and keeping the contents of nginx-Ruk-Com PaaS.conf as default/backup But in this case, because the required changes are quite simple and we're pretty sure we know what we're doing, working directly with the file nginx-Ruk-Com PaaS is therefore easier.
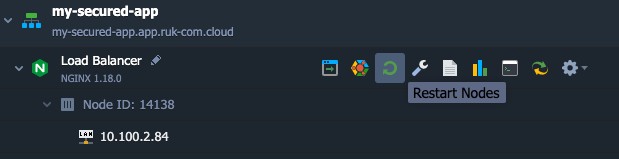
6.SaveThe changes you made again andRestartNGINX balancer node
7. Now when trying to open the application in the browser. You (and other clients) must pass an authentication window before accessing the application.
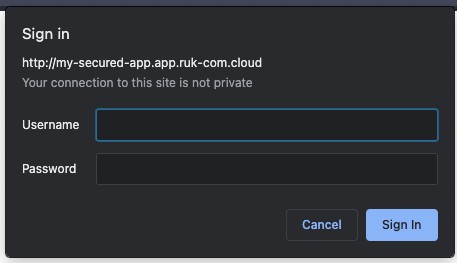
After providing the appropriate credentials (i.e. the credentials for which you generated the hash), your application will open.
IP Address Deny
If you notice some corruption being caused to your application by some users. You can stop him by blocking any requests sent from that user's IP address and thereby denying you access to the application. This can be done easily by following the steps below.
1. Open the Ruk-Com dashboard with your Env and click the button.Configfor nodeNGINX balancer
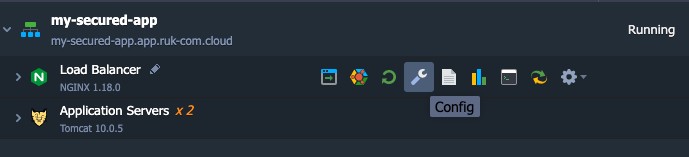
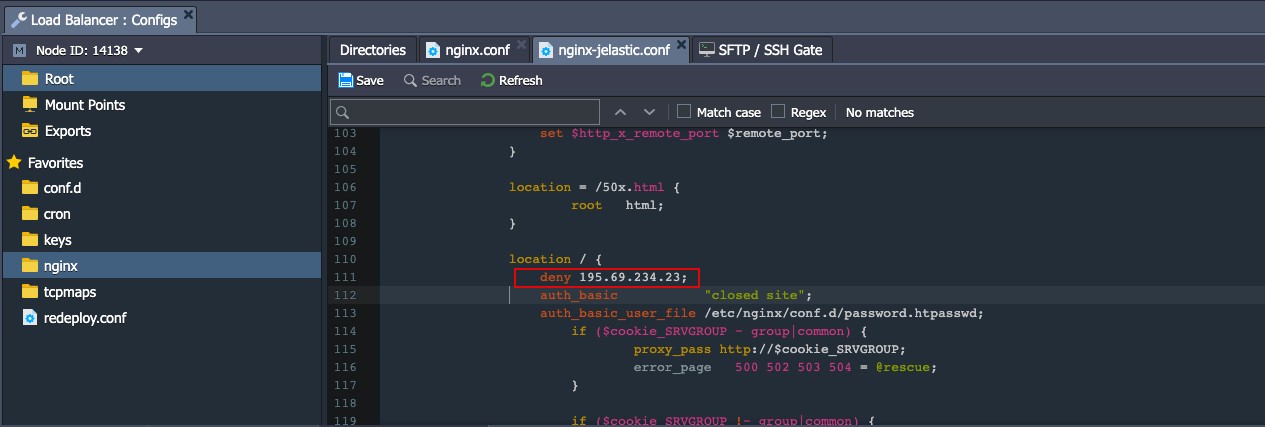
2. Click on file.nginx-Ruk-Com PaaS.confin folderconfWithin the tabConfiguration Managerthat is open, then locate the block in the first server code section and paste the following line into it:
deny {IP_ADDRESS};deny {IP_ADDRESS};
where{IP_ADDRESS}– is the address where you want to explicitly block the ability to open your application.
Note:
- You can also set this parameter to all, which means no one will have access to your application. In this case, specifying additional permission commands here may be helpful. This is used to determine the IP address (or range of addresses) you want to grant access to.
- If in case the simple actions offered above do not work for you. (This may be caused by a local configuration that on either platform), you can try the following instead:
if ($http_x_forwarded_for ~* {IP_ADDRESS}) {
  return 403;
}3.Savechanges andRestartyour NGINX node using the appropriate button.
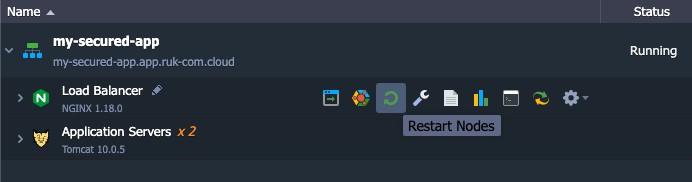
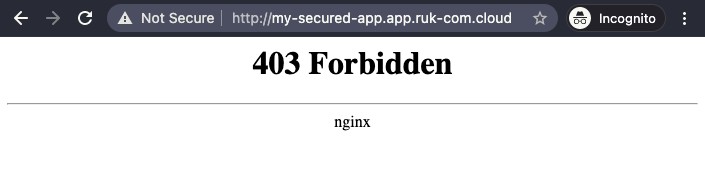
4. Because of this, users with rejected IP addresses will face a 403 Forbidden error while trying to access your application.
Methods Combination
To combine IP address-based restrictions and authentication methods, you would use the commandsatisfyBy default (i.e. if not explicitly declared in the configuration) it is set toallThis means that users should meet both types of conditions to be eligible. If you specify this command within the file configuration and set it toanyThe user will be able to open the application. If at least one condition is present Here is an example of such a configuration:
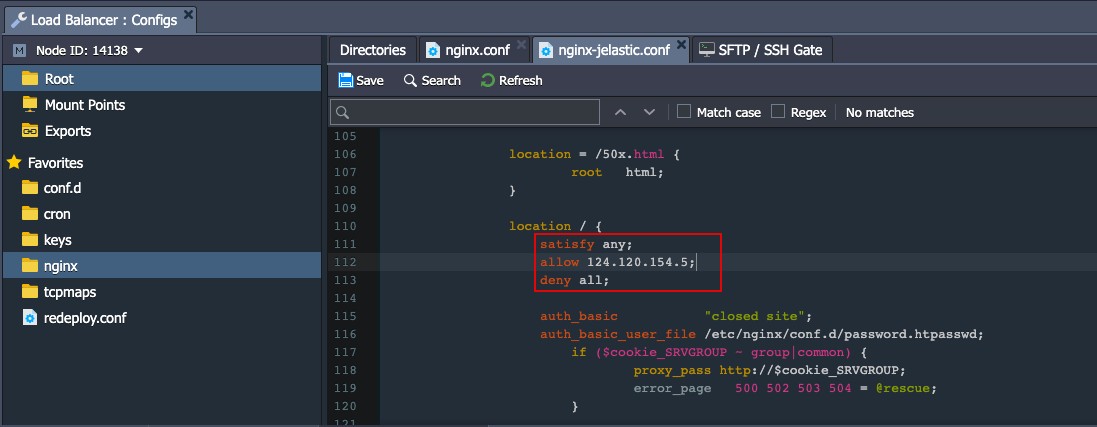
Therefore, an unauthenticated user will only be granted access if his IP address is whitelisted. Alternatively, users with rejected IP addresses will still be able to access the website if they enter the correct username and password.
So now you know a few basic ways to protect your apps. It only grants access to trusted users and rejects untrusted and potentially dangerous apps. Remember that spending time enhancing your application security now can save you a lot of time and money later, and even if it doesn't do any harm.