
Volumes
This guide is maintained for Ruk-Com PaaS. Screens and options may vary by platform version and account permissions.
Confirm the environment, region and account permissions, and back up current settings before changing a production system.
The Volumes tab contains the list of mounted at the current container data volumes, which are designed to persist the data independently of the container lifecycle. They are displayed in a view of paths to the appropriate mounted points inside a node:
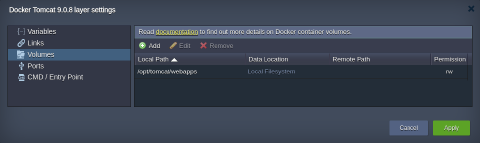 Storing data within volumes allows different internal operations (e.g., redeploying the container to another tag version) to be performed without affecting or losing the data. Such volume content preservation provides a high level of integrity for your data.
Below, we’ll consider how to add a custom volume for your container and types of data mounting the platform provides - at a Local Filesystem, separate dedicated Data Container, layer Master Container or External NFS Server.
Operating Custom Volumes
By default, the predefined volumes (i.e., which are determined within the appropriate template settings and are automatically set during container creation) are shown in the Docker layer settings > Volumes frame.
Beside that, you have an ability to mount and manage your custom volumes, placed either locally, at other instance on a platform or any external server. For that, follow the steps below.
- Select the Add button above the list to see four tabs, named in accordance to the types of volumes you are able to create:
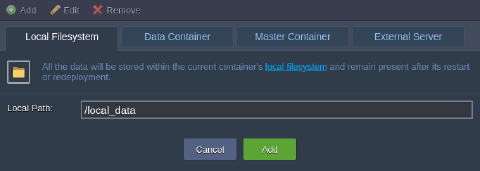
- Local Filesystem - the specified directory will be used as a local storage, intended to persist the data independently of the current container lifecycle (as well as by any other node)
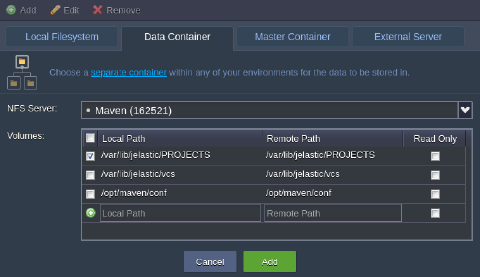
 * Data Container - this type of volume allows to mount data from any other layer within your account
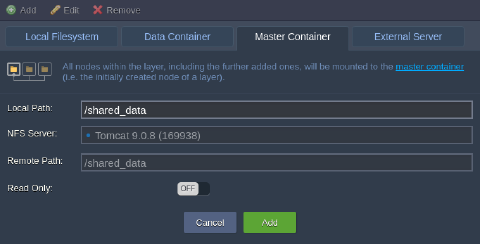
 * Master Container - data, stored within such volume, is physically placed at the initially created node of the layer (so-called “master node”) and is automatically shared with all of the rest instances within this layer
 * External Server - this option is intended to mount data from the external NFS server (either your custom third-party storage or container at another platform)
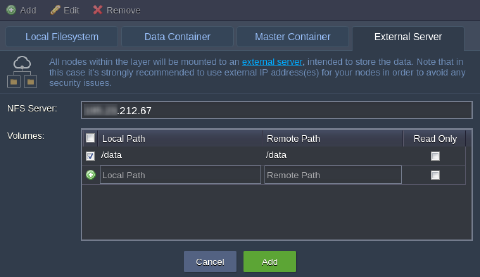
When all the parameters for the chosen mount type are specified (the details can be observed within the linked guides), click Add to finish the configuration.
- With the Edit option at the top pane (or through double-clicking on the corresponding record), you can change some settings for the already existing volumes:
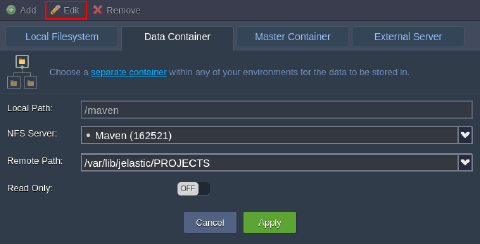 Here, the Local Path is unchangeable value, but you still can switch the mounting method (by moving to a different tab) and/or adjust the access permissions (with the Read Only switcher).
Do not forget to Apply the changes you’ve made.
- In case your custom volume is not needed anymore, it can be easily unmounted by choosing the corresponding string and clicking on the Remove button above.
Notes:
- before deletion, make sure the appropriate volume does not contain any substantial data, as it will be permanently removed
- the predefined (i.e., default) volumes can’t be deleted (whilst still being available for editing)
- if you want to remove volume but keep the mount point, untick the Unmount path checkbox
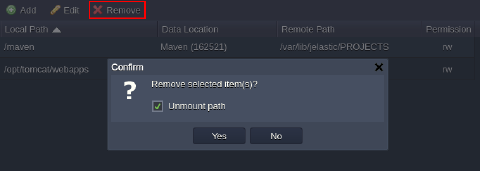 Confirm your decision within the appeared pop-up frame.
After that, don’t forget to Apply all your changes with the corresponding button at the general Docker layer settings window and, if required, within the topology wizard (in case of modifying the already existing environment).