
Generate SSH Key
This guide is maintained for Ruk-Com PaaS. Screens and options may vary by platform version and account permissions.
Confirm the environment, region and account permissions, and back up current settings before changing a production system.
The instructions below walk you through the steps of generating an SSH key. Since the 8.0.2 version, the platform supports the following key types:
- ECDSA
- EdDSA
- RSA
Follow the steps in one of the following sections (based on your operating system):
For Linux/MacOS
Generate a new SSH key (for example, the RSA type) using the ssh-keygen tool:
- Initiate generation with the following command:
bash Copy
ssh-keygen -t rsa
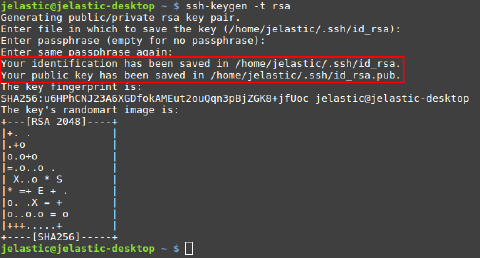 If needed, adjust the desired keys location and passphrase (we’ll proceed with the default values).
- You can view the value of both public and private SSH keys with the cat command (the exact location is circled in the image above). For example:
bash Copy
cat /home/jelastic/.ssh/id_rsa.pub
 3. Now, you can add the generated SSH key to your PaaS account:
- the public key for access via SSH Gate
- the private key for authentication at your remote GIT repository via SSH
For Windows
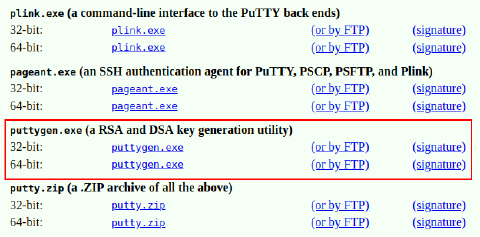
- Download and run an SSH keygen tool, for example, PuTTYgen:
 2. For example, specify the following parameters:
- choose the SSH-2 RSA key type
- enter the desired number of bits (e.g., 2048)
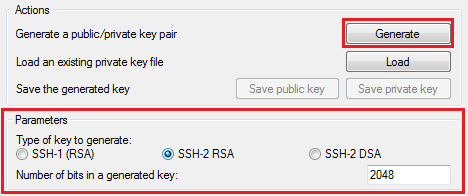 Click Generate.
- Now, depending on the type of key you need:
- to get the public key for SSH access to your account via local client - copy the generated key from the output field at the top of the window
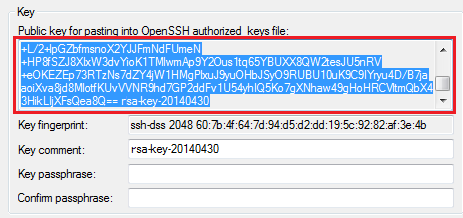 * to get the private key for authentication at your remote GIT repository via SSH - expand the Conversions menu and select the Export OpenSSH key option
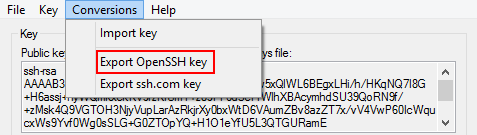
Afterward, you can open this file in any text editor and copy the key body for being added to the platform dashboard.