
Endpoints
This guide is maintained for Ruk-Com PaaS. Screens and options may vary by platform version and account permissions.
Confirm the environment, region and account permissions, and back up current settings before changing a production system.
Endpoints: Direct Connection to Cloud
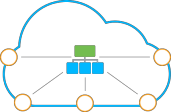
Endpoints are a powerful feature of the Ruk-Com PaaS that allows you to expose specific ports on your container for external access without the need for a public IP address. The platform automatically performs the necessary TCP/UDP port mapping, granting you direct access to the required container through the Shared Load Balancer. This capability is particularly useful for enabling third-party tools connections to your applications and services, facilitating tasks such as remote database management, direct deployment from IDEs, running multiple project copies on a single instance, and accessing admin panels. By leveraging endpoints, you can streamline your workflow and reduce costs associated with public IP usage.
Follow the instructions below to find out how to work with endpoints, and check out a few interesting use cases that you can try yourself.
Manage Endpoints
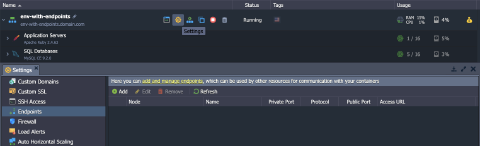
In order to manage endpoints, go to the environment’s Settings > Endpoints tab. Here, you can view the list of all existing endpoints and manage them as needed:
Add Endpoints
To create a new endpoint, click the Add button from the top tools’ pane and fill in the Add Endpoint form with the relevant data:
- Node - select one of the environment nodes from the list to create an endpoint for
- Name - type the endpoint’s name or choose one of the pre-configured templates (see the list in the hint below)
- Private Port - specify the node’s preferred local port to be used for mapping
- Protocol - select either TCP or UDP protocol
The Public Port and Access URL fields will be configured by the platform automatically.
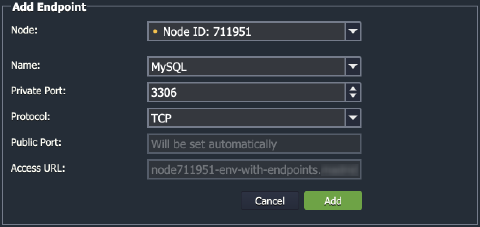 Click Add when ready.
Tip: For your convenience, we’ve prepared a list of pre-configured endpoint templates that you can use for the most common services.
Click to expand.
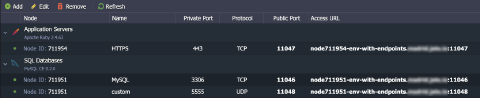
Your endpoint will be added to the list in a moment with actual values of the Public Port and Access URL already displayed. You can use these parameters to perform the required operations.

Notes:
- For endpoint functionality to work properly with the VPS and custom Docker containers, the appropriate private ports (stated during the endpoint creation) should be opened on the node manually.
- In order to use endpoints on nodes with public IP attached, you need to drop the “node${nodeId}-” prefix from the endpoint’s Access URL (as it will resolve the public IP otherwise).
Edit/Remove Endpoints
If necessary, existing endpoints can be easily adjusted. Double-click the required record to edit the endpoint settings or use buttons in the tools’ panel to:
- Edit - change the endpoint’s name, private port, and protocol settings (same as during the addition)
- Remove - delete the selected endpoint
Endpoints Use Cases
Once the required endpoints are set up, you can use them for running different tasks. Below, we’ll describe a few common use cases that you can benefit from:
Database Management
With endpoints, you can easily establish a remote connection to your database server without the need for a public IP.
The most common approach is to use the embedded terminal of your server or local machine, as it requires just the standard database client:
shell
mysql -h {host} -P {port} -u {user} -p
where:
- {host} - endpoint’s Access URL without the port suffix
- {port} - endpoint’s public port number
- {user} - database user name (the platform sends an email with the default database credentials after the environment creation)
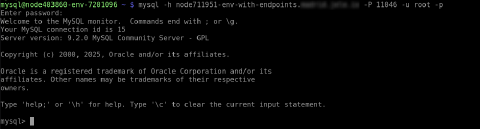 You need to provide the appropriate DB user’s password and, after the connection is established, can start working with your database by executing the required SQL queries.
Another way to remotely manage your database is to use a local client. It provides a user-friendly graphical interface and a variety of features to accelerate your work. Below, we’ll show you how to connect to your database using the popular MySQL Workbench client.
- Start your client and click the New Connection button.
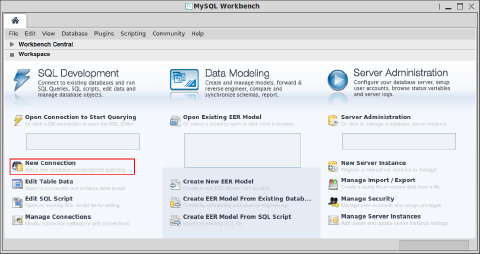 2. In the appeared Setup New Connection frame, fill in the following fields at the top:
- Connection Name - set the connection name
- Connection Method - choose the “Standard (TCP/IP)” method
Then, specify the required DB data inside the Parameters tab:
- Hostname - endpoint’s Access URL without the port suffix
- Port - endpoint’s public port number
- Username - database user name (the platform sends an email with the default database credentials after the environment creation)
- Password - click Store in Keychain to enter and save your password or skip this field to manually provide it during each connection attempt
- Default Schema - the database schema to be used by default (optional)
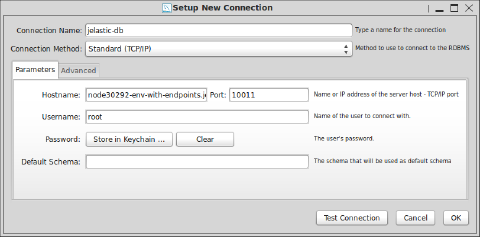 Click OK to complete.
- Double-click on the newly appeared connection to initiate it. If needed, specify your password in the appeared window.
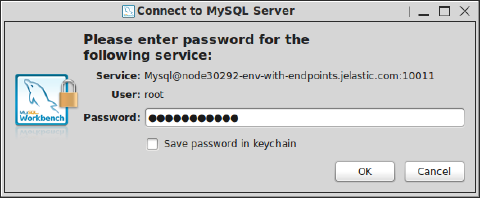
Tip: You can tick Save password in keychain if you don’t want to enter it manually each time you need to access your database.
Click the OK button to proceed.
- In a moment, you’ll be connected to your database.
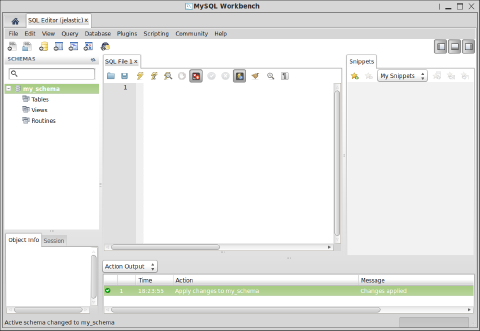 Great! Now, you can start organizing your data using all the provided benefits of the full-featured management client. For example, backup and restore your data within dump files.
Multiple Projects on App Server
Aside from the standard case of DB management, endpoints also give the ability to implement a variety of useful and interesting solutions for other servers. Below, we’ll show how to use a single application server as your production and development environment simultaneously.
- Create an endpoint for your application server with the preferred unused private port opened.

Note: Do not choose port 80 as a private port for this task, as Apache uses it by default for the incoming HTTP requests handling.
- Now, deploy your application twice to different contexts (e.g., prod and dev).
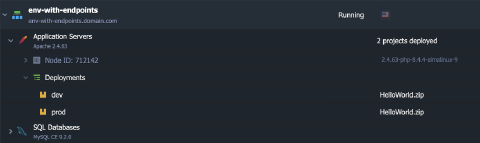 3. The next step is configuring the Apache server. Click the Config button next to it and open the /etc/httpd/conf/httpd.conf configuration file.
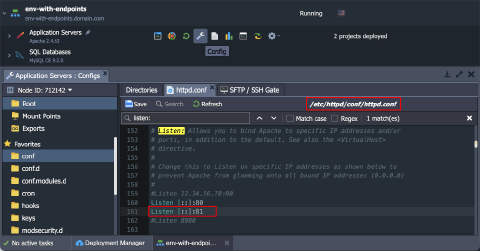 Add the private port from the endpoint to the list of listened ports:
conf
Listen [::]:{port}
- Locate the VirtualHost section for the default port 80 and duplicate it, specifying the corresponding port number (the same as in the step above - 81 in our case). Then adjust the appropriate DocumentRoot locations for both virtual hosts with the corresponding projects (prod - for the default one and dev - for the custom one).
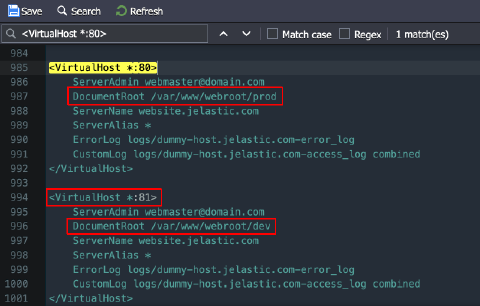 5. Save the changes and Restart the Apache server to apply them.
 6. Now you can connect to your prod project as usual, using the Open in Browser button or external custom domain (if one was configured for your app). To access the dev version, you just need to specify the used endpoint’s Access URL.
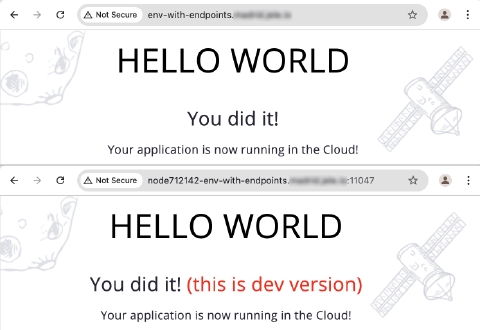 As a result, you’ve got two connection points to your two projects, which allow you to perform any desired testing or development tasks at one of the copies, with zero influence on the other one. Moreover, you can easily swap projects when necessary.