
Integrate Traffic Distributor with Running Application
This guide is maintained for Ruk-Com PaaS. Screens and options may vary by platform version and account permissions.
Confirm the environment, region and account permissions, and back up current settings before changing a production system.
Objective
This guide explains how to use Integrate Traffic Distributor with Running Application on Ruk-Com Cloud PaaS, with ordered procedures and practical verification points.
Before you begin
- Sign in with an account permitted to manage the relevant environment.
- Confirm the target environment, region and resources before saving changes.
- Create a backup or rollback plan before changing a production system.
Most developers face the problem of distributing traffic between multiple backends when there are applications already running by existing user groups and constant incoming load. So in addition to general traffic sharing configuration issues, it is further complicated by the need to apply appropriate "on-the-fly" changes to the front-end application instance, in many cases causing the application to hang temporarily. Below we consider how to combine solutions.Traffic Distributor (TD)It fits easily and painlessly into the topology of the running application.
Note:Traffic Distributor provides the ability to benefit from many useful solutions, such as:
- Apply application updates"invisible"That cannot be seen.blue-green deployment
- Check the performance, user experience, and stability of the new version of the app through testing.A/B
- Increase service availability with advanced failover protection
The steps are as follows:
- deploy a new version of the app and add it to the routing
- Configure entrypoint app through TD
Add Application Copy to Routing
For this example we run the application on a local Apache server.primary-envenvironment

1. In the first step you need to create another env environment with the same application inside. (We will name itSecond-env)
Tips:You can use the featurecloning environmentto instantly copy an identical environment (i.e. with all appropriate data and settings set within it) of any type.

More:Be sure to correctly configure "hardcoded" information (direct links, IPs, etc.) for the cloned environment, if required.
2. Now it's ready.Install Traffic Distributorand then by specifying these two environments as backends
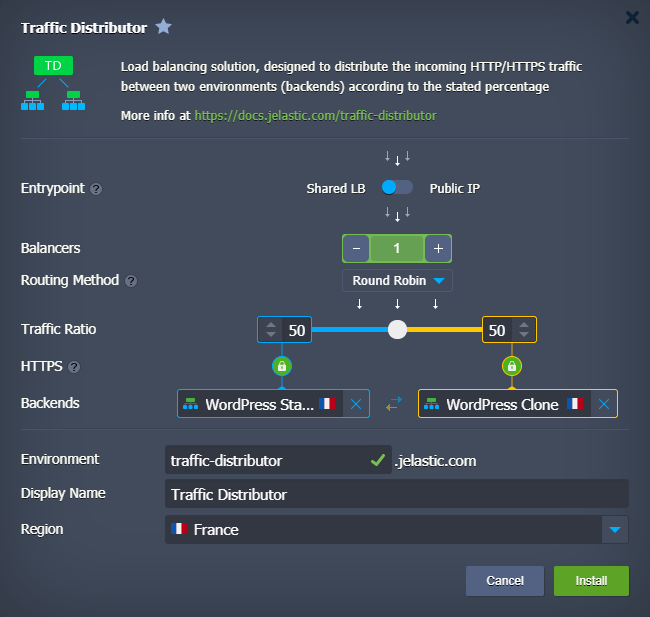
Tips:If there are multiple environment regions selected by the hosting platform provider. You can later move your environment to a different hardware set. This will provide better failover protection because you will be able to handle hardware issues that depend on your backends (if they occur) by routing requests to a working instance.
3. That's it, the Traffic Distributor is now set up and ready to handle requests to the application.
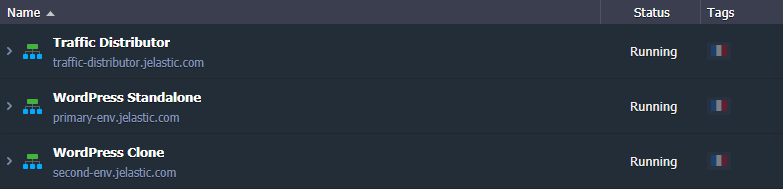
All that remains is to redirect incoming traffic from the first environment to the Traffic Distributor.
Configure App Entrypoint through TD
Most applications in production havecustom domainIn the basic environment example (primary-env) already has a custom domain name associated with it.
For proper request redirection (e.g. through a dispatcher) we need to move the appropriate entrypoint to the TD environment. This way it is placed in front of the selected backend pair and shares the incoming load between them as configured. Follow these easy steps on how to bind a custom domain:
- If usingCNAMEorANAMERedirect - Switch domain between default environment and TD.
- If using A Record - switch Public IPs to move the external IP used to the TD environment.
Switching domains
1. Hover over the custom domain environment and bind toprimary-envThen click the Settings button.
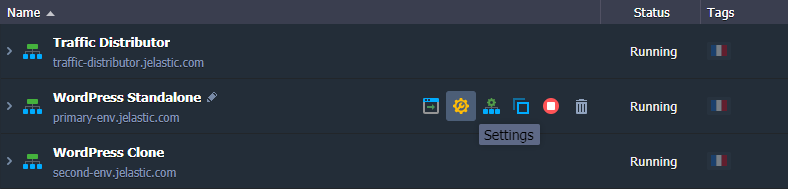
2. Within the environment settings tab, click on the section.Custom domainsThen go to options[Swap Domains]/swap-domains/)Select the Traffic Distributor environment within the drop-down list.
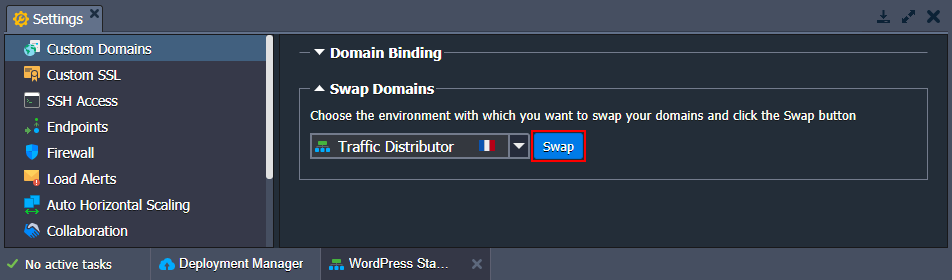
Click the buttonSwapand confirm this action in the pop-up to apply the changes.
3. Wait a moment. The domain-customized application will be moved environment with Traffic Distributor so that both of your backends will be available through this domain.
Switching Public IPs
The easiest way to send a Public IP fromprimary-env(such as your custom domain) to a Traffic Distributor is by using theExternal Addresses SwapCorresponding versions are available through Ruk-Com PaaS.APIandCLI
Allows required configuration operations to be performed in a single command, thereby eliminating configuration.A Recordmanually
If you want to work through the GUI, you need to go to your domain registrar and manually replace the external IP address in A Record for your custom domain.
1. Make sure the NGINX balancer instance in your Traffic Distributor environment hasExternal IP addressAttached Click Copy to copy the values from the dashboard.
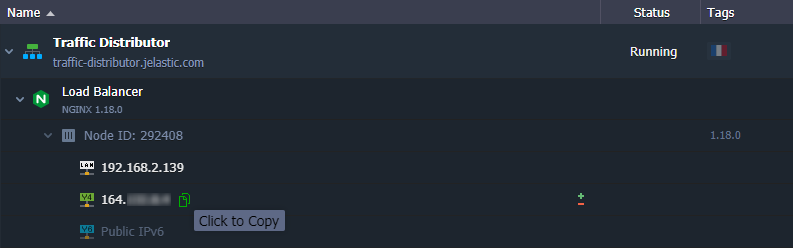
2. Then access your DNS management and set A Record to point to the new IP address.
Tips:
- To apply these changes, you must wait for the current DNS record cache to expire (as the DNS server may return old domain addresses upon request). If you want to know the exact length of time that a domain's old IP addresses will be kept in the cache, you can check the settings.TTLin your DNS manager (usually specified in seconds)
- Be sure to double-check the application's configuration for hardware IP-dependent settings and adjust accordingly.
3. After changing the application's entrypoint address, you can extractpublic IPExit the default environment (if you no longer need direct access) so as not to pay for unused portions.
That's all, all incoming traffic for your custom domain will be processed by the Traffic Distributor solution, which will route it according to the set traffic ratio between your application's backends.