
Let's Encrypt SSL with Node.js
This guide is maintained for Ruk-Com PaaS. Screens and options may vary by platform version and account permissions.
Confirm the environment, region and account permissions, and back up current settings before changing a production system.
The platform automates SSL certificate binding for most software stacks when working with the Let’s Encrypt add-on. However, the out-of-box automation is difficult for the Node.js nodes due to the stack specifics. In the Node.js application, Let’s Encrypt certificates are issued but are not bound - just stored at the /var/lib/Ruk-Com PaaS/keys directory. You can manually use them in your application by creating a Web server and reading the certificates directly from the code.
Tip: As an alternative, you can place a load balancer node in front of your Node.js server to act as a reverse proxy. The Let’s Encrypt SSL add-on can be installed on such a balancer, benefiting from out-of-box automation.
Such an approach is preferable for larger projects that want to utilize the horizontal scaling feature as it will require a load balancer node anyway.
This guide will provide a basic example of how you can implement the Let’s Encrypt SSL add-on for the Node.js application.
Using SSL with NodeJS
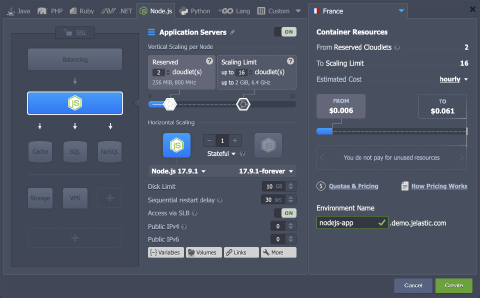
- Create an environment with the Node.js application server.
 2. Install the Let’s Encrypt add-on to generate free SSL certificates for your application.
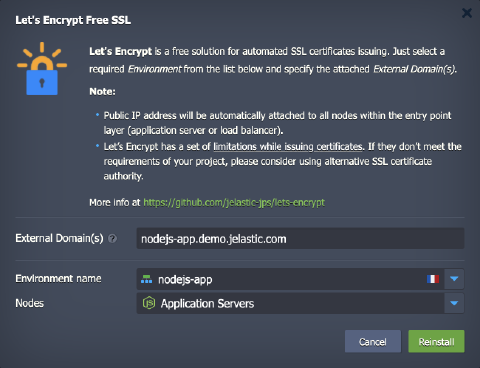 Due to the Node.js engine specifics, the Let’s Encrypt add-on just generates SSL certificates. You must manually adjust your application code to read certificates from:
- /var/lib/Ruk-Com PaaS/keys/privkey.pem
- /var/lib/Ruk-Com PaaS/keys/fullchain.pem
- /var/lib/Ruk-Com PaaS/keys/ca.cer
- Create a new app or integrate HTTPS configs into the existing application. Check the examples below:
- new application – replace the content of the default server.js file in the /home/Ruk-Com PaaS/ROOT directory
Copy
const https = require('node:https');
const fs = require('node:fs');

const options = {
  key: fs.readFileSync('/var/lib/jelastic/keys/privkey.pem'),
  cert: fs.readFileSync('/var/lib/jelastic/keys/fullchain.pem')
};

https.createServer(options, (req, res) => {
  res.writeHead(200);
  res.end('hello world\n');
}).listen(443);

console.log("The HTTPS server has started at: https://localhost:443/");
- existing application – for example, deploy the default “Hello World” package and edit the /home/Ruk-Com PaaS/ROOT/server.js file to work over HTTPS
Copy
#!/usr/bin/env node

var https = require("https"),
    url = require("url"),
    ejs = require("ejs"),
    fs = require("fs"),
    os = require("os"),
    staticResource = require("static-resource"),
    port = 443,
    serverUrl,
    handler,
    favicon;

const options = {
  key: fs.readFileSync('/var/lib/jelastic/keys/privkey.pem'),
  cert: fs.readFileSync('/var/lib/jelastic/keys/fullchain.pem')
};

serverUrl = "https://localhost:" + port + "/";
handler = staticResource.createHandler(fs.realpathSync("./public"));

favicon = fs.realpathSync('./public/favicon.png');

https.createServer(options, function (req, res) {
    var path = url.parse(req.url).pathname;

    if (path === "/") {
        res.writeHead(200, {"Content-Type": "text/html"});
        res.write(ejs.render(fs.readFileSync("./index.ejs", "utf8"), {
            hostname: os.hostname()
        }));
        res.end();
    } else if (req.method === 'GET' && path === '/favicon.png') {
        res.setHeader('Content-Type', 'image/png');
        fs.createReadStream(favicon).pipe(res);
    } else {
        if (!handler.handle(path, req, res)) {
            res.writeHead(404);
            res.write("404");
            res.end();
        }
    }
}).listen(port);

console.log("The HTTPS server has started at: " + serverUrl);
- Run your application via Web SSH. In our example, we use the foreverprocess manager (sudo is needed to listen on the privileged port 443).
Copy
cd /home/jelastic/ROOT
sudo forever start server.js
Note: The command should be adjusted for different process managers. Or you can start your application without it:
Copy
sudo node server.js
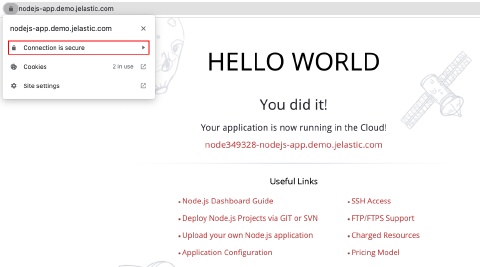
That’s all! Go to your Node.js application over https:// to verify access and certificate validity.
Certificate Update
Let’s Encrypt SSL certificates remain valid for 90 days. After that, they should be updated for the encryption to remain valid. The add-on provides automated renewal 30 days before the expiration. However, after the certificate update, you need to restart (reload is preferred, if possible) the server to apply new certificates.
The operation can be automated alongside the certificate update by means of the webhooks – a custom script executed after the default add-on operations.
Go to the /var/lib/Ruk-Com PaaS/keys/letsencrypt folder (create if missing) and add the settings-custom file. Based on the Node.js process manager, your restart/reload script may vary. For example:
Copy
deployHook=sudo forever restart /home/jelastic/ROOT/server.js

Tip: Alternatively, you can provide the .sh script with the required commands:
Copy
deployHook: /path/to/your/file.sh
Ensure that your script file is executable (chmod +x {fileName}). For example, the script content can be the following:
Copy
#!/bin/bash
 echo "This is example of deployHook script" >> /tmp/testFile
Also, you can configure the update hook via API using the deployHook parameter. See Let’s Encrypt SSL article for more details.
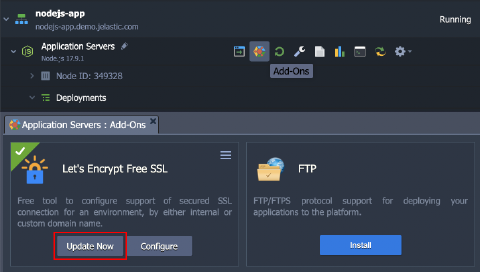
You can manually trigger certificate updates from the Add-Ons menu for your Node.js server.
Additional Recommendations
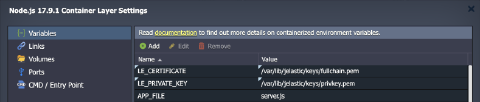
- Create environment variables with paths to the Let’s Encrypt certificates to avoid “hardcoding” and simplify edits in case of certificate location changes.
- Let’s Encrypt certificate - /var/lib/Ruk-Com PaaS/keys/fullchain.pem
- Let’s Encrypt private key - /var/lib/Ruk-Com PaaS/keys/privkey.pem
 * When working with the Let’s Encrypt add-on via API, you can use the deployHook parameter to handle custom logic once certificates got issued/updated.