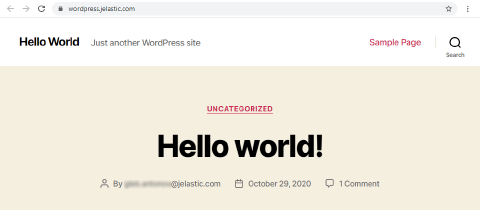
Marketplace
This guide is maintained for Ruk-Com PaaS. Screens and options may vary by platform version and account permissions.
Confirm the environment, region and account permissions, and back up current settings before changing a production system.
The Marketplace is a library of popular applications configured and optimized through the platform Packaging Standard. You can install these packaged solutions automatically from the dashboard, without manual deployment and optimization steps.
Open the Marketplace with the appropriate button at the top-left corner of the dashboard.
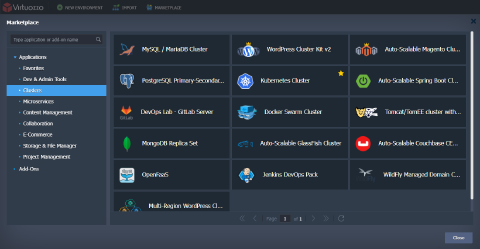 In the Marketplace window, you can browse categorized solutions to install new Applications from scratch and Add-Ons for existing environments. The platform maintains the following packages for one-click installation:
- Applications| Name | App ID | Short Description |
| --- | --- | --- |
| Alfresco |
alfresco| Your Enterprise Content. Always in sync. The only enterprise content management solution that you can use in the cloud, on-premises, or both. | | Ametys |ametys| Ametys is a free and open-source professional web content management system (WCMS), which combines content richness with a user-friendly interface. | | Auto-Scalable Couchbase CE Cluster |couchbase-cluster| Out-of-the-box Couchbase Community Edition cluster with preconfigured auto scaling and load balancing. | | Auto-Scalable GlassFish Cluster |glassfish-cluster-native| Pre-configured and ready-to-work GlassFish Cluster with auto scaling triggers. The cluster consists of 1 DAS node, 2 Worker nodes, and 1 NGINX node as the load balancer. By default, connection to the cluster is secured with built-in SSL. | | Auto-Scalable Magento Cluster v2 |magento-cluster| Auto-scalable and highly-available Magento cluster with load balancing, data replication, content caching and user session storage. | | Auto-Scalable Spring Boot Cluster |spring-boot-cluster| Pre-configured and ready-to-work Spring Boot Cluster with auto scaling triggers. By default, connection to the cluster is secured with built-in SSL, which is available for verified accounts. | | Backup Storage |wp-restore,wp-edition-restore| Create a centralized storage repository for backups of the filesystem and the database. It can be deployed as a single node or as a multi-node fault-tolerant scalable GlusterFS cluster. Backup storage can keep multiple backups of numerous containers created under a single account using the Restic software. Storage works in tandem with backup add-ons integrated into prepackaged applications. | | Cyclos 4 PRO |cyclos4| Cyclos 4 PRO is a payment platform for large businesses and organizations. It is secure and reliable Java software that can be installed on your server. Both the application server and the database server are fully clusterable. It offers mobile banking (Mobile app, SMS, USSD, and IVR), online banking and much more. | | DevOps Lab - GitLab Server |gitlab-ci-cd| Private GitLab Server with scalable runners and Docker Hub Registry. | | Django CMS |djangocms| Django CMS is an open-source content management system with a user-friendly interface and rich feature set. Django CMS is aimed at helping developers take applications from concept to completion as quickly as possible, avoiding common security issues, and flexibly scaling busy websites. | | Docker Engine CE |docker-engine-ce| Automatic installation of Docker Engine (CE) as a standalone or worker node. | | Docker Swarm Cluster |docker-swarm-ce| Docker Swarm Cluster with out-of-box auto-clustering and auto-scaling. | | DokuWiki |dokuwiki| DokuWiki is simple to use and highly versatile open-source wiki software that doesn’t require a database. It is loved by users for its clean and readable syntax. The ease of maintenance, backup, and integration makes it an administrator’s favorite. | | Drupal |drupal| Drupal is an open-source content management platform that enables users to create and manage various websites and web applications. | | Eclipse Mosquitto |mosquitto-dev| An open-source MQTT message broker for IoT (Internet of Things) network management. | | Ghost |ghost| The professional publishing platform. | | Gitblit |gitblit| Gitblit is an open-source, pure Java stack for managing, viewing, and serving Git repositories. It’s designed primarily as a tool for small workgroups who want to host centralized repositories. | | GlusterFS Replicated Volume |glusterfs| GlusterFS Replicated Volume. | | IOTA Node |iota| IOTA’s Tangle is an open, feeless and scalable distributed ledger. | | Jenkins DevOps Pack |jenkins| Auto-scalable and clustered solution with pre-installed plugins to support building and deployment automation for organizing continuous integration (CI) and continuous delivery (CD) pipelines. | | Jitsi Video Conferencing |jitsi| Host your own Jitsi server. | | Joomla |joomla| Joomla! is an open-source content management system (CMS) for publishing web content. It offers a powerful yet user-friendly interface for building websites and online applications. | | Kubernetes Cluster |kubernetes| Kubernetes cluster with automated scaling and cost-efficient pay-per-use pricing for running cloud-native microservices. | | Laravel |laravel| Open-source PHP web framework for rapid development. | | Liferay |liferay| Leading open-source web-based platform for building portals. | | LimeSurvey |lime| LimeSurvey is an open-source online statistical survey web application written in PHP. It enables users without coding knowledge to develop, publish and collect responses to surveys. Surveys can be configured to include branching, apply custom layouts/designs (using a web template system), and provide basic statistical analysis of survey results. | | Load Alerts to Slack (BETA) |loadalerts-to-slack-installer| Slack integration with the Ruk-Com PaaS alert system. | | Magento Standalone |magento| Magento is the eCommerce software and platform trusted by the world’s leading brands. Grow your online business with Magento! | | Magnolia CMS |magnolia| Magnolia is an open-source Java CMS that delivers smartphone simplicity at enterprise scale. The mobile-inspired HTML5 user interface works through customizable, task-focused Apps, a notification stream called the Pulse, and a system of Favorites for quickly accessing the workspace. | | MariaDB Multi-Region Galera Cluster |multiregion-galera-cluster| MariaDB Galera Cluster deployed across multiple regions. | | Mattermost Chat Service |mattermost| Mattermost is an open-source, self-hostable online chat service with file sharing, search, and integrations. It is designed as an internal chat for organizations and companies, and mostly markets itself as an open-source alternative to Slack. | | MODX |modx| MODX is the web content management platform for those who care about no-compromise design and exceptional user experience. It gives you complete control over your site and content, with the flexibility and scalability to adapt to your changing needs. | | Moodle |moodle| Moodle is a learning platform, designed to provide educators and learners with a single robust, secure, and integrated system to create personalized learning environments. | | Multi-Region Redis Cluster |redis-cluster-multiregions| Enterprise-grade Redis Cluster with automatic distribution across several regions. | | Multi-Region WordPress Cluster v1 (Alpha) |wordpress-cluster-multiregions| Enterprise-grade WordPress Cluster with automatic distribution across several regions. | | Multi-Region WordPress Standalone |wordpress-multiregion-standalone| WordPress standalone instances deployed across multiple regions, powered by LiteSpeed. | | MySQL-based SSL/TLS Encrypted Connection (MySQL/MariaDB/Percona) |mysql-based-ssl| Enforces SSL/TLS on database connections in MySQL/MariaDB/Percona cluster and standalone deployments. Certificate folder/var/lib/jelastic/keys/SSL-TLS. | | MySQL/MariaDB/Percona Cluster |mysql-cluster-main| A set of MySQL/MariaDB/Percona cluster topologies with pre-configured replication and auto-discovery of nodes. | | MySQL/MariaDB/Percona Multi-Region Cluster |mysql-multiregion-cluster| A set of Multi-Region database cluster topologies based on MySQL/MariaDB/Percona stacks. | | Nextcloud |nextcloud| Nextcloud is a free and open-source file hosting solution that provides cloud storage, file synchronization, and collaboration features. | | Nexus Repository Manager |nexus| Nexus Repository OSS is an open-source repository that supports many artifact formats, including Docker, Java, and npm. With Nexus tool integration, pipelines in your toolchain can publish and retrieve versioned apps and their dependencies using central repositories accessible from other environments. | | Node-RED Dev |node-red-dev| Node-RED development environment for building IoT networks in the cloud. | | Odoo Community Edition |odoo-ce| Odoo is an all-in-one business software (ERP, CMS, CRM application, e-Commerce backend, etc.). | | Open Liberty in Kubernetes |openliberty-in-k8s| Open Liberty is an open-source framework for building fast and efficient cloud-native Java microservices empowered by features from MicroProfile and Jakarta EE. | | OpenCart |opencart| OpenCart is an open-source PHP-based online shopping cart system. A robust e-commerce solution for Internet merchants that provides the ability to create your own online business and participate in e-commerce at a minimal cost. OpenCart offers a feature-rich, visually appealing interface that is easy to use. | | OpenCms |opencms| OpenCms is an open-source content management system (CMS) that allows users to create and manage complex websites quickly and efficiently. OpenCms features a user-friendly, fully browser-based interface and a flexible template engine, making it suitable for both small and large-scale web projects. | | OpenVPN Access Server |openvpn-as| A private OpenVPN server installation inside your own cloud environment for establishing a secure Internet connection and remote access. | | osTicket |osticket| osTicket is one of the most popular and highly trusted customer support ticketing systems. osTicket seamlessly routes all inquiries into a simple and easy-to-use web-based customer support platform. | | ownCloud |owncloud| ownCloud is an open-source file cloud storage platform. It supports simple document storage, data sharing, and synchronization. | | Plesk Hosting Platform |plesk| A web hosting platform with a complete set of technical, security, and automation tools. | | Postgres SSL/TLS Encrypted Connection |postgres-ssl| Enforces SSL/TLS on database connections in Postgres cluster and standalone deployments. Certificate folder/var/lib/jelastic/keys/SSL-TLS. | | PostgreSQL Multi-Region Cluster |postgres-cluster-multiregions| Enterprise-grade Postgres Cluster with automatic distribution across several regions. | | PostgreSQL Primary-Secondary Cluster |postgres-master-slave| PostgreSQL Primary-Secondary Cluster with asynchronous replication. | | PrestaShop |prestashop| PrestaShop is an open-source and fully customizable solution for selling products online. PrestaShop is effective, fast, and easy to use, even for non-professionals. | | qdPM |qdpm| qdPM is a free web-based project management tool suitable for a small team working on multiple projects. It is fully configurable; you can easily manage projects, tasks, and people. Customers interact using a ticket system integrated into task management. | | Redis cluster |redis-cluster| High-performance and highly available scalable Redis cluster with horizontal data sharding. Each primary node is complemented by a secondary node to ensure read load distribution and auto-recovery if the primary goes down. | | Redis Encrypted Connection |redis-based-ssl| Enforces SSL/TLS on database connections in Redis cluster and standalone deployments. Certificate folder/var/lib/jelastic/keys/SSL-TLS. | | Redmine |redmine| Redmine is a flexible project management web application written using the Ruby on Rails framework. | | Spring Boot Fat Jar Builder |spring-boot-fat-jar| This package consists of Maven and the Spring Boot framework inside a Java Engine node. It automates building a sample Java project as a fat (or so-called uber) JAR to run as a microservice. | | Spring Boot Thin Jar Builder |spriing-boot-thin-jar| This package consists of Maven and the Spring Boot framework inside a Java Engine node. It automates building a sample Java project as a thin JAR to run as a microservice. | | Tomcat/TomEE cluster with High Availability |tomcat-tomee-cluster| Tomcat/TomEE cluster. | | Traffic Distributor |traffic-distributor| Load balancing solution, designed to distribute the incoming HTTP/HTTPS traffic between two environments (backends) according to the stated percentage. | | WebMail Lite |webmail| WebMail Lite is a fast and easy-to-use webmail front end for your existing IMAP mail server. WebMail Lite can be used to access mail on virtually any IMAP-enabled mail server. The integrated web administration panel allows you to manage system settings without manually editing configuration files. | | WildFly Continuous Deployment |wildfly-cd| Continuous Deployment for WildFly. | | WildFly Managed Domain Cluster |wildfly-cluster| WildFly Cluster in Managed Domain Mode. | | WordPress Cluster Kit v2 |wordpress-cluster| WordPress Cluster with built-in kit v2 for choosing optimal servers, database clustering type, scaling mode, and a set of advanced features for high-traffic projects. | | WordPress Standalone Kit |wordpress| WordPress Standalone Kit with built-in kit for choosing optimal application servers and a set of advanced features for running websites and blogs. | | XWiki |xwiki| XWiki is an open-source, light and powerful wiki platform that is designed to help you create and manage content collaboratively. Due to its highly modular architecture, XWiki allows you to deploy a professional wiki with extensibility features such as scripting in pages and plugins. | - Add-Ons| Name | App ID | Short Description |
| --- | --- | --- |
| Database Backup/Restore for the filesystem and the databases |
db-backup| Backup Add-On for the database. It can be used to create scheduled backups in any required time zone and restore corrupted databases, even if the content has been completely deleted. | | Database Cluster Recovery |db-recovery| The add-on performs comprehensive diagnostics of your database cluster and can perform automatic recovery. | | Database Corruption Diagnostic |db-corruption-check| The add-on checks your database for corrupted or inconsistent data across components. | | Env Start/Stop Scheduler |start-stop-scheduler| The scheduler for automatic environment hibernation and wake-up. | | File Synchronization |file-sync| Lsyncd is a lightweight, live mirror solution used to synchronize app servers. When coupled with inotify, lsyncd initiates file sync only after it detects actual changes in the system. This reduces CPU load and avoids spending resources on unnecessary synchronization. | | Git-Push-Deploy Add-On |git-push-deploy| Simple CI/CD pipeline for Git projects. | | Let’s Encrypt Free SSL |letsencrypt-ssl-addon| Free tool to configure secure SSL connections for an environment using either an internal or custom domain name. | | New Relic APM |newrelic-apm| Monitor and troubleshoot your Java/PHP web apps. | | NGINX Amplify |nginx-amplify-agent| NGINX Amplify is a free tool for monitoring NGINX server metrics. | | NGINX Safe Reload |nginx-safe-reload| Apply NGINX configuration changes without a restart by performing a syntax check and safely reloading the service. | | Node.js and NPM Installer |certified-nodejs-installer| Automatically installs the required version of Node.js for your containers and grants access to the NPM package manager. | | TimeZone Change |timetz| Time zone change tool. | | WordPress Backup/Restore for the filesystem and the databases |wp-backup| Backup Add-On for the WordPress application root directory and the database. It can be used to create scheduled backups in any required time zone and restore corrupted websites, even if the content has been completely deleted. |
Note: The provisioned set of packages can vary on each platform, depending on the hosting provider settings.
The Ruk-Com PaaS team frequently adds new solutions to this list. Updates are announced on the platform blog; subscribe to receive notifications about new packages.
Import the appropriate manifest file via the dashboard to deploy a solution. You can also explore package source code, fork a repository, and customize it before installation.
Subscription Products
Note: This feature’s availability depends on your hosting provider’s settings.
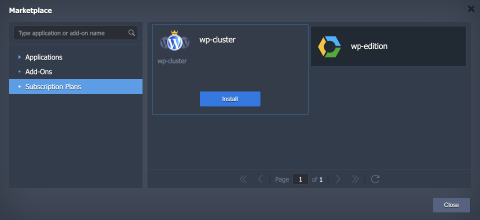
The Subscription Plans section of the Marketplace lists products offered on a subscription basis (at a fixed price). For details, see Subscription-Based Products.
Installing a Solution from the Marketplace
The example below walks through installing a packaged solution.
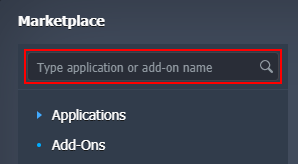
- To find a particular application, use the Search box at the top of the Marketplace section. Type a phrase to search solution names and descriptions for both applications and add-ons.
 2. This example uses WordPress Standalone Kit. Select it from the search results to open the installation frame. Alternatively, find the solution in the categorized list (Content Management in this example), hover over it to view details, and click Install.
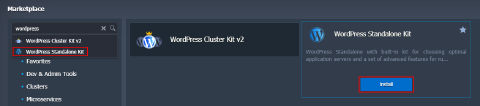 3. Depending on the package, you may need to provide additional settings. For example, you can specify the node count or enable specific options.
For details on WordPress Standalone Hosting, see the linked guide. Basic settings required by most applications include the environment name, alias, and, when available, region.
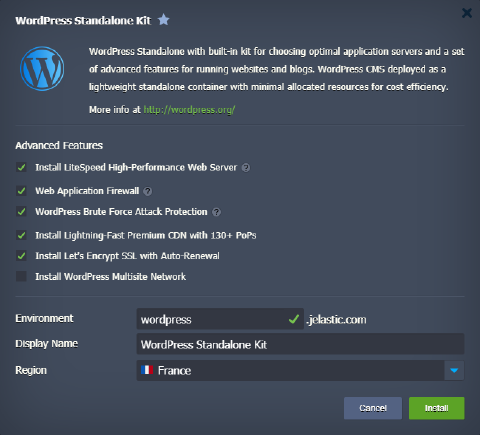 Click Install to continue.
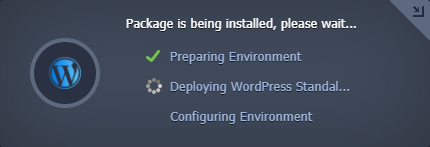
- Installation may take several minutes, depending on the selected solution.
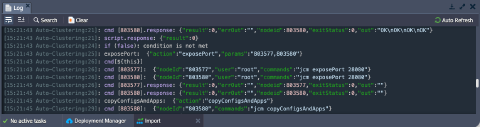
Tip: You can track package installation in detail in the Cloud Scripting logs (Import>JPS>View Logs) in the dashboard:
- After configuration completes, a success window appears. In this example, it also shows administration credentials (also sent by email notification).
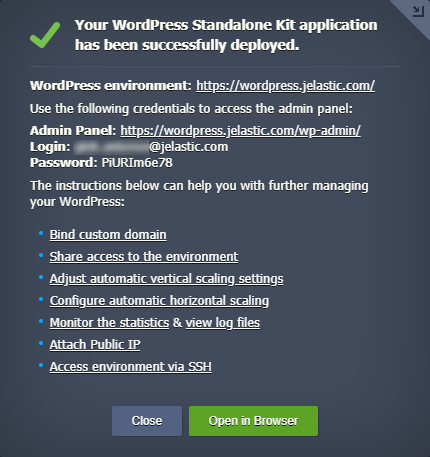 Click the Open in Browser button.
- The installed application opens in a new browser tab.