
SSH Access to Container: Manage Your Server Remotely
This guide is maintained for Ruk-Com PaaS. Screens and options may vary by platform version and account permissions.
Confirm the environment, region and account permissions, and back up current settings before changing a production system.
Objective
This guide explains how to use SSH Access to Container: Manage Your Server Remotely on Ruk-Com Cloud PaaS, with ordered procedures and practical verification points.
Before you begin
- Sign in with an account permitted to manage the relevant environment.
- Confirm the target environment, region and resources before saving changes.
- Create a backup or rollback plan before changing a production system.
Ruk-Com Cloud PlatformIt allows you to conveniently access containers within your account via SSH. You can choose from 2 main methods:
- wp:list-item
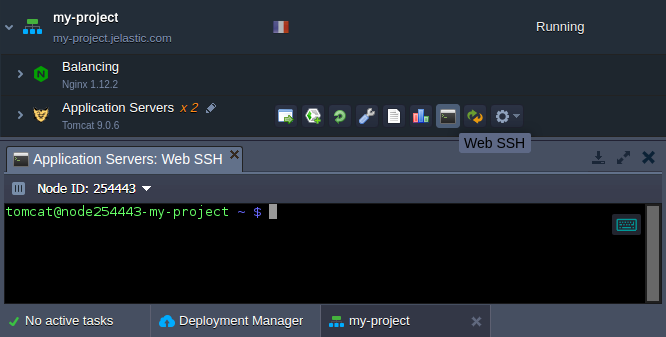
- Web SSH- You can click the buttonWeb SSHnext to the desired environment or container to instantly open Terminal online in a web browser. A terminal will appear at the bottom of the dashboard. It allows you to quickly manage your server without using external programs.
- wp:list-item
- SSH Gate (via Local SSH Client)- Another way to connect to your server is to use an SSH client from your own machine (such as Terminal or a program like PuTTY) usingSSH Key PairPreset:wp:list wp:list-item
- addPublic KeyGo to your account via the Ruk-Com Cloud dashboard. /wp:list-item wp:list-item
- usePrivate Keymatched on your machine for connection.
This method is suitable for those who want to manage their server from their personal machine. without opening the browser
/wp:list-item
/wp:list
/wp:list-item
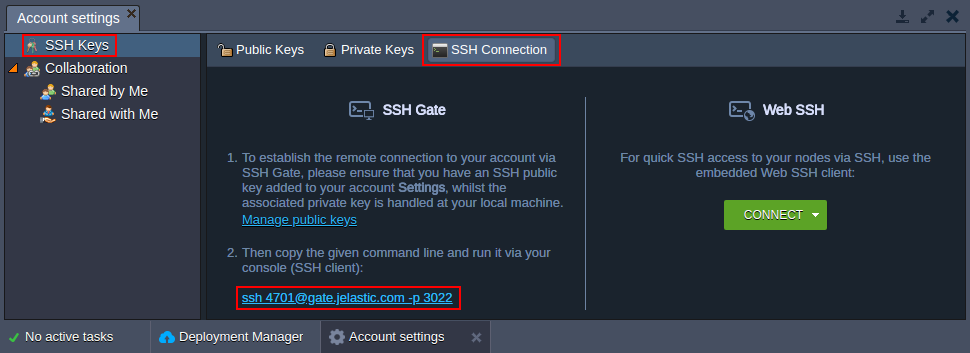
Once you have set up all the necessary information, You can connect via SSH using the commands shown inred frameUnder the tabSSH Accessin your account
?️Note:
For convenience and quick access This article will focus on use throughWeb SSHMainly
However, the commands listed below can also be used if you are connected via SSH using your local SSH Client.
Tips:
For most servers within Ruk-Com Cloud PaaS (Including custom Docker containers) You will automatically receive full root privileges. When connecting via SSH
The remaining nodes, which are usually created from Stack Templates certified by Ruk-Com Cloud, have some permission restrictions. But it can also be controlled and managed to a sufficient degree through a special set of commands allowed by the system.
If you want to see the listTerminal commandsAll with explanations of the various options. You can see more from the website.
In this guide, we will focus on the most basic commands. So you understand how it works and can confidently start managing containers via the SSH Protocol.
Navigating the file system within a container (via SSH)
This section is suitable for beginners. It will help you understand the basics of navigating file systems within containers via SSH if you already have experience. You may skip to the next topic related to senior management.
Once you have successfully connected to the container through the console, The system will take you toHome Directoryof the server automatically This is often where files and settings are stored.
Basic commands for navigating folders:
- wp:list-item
cd {directory_path}
Change to the specified directory, which{directory_path}Can be:wp:list wp:list-item- Current subfolder, e.g.
cd logs
/wp:list-item
wp:list-item
- Folders nested at multiple levels, e.g.
cd opt/tomcat
/wp:list-item
wp:list-item
- Full path (Absolute path) e.g.
cd /var/www/webroot/ROOT
/wp:list-item
/wp:list
/wp:list-item
wp:list-item
cd ..
Return to the previous level of folder in the file tree.
/wp:list-item
wp:list-item
cd ~
Immediately return to the user's Home Directory. It doesn't matter what folder you're in.
/wp:list-item
wp:list-item
cd /
Go to the container's Root Directory. (beginning of the entire file structure)
/wp:list-item
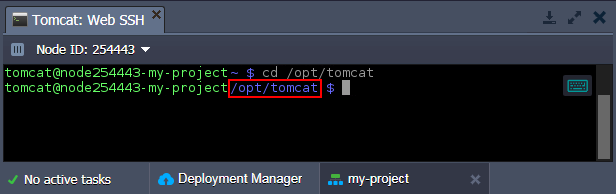
You will see the purple string next to the container host name change. which indicates your current location.
Tips:If you're just starting out with the stack runtime that runs your instance. You should first explore the internal structure (such as the file and directory tree). available configuration files, etc.) The most convenient way is to useFile ManagerBuilt-in GUI which is available by clicking a button.Confignext to the desired server on the control panel in the dashboard.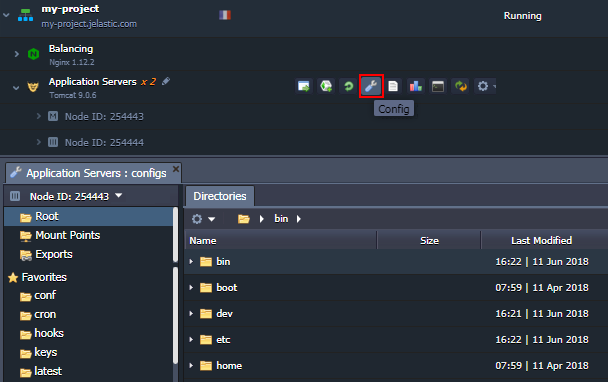
Click the button“Config”next to the container. The system will open the screen.File Managerwhere you can instantly browse files/directories, delete, edit or upload files.
1. To create a new file or folder, run the next command:
- wp:list-item
- touch [path-to/]{file}-Create a new file /wp:list-item wp:list-item
- mkdir [path-to/]{dir}-Create a new folder
where
{file}and{dir}- Name of desired file or folder (if created in current directory)
[path-to/]- Optional parameters For this case, the new item should be in a different location.
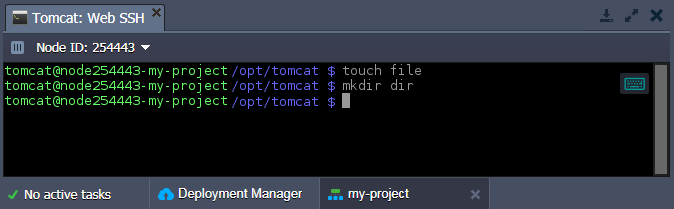
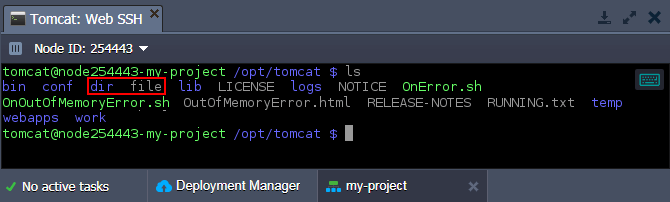
2. To ensure that the files and folders listed above have been created. Let's see the files and directories at the current location using this command:
ls
3. Common commands used for file management
- wp:list-item
- cat- Use with text files; Depending on the args specified, viewing, merging, and duplicating files is allowed (duplicate) /wp:list-item wp:list-item
- cp- Used for copying files and directories. /wp:list-item wp:list-item
- locate- Used to search for specific files or directories within the server by name. (or some parts) /wp:list-item wp:list-item
- mv- Used for moving files or renaming files and directories. /wp:list-item wp:list-item
- pwd-Used for viewing the full path to the current directory (relative to the root container). /wp:list-item wp:list-item
- rm-Used to delete specified files or directories. /wp:list-item
Now let's look at the default shell to monitor and manage node metrics. resource use internal work processes, etc.
Commands for viewing server system information
1. Get a short summary of the current container state and make sure, for example, that there are no abnormal performance or operability issues using the commandw:
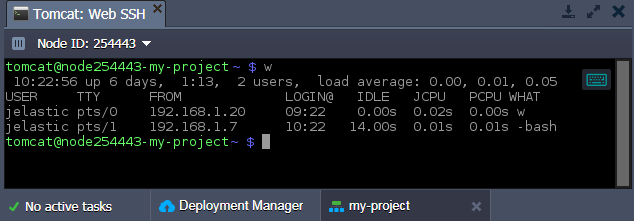
You will see the result is general system information (namely - current system time Instance uptime Number of users recorded and the average number of active processes in the last 1/5/15 minutes) and details about the connected users below (name, terminal type, origin connection IP, login time, statistics about recent activity and the name of the currently active process).
Tips:The unique characteristics of using the Shell as usual are the commands wThere will be no data of users connected through the terminal emulator.
2. All statistics about the server's RAM usage are stored in the file. /proc/meminfo To inspect the contents, use the cat command:
cat /proc/meminfo
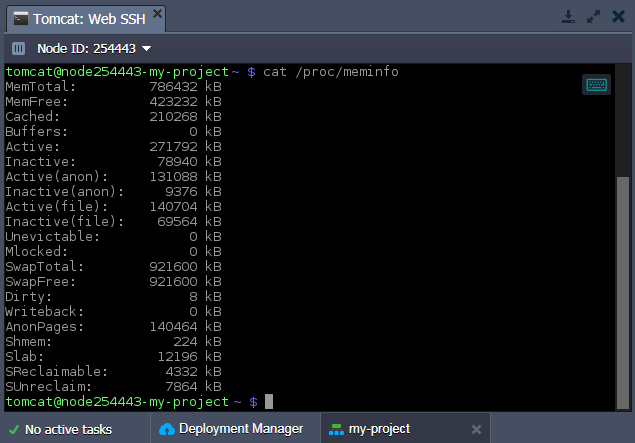
You can check information such as total allocated memory (MemTotal) Unused memory (MemFree) Memory used as cache (Cached) and others
3. Displaying basic information about software and hardware containers Proceed with the following command:
uname -a
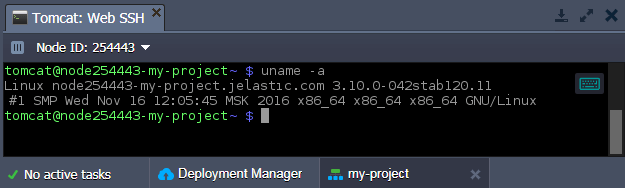
You'll see information about the server kernel (name, version, release date), node hostname, CPU type, OS, and more.
How to manage remote container processes through the terminal
1. While connected via SSH, you can monitor all running processes within the container with the commandtop:
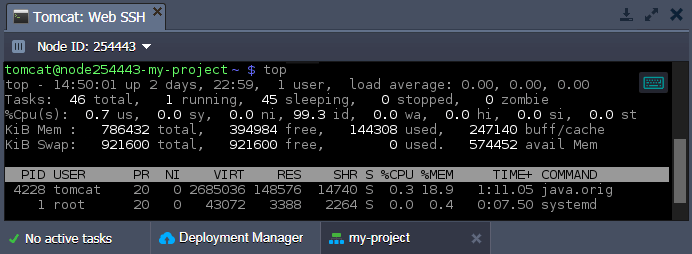
The data is continuously updated in real-time mode, showing information about all user processes. (including system processes)
Press Ctrl + C to stop executing the command and return to console input mode.
2. To display only the processes that the user is currently using, type the commandps:
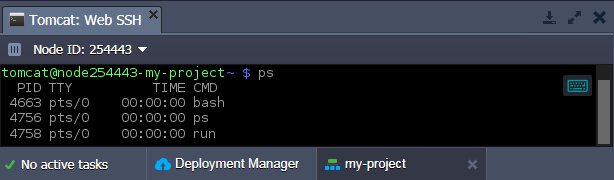
3. Another useful command iskillThis allows terminating any process specified by{pid}as argument (required process identifiers can be found in the output of the previous command):
kill {pid}
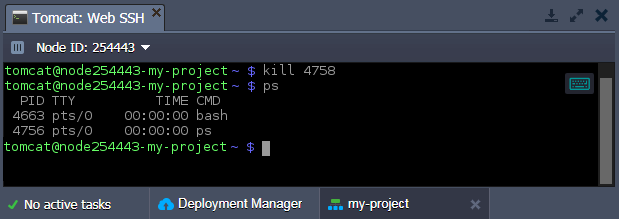
As you can see, the running process shown on the screen in step 2 of this section has stopped because it is not currently displayed in the active list.
Storing executable application files via SSH Console
You can download desired files from the internet (such as your application archives) through the console to store or later deploy them within your server.
1. CommandwgetAllow file download according to{link}Specified:
wget {link}
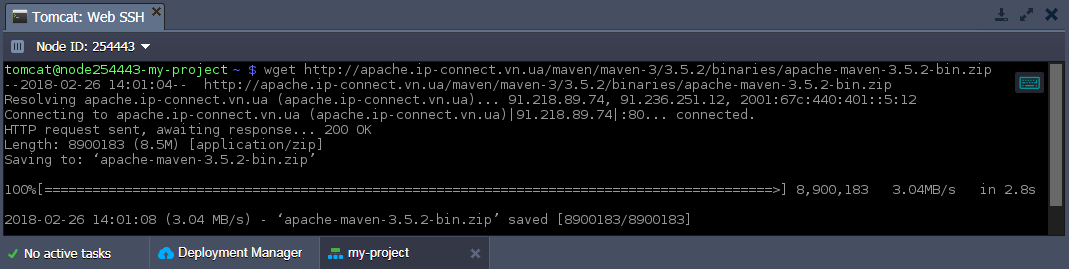
2. Then you canunzipPermanent file downloaded using command:
unzip {archive}
where{archive}is the path to compress your package.
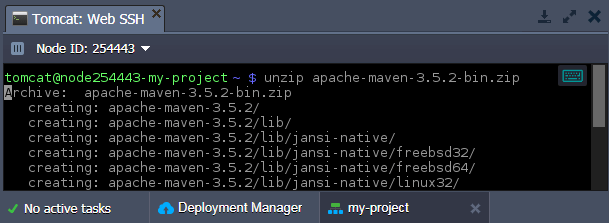
So all extracted files will be placed in the same name folder. (behind the archive) within the current directory
Setting custom server variables via SSH
1. A list of default environment variables for any container can be viewed within the file..bash_profile It is located in the main directory of the container. So check that you are in the correct container directory and run the next command:
cat .bash_profile
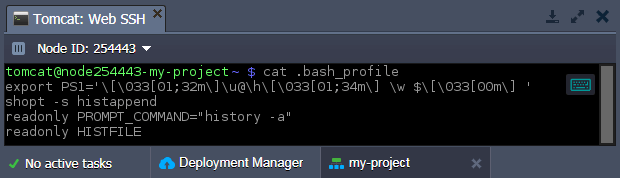
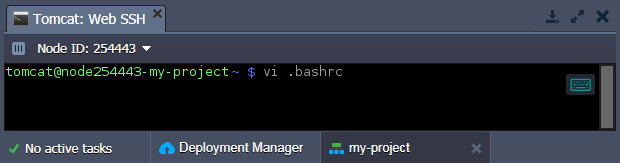
2. File.bash_profileIt will not be editable, in case you want to set additional variables you can write in the file.bashrcwithin the same folder (if not, create one) using a text editor (e.g.vi):
3. New variable assignments should be defined in the following format:
export {VAR_NAME}={VAR_VALUE}
where:
- wp:list-item
- {VAR_NAME}- The name of the variable you want to create. /wp:list-item wp:list-item
- {VAR_VALUE}- Value of appropriate variable
/wp:list-item
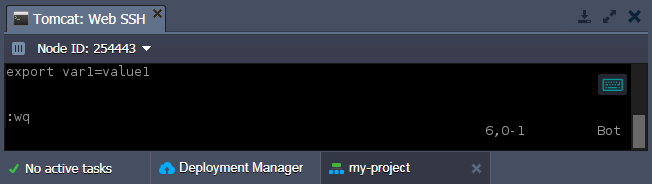
Note:File.bashrcIt is read during bash startup, so changes are automatically applied at the start of all additional user sessions. But in case you want to apply the changes made immediately, run the commandbashto restart the shell
4. Verifying whether your custom variables were successfully applied Run the following command:
echo ${VAR_NAME}
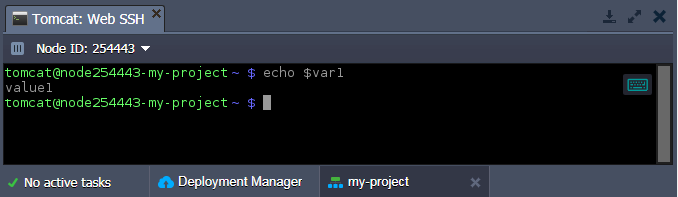
You will see the string {VAR_VALUE} similar to the value you just assigned to the ${VAR_NAME} variable in the.bashrc file.
Specifics of Certified Containers Remote Management
Ruk-Com Cloud PaaS provides two types of software stacks on which each container is built:
- wp:list-item
- dockerized- Integrated model templates based on standards supportNative DockerIt provides general principles and container management functionality for all types of servers (e.g. compute nodes, or database servers, or cache instances, etc.).
By connecting to that server via SSH, you automatically have full control over the instance with root privileges and can perform any desired actions within the container.
/wp:list-item
wp:list-item
- certified- Software templates based on the original implementation stack and improved by our team according to the specific platform.
When logging into that server via SSH, you will be logged in as the default server user. In order to manage containers efficiently We have created additional options available under a normal user account:
wp:list wp:list-item - sudo sbin/service {service_name} {start|stop|restart|condrestart|status|reload|upgrade|help}- A set of commands to execute the master server defined with a placeholder.{service_name}(Possible values depend on the server used: jetty, mysql, tomcat, memcached, mongod, postgresql, couchdb, glassfish-domain1, nginx, php-fpm and httpd)
- sudo usr/bin/jem firewall {fwstart|fwstop}- to run/stop the container firewall accordingly
- sudo usr/bin/jem nscd- to controlname-service caching daemonIt keeps logs for the most common server name requests (e.g. passwd, host, group, etc.).
- sudo sbin/service rpcbind.service- To operate with the serviceRPC bindUsed to match the user-readable name to the program number that handles RPC calls.
The above command, although run in sudo mode, does not require entering the server administrator's root password. This allows you to take advantage of all the necessary container functionality required for proper functioning of your application even with regular account permissions.
Conclusion
You know all the basic information you need to manage your containers through the console. You can leverage PaaS more flexibly while deploying your applications starting with Multi-Cloud at one of our certified providers worldwide.