
Getting Started
This guide is maintained for Ruk-Com PaaS. Screens and options may vary by platform version and account permissions.
Confirm the environment, region and account permissions, and back up current settings before changing a production system.
This guide shows how to create a platform account and deploy your first application, either automatically from the Marketplace or manually from the dashboard.
Sign Up: How to Create an Account
You need a platform account before you can work in the dashboard. If you do not have one yet, register through:
After you sign up, you receive a confirmation email. Follow the instructions in that message (some providers also require captcha or SMS verification).
Note: The account activation link in the email is valid for 24 hours (the exact period can vary by hosting provider). If it expires, register again.
Platform Dashboard
Open a platform dashboard through a hosting provider domain.
- Expand the menu in the bottom-left corner and select Signup.
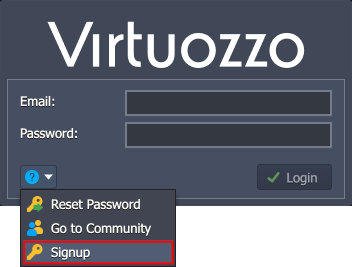 2. Enter your Email in the form that appears.
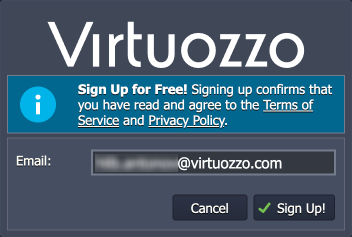 Click Sign Up! to agree to the provider’s terms of use and privacy policy, then click Sign Up.
The platform sends a confirmation email automatically.
Deploy Application
The first time you open the dashboard, a short tutorial starts automatically. You can also open it later from Help>Tutorial. The tutorial gives a platform overview and walks through creating your first environment and deploying an application. Follow the tutorial, or skip it and use the steps below:
Application Marketplace
You can open the platform Marketplace from the dashboard and install popular solutions in one click.
- Click Marketplace at the top of the dashboard.
 2. Find the solution you need in the categorized list on the left or with the search field at the top.
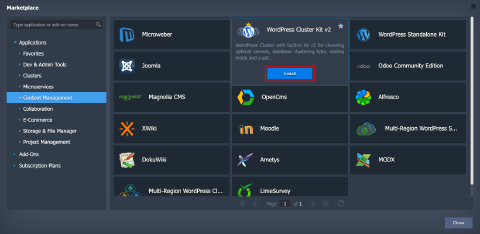 Hover over the application tile and click Install.
- Configure the installation options. Depending on the application, you can have multiple options to customize the installation or have only standard ones to set the environment name, alias, and region.
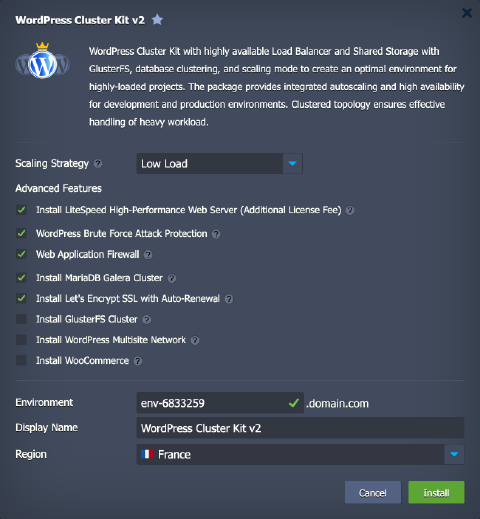 Click Install to start the installation. The platform then creates an environment with the required topology, deploys the application, installs dependencies, and configures connections (for example, to a database) and settings.
In a few minutes, the application is ready to use.
Manual Deployment
If you want to deploy a custom application and control each stage of the process, follow these steps:
- Click New Environment in the upper-left corner of the dashboard.
2. The Topology Wizard opens so you can set up your environment. From this wizard you can:
- choose preferred programming language (Java, PHP, Ruby, Python, Node.js, .NET, Go) or custom Docker containers
- select one or more software stacks from the list
- configure automatic vertical scaling for usage-based pricing and horizontal scaling for flexibility and reliability
- add a public IP for direct access from the Internet
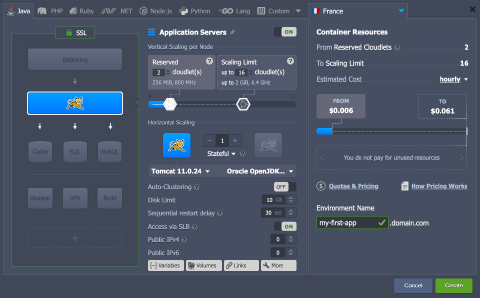 For this example, click Create to provision a single Tomcat application server.
- In a minute, the environment appears on the dashboard.
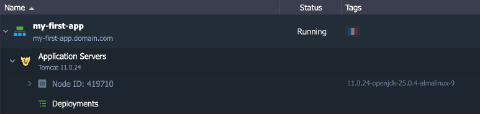 4. The platform supports several application deployment methods. For this example, deploy the default Hello World application from the archive in the deployment manager at the bottom of the dashboard.
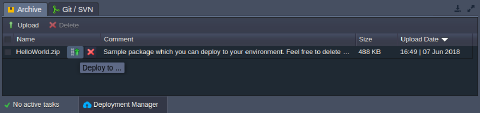
Tip: You can add applications to the Deployment Manager by uploading an archive (from your local machine or via URL) or by adding a Git/SVN repository.
Hover over the project and click Deploy to.
- In the Deploy dialog, select your Environment and click Deploy.
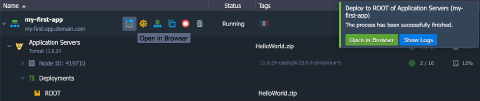
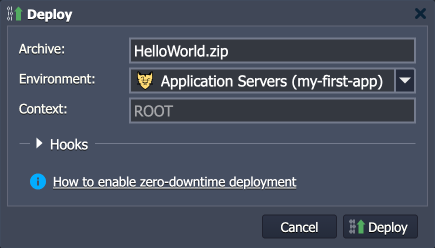 6. Wait for the successful deployment pop-up, then click Open in Browser to confirm that the application works.
 If the application needs extra settings or does not have a web interface, use the built-in configuration tools.