
Running Multiple Domain Names on PHP Server
This guide is maintained for Ruk-Com PaaS. Screens and options may vary by platform version and account permissions.
Confirm the environment, region and account permissions, and back up current settings before changing a production system.
Objective
This guide explains how to use Running Multiple Domain Names on PHP Server on Ruk-Com Cloud PaaS, with ordered procedures and practical verification points.
Before you begin
- Sign in with an account permitted to manage the relevant environment.
- Confirm the target environment, region and resources before saving changes.
- Create a backup or rollback plan before changing a production system.
Using multiple domains increases usability. The performance and scalability of PHP applications also saves costs by eliminating the need to set up separate instances.
So let's see how to run multiple domains on PHP application server to make your application more scalable and efficient.
1. Login to Ruk-Com Cloud Dashboard.
2. Click the buttonNew EnvironmentTop left of dashboard
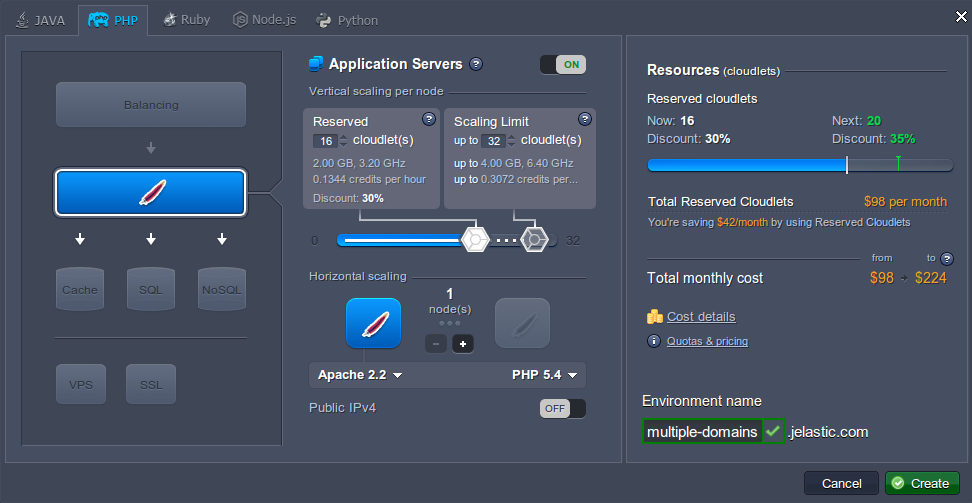
3. When the window appears, select the PHP tab, select the application server, and specify the number of resources your application requires. After that, enter a name for the environment creation and click the button.Create

4. You must have a name in DNS to resolve your IP addresses. Therefore, purchasing a domain name for your environment can be done in two ways: adding a CNAME record or setting A Records. You can see more details.here
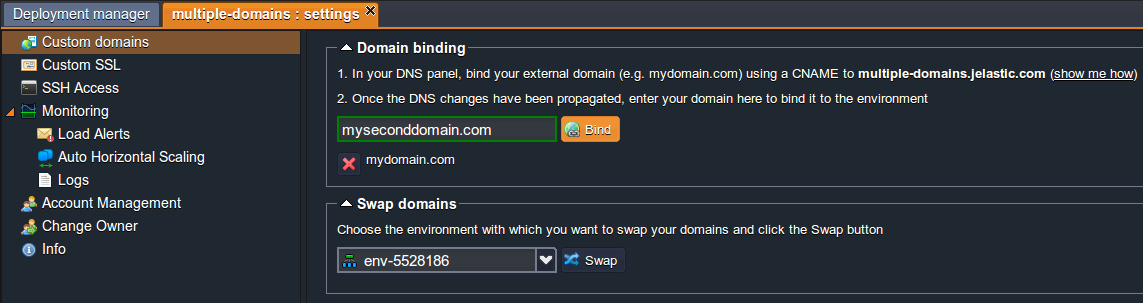
5. After that, click the buttonSettingsto your environment and bind the domains. For example, we use these URLs: mydomain.com and myseconddomain.com.
6. You can now upload the package.zipBy going toDeployment Managerand deploy your environment created earlier.
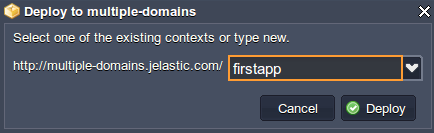
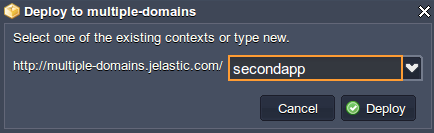
7. Once your application is successfully deployed, you need to configure your virtual host.
- For Apache
Click the Config button next to Apache server and open the httpd.conf file (in theconf) to set the VirtualHost parameters for two separate domain names by specifying the path to the deployed context and the domain name:
Listen 80
<VirtualHost *:80>
    DocumentRoot /var/www/webroot/firstapp
    ServerName mydomain.com
    ...
</VirtualHost>
<VirtualHost *:80>
    DocumentRoot /var/www/webroot/secondapp
    ServerName myseconddomain.com
    ...
</VirtualHost>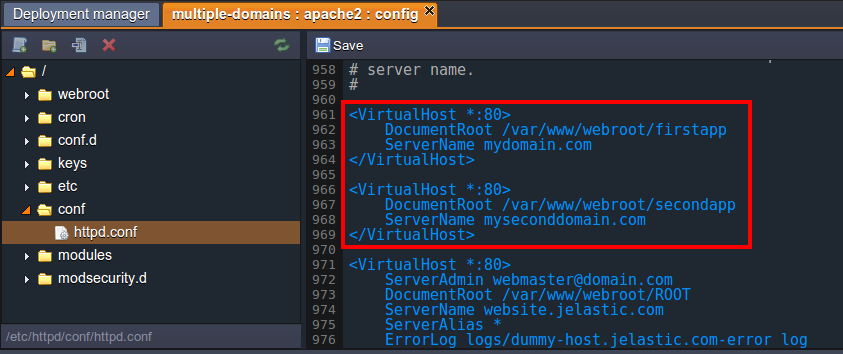
- For NGINX
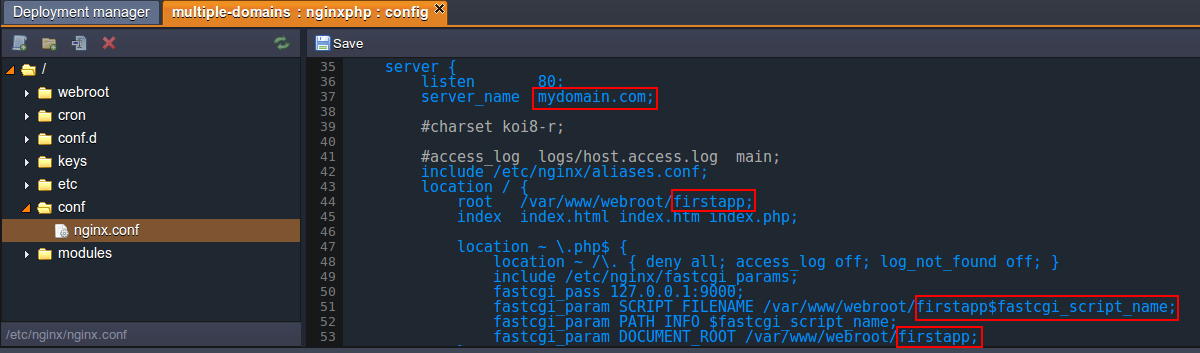
Click the Config button next to NGINX server and open the nginx.conf file atconfDirectory
Specify your settings in the server block.
server_name (your domain)
ROOT (the text you specify while deploy)
Please note that you need a separate server block. That has settings ready for each domain you bind.
    server {
        listen       80;
        server_name  localhost;

include /etc/nginx/aliases.conf;
        location / {
            root   /var/www/webroot/ROOT;
            index  index.html index.htm index.php;

            location ~ \.php$ {
                location ~ /\. { deny all; access_log off; log_not_found off; }
            include /etc/nginx/fastcgi_params;
            fastcgi_pass 127.0.0.1:9000;
            fastcgi_param SCRIPT_FILENAME /var/www/webroot/ROOT$fastcgi_script_name;
            fastcgi_param PATH_INFO $fastcgi_script_name;
            fastcgi_param DOCUMENT_ROOT /var/www/webroot/ROOT;
            }

        }
        index  index.php index.html index.htm;

error_page   500 502 503 504  /50x.html;
        location = /50x.html {
            root   html;
        }

location ~ /\. { deny all; access_log off; log_not_found off; }

location ~ \.php$ {
        location ~ /\. { deny all; access_log off; log_not_found off; }
            include /etc/nginx/fastcgi_params;
            fastcgi_pass 127.0.0.1:9000;
            fastcgi_param SCRIPT_FILENAME /var/www/webroot$fastcgi_script_name;
            fastcgi_param PATH_INFO $fastcgi_script_name;
            fastcgi_param DOCUMENT_ROOT /var/www/webroot;
        }

    }
In our case, the settings are as follows:
        server {
        listen       80;
        server_name  mydomain.com;

    include /etc/nginx/aliases.conf;
        location / {
            root   /var/www/webroot/firstapp;
            index  index.html index.htm index.php;

            location ~ \.php$ {
                location ~ /\. { deny all; access_log off; log_not_found off; }
            include /etc/nginx/fastcgi_params;
            fastcgi_pass 127.0.0.1:9000;
            fastcgi_param SCRIPT_FILENAME /var/www/webroot/firstapp$fastcgi_script_name;
            fastcgi_param PATH_INFO $fastcgi_script_name;
            fastcgi_param DOCUMENT_ROOT /var/www/webroot/firstapp;
            }

        }
        index  index.php index.html index.htm;

        error_page   500 502 503 504  /50x.html;
        location = /50x.html {
            root   html;
        }

            location ~ /\. { deny all; access_log off; log_not_found off; }

        location ~ \.php$ {
        location ~ /\. { deny all; access_log off; log_not_found off; }
            include /etc/nginx/fastcgi_params;
            fastcgi_pass 127.0.0.1:9000;
            fastcgi_param SCRIPT_FILENAME /var/www/webroot$fastcgi_script_name;
            fastcgi_param PATH_INFO $fastcgi_script_name;
            fastcgi_param DOCUMENT_ROOT /var/www/webroot;
        }

    }


server {
        listen       80;
        server_name  myseconddomain.com;

            include /etc/nginx/aliases.conf;
        location / {
            root   /var/www/webroot/secondapp;
            index  index.html index.htm index.php;

            location ~ \.php$ {
                location ~ /\. { deny all; access_log off; log_not_found off; }
            include /etc/nginx/fastcgi_params;
            fastcgi_pass 127.0.0.1:9000;
            fastcgi_param SCRIPT_FILENAME /var/www/webroot/secondapp$fastcgi_script_name;
            fastcgi_param PATH_INFO $fastcgi_script_name;
            fastcgi_param DOCUMENT_ROOT /var/www/webroot/secondapp;
            }

        }
        index  index.php index.html index.htm;

        error_page   500 502 503 504  /50x.html;
        location = /50x.html {
            root   html;
        }

    location ~ /\. { deny all; access_log off; log_not_found off; }

    location ~ \.php$ {
        location ~ /\. { deny all; access_log off; log_not_found off; }
            include /etc/nginx/fastcgi_params;
            fastcgi_pass 127.0.0.1:9000;
            fastcgi_param SCRIPT_FILENAME /var/www/webroot$fastcgi_script_name;
            fastcgi_param PATH_INFO $fastcgi_script_name;
            fastcgi_param DOCUMENT_ROOT /var/www/webroot;
        }

    }
8. Don't forget to save changes and restart the application server to apply the new settings.
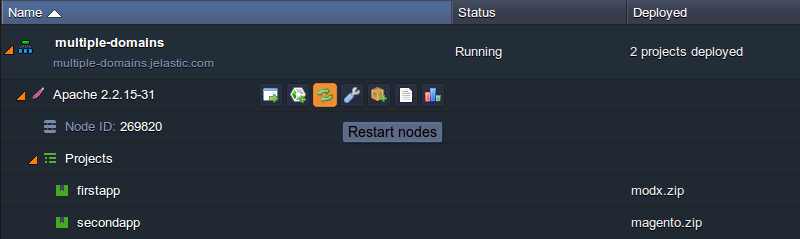
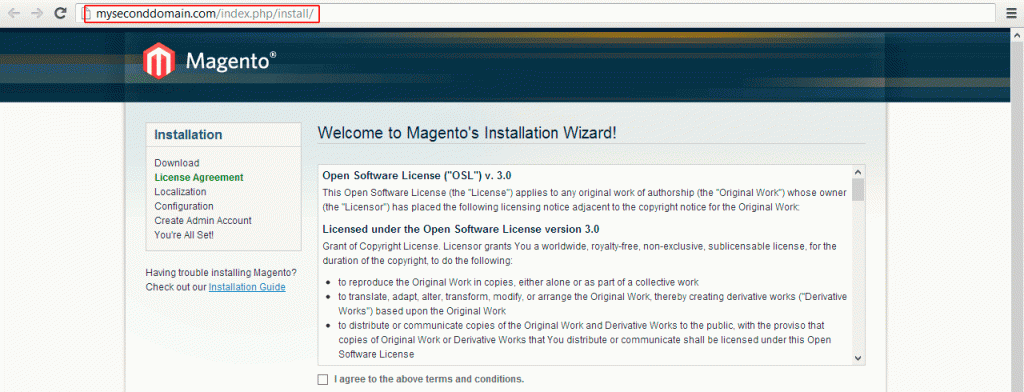
9. You can now check the results to make sure everything is working properly.
Hope this guide is helpful for you. Domain names are important pieces of information for your online identity, so be sure to protect them with Ruk-Com Cloud in just a few minutes.