
Add SSH Key
This guide is maintained for Ruk-Com PaaS. Screens and options may vary by platform version and account permissions.
Confirm the environment, region and account permissions, and back up current settings before changing a production system.
When you have your SSH key generated, you can add it to your PaaS account.
In order to manage private SSH keys intended for authentication at your GIT account, follow the corresponding instruction within the SSH Access to GIT Repository guide.
For adding a public SSH key, which subsequently can be used for gaining SSH access to your PaaS account, proceed to the steps below: 1. Open the platform dashboard and navigate to the upper toolbar.
 Click the Settings button.
2. The Account setting tab with the already selected SSH Keychain option will be opened.
Click the Settings button.
2. The Account setting tab with the already selected SSH Keychain option will be opened.
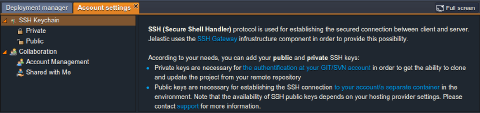 Within this section you can find some information about the SSH protocol usage at the platform and the possibilities it provides with a few useful links to documentation.
- Once you are acquainted with the details above, switch to the Public suboption and click the Add Public Key button.
 4. Paste the previously generated public key to the Key input field. The Add Public Key field will be automatically populated if your key already contains this value (or you can specify your own one here). Click Add Key.
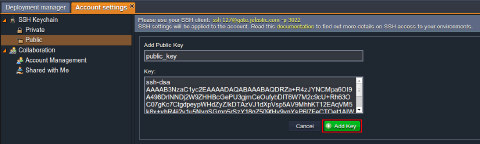 5. As a result, the added SSH key will appear in the list, while you’ll simultaneously receive an email with details on it (like title, fingerprint and connection string for your SSH client).
 In this way, you can add several keys or delete the unnecessary ones using the red-cross button.
Note: The added SSH key is attached to your account, but not just to a separate environment.