
Traffic Distributor Installation
This guide is maintained for Ruk-Com PaaS. Screens and options may vary by platform version and account permissions.
Confirm the environment, region and account permissions, and back up current settings before changing a production system.
The process of Traffic Distributor installation is fairly simple with the PaaS - being specially packed for the Marketplace, it can be created in a few clicks and start working in just a matter of minutes. Herewith, the configurability of the solution is great, so let’s walk through the installation steps below to learn about all of the available functionality and hidden nuances.
Note: The described flow is suitable for the installation from scratch, i.e., in case you want to route traffic for the new environments. In order to be applied to the already running and loaded applications in production, follow the Traffic Distributor Integration guide.
- Open the Marketplace frame by clicking on the appropriate button at the top of the dashboard.
 2. Within the Apps tab of Marketplace, navigate to the Dev & Admin Tools section to locate the Traffic Distributor package (or use the Search field at the top) and click the Install button for it.
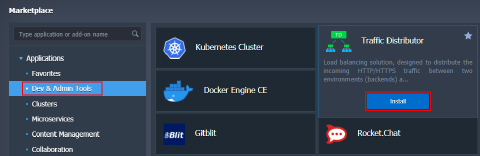 3. On the very first installation, you’ll be shown a frame with a brief solution overview and some of its key benefits highlighted:
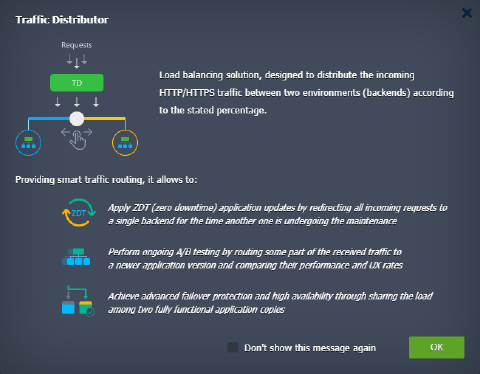
Tip: Tick the corresponding Don’t show this message again check-box to skip this information window in the future.
Click OK to proceed.
- At the appeared interactive installation frame, you can adjust some parameters to configure your Traffic Distributor topology and set up the desired routing for backends.
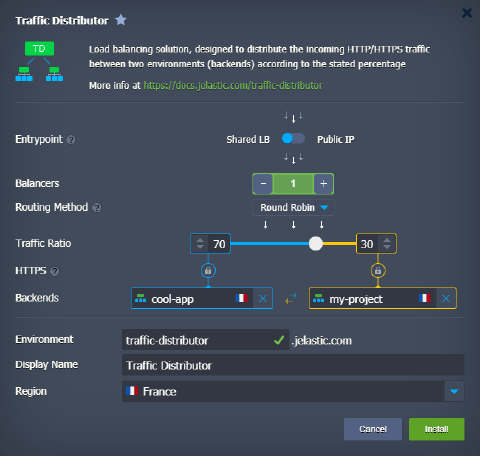 The following data should be specified:
- Entrypoint - switcher with either Shared Load Balancer or Public IP position
- Balancers - the number of the NGINX instances that will be added to the Traffic Distributor topology
- Routing Method - select from the three available types of traffic distribution: Round Robin, Sticky Sessions, and Failover
- Traffic Ratio - set backend’s weight (priority) to control the distribution of the requests
- HTTPS - enable this option if backends are serving traffic via HTTPS
- Backends - select two environments to be balanced, either from the automatically fetched list of available ones from your account or type in the required IP address/domain name (for a custom host)
Note: The endpoint URLs can’t be specified as backends for traffic distribution as they presuppose operating via external Public ports, while interaction in the confines of a single platform is built on Private ports usage.
In this case, you need to set custom port redirects for your backends. For that, switch to the upstream section of the /etc/nginx/nginx-Ruk-Com PaaS.conf file inside the load balancer server of your Traffic Distributor environment.
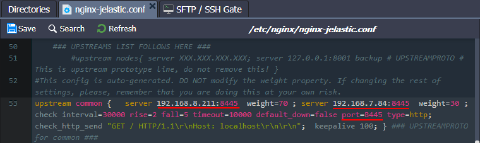 Here, you need to add the required internal containers’ port number to the appropriate backend IP addresses and, additionally, define it within the health check parameters.
- Environment - domain name for your environment (e.g., traffic-distributor)
- Display Name - optionally, an alias to be shown for the environment (Traffic Distributor by default)
- Region - a drop-down list of the available environment regions
When all of the required data is specified, click the Install button. The platform will do everything else automatically.
- After a couple of minutes, you’ll see an installation success window with some advice on the Traffic Distributor usage.
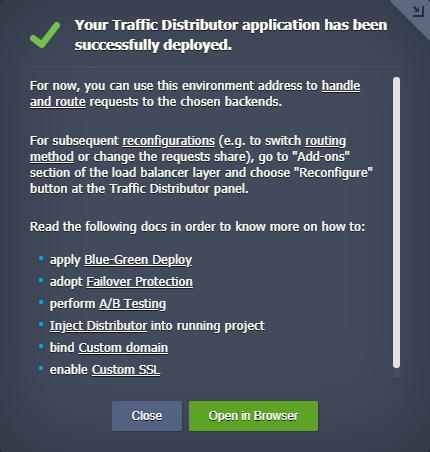
Note: As Traffic Distributor loading depends only on the number of incoming requests, it does not require a lot of resources. Thus the default one fixed cloudlet with vertically scale ability (up to 16 cloudlets) will be enough to handle even a huge amount of simultaneous requests.
Using the links at the end of the frame, you can learn how to:
- apply Blue-Green Deploy
- adopt Failover Protection
- perform A/B Testing
- Integrate Distributor
- bind Custom Domain
- enable Custom SSL
Traffic Distributor Reconfiguration
After the Traffic Distributor installation, you’ll get a dedicated environment with the NGINX load balancer(s) and a special add-on attached. It ensures quick and simple reconfiguration possibility for this solution and providing access to some additional options:
- Hover over the NGINX instance in your Traffic Distributor environment and click the Add-Ons button to open the corresponding tab.
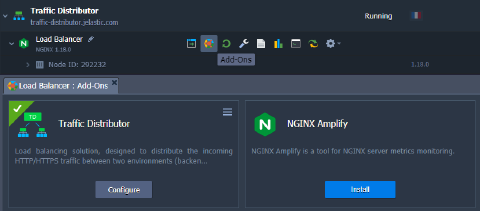 2. In order to change the configurations for your add-on, click the Configure button in the center of the frame or select the appropriate option from the menu list in the top right corner.
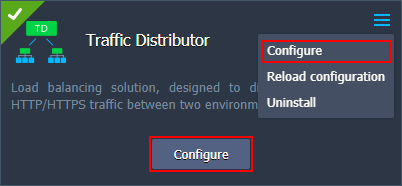
Tip: The Reload configuration option is required to apply manual changes to the Traffic Distributor configuration files without restarting the node (i.e., without downtime).
- Within the opened form, you can reconfigure any Traffic Distributor option just as during the installation process:
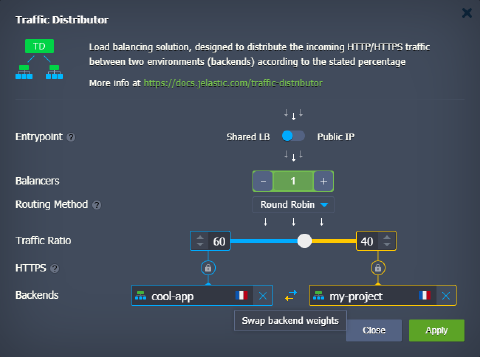 Options available for configuration are:
- Entrypoint - switcher with either Shared Load Balancer or Public IP position
- Balancers - the number of the NGINX instances that you would like to have in the Traffic Distributor topology
- Routing Method - select from the three available types of traffic distribution: Round Robin, Sticky Sessions, and Failover
- Traffic Ratio - set backends’ weight (priority) to control the distribution of the requests
- HTTPS - enable this option if backends are serving traffic via HTTPS
- Backends - select two environments to be balanced, either from the automatically fetched list of available ones from your account or type in the required IP address/domain name (for a custom host)
Tip: Using the Swap backends weights button, see in the image above, you can quickly exchange the server’s Traffic Ratio values.
Confirm changes with the Apply button.
- After a while, you’ll see the corresponding success notification at the top right corner of the dashboard.
 Here, you can click on the Show Logs button to open the dedicated file.
- Within the opened traffic-distributor log, you can find information on the actions applied to your add-on with the corresponding operations timestamps and current distribution values:
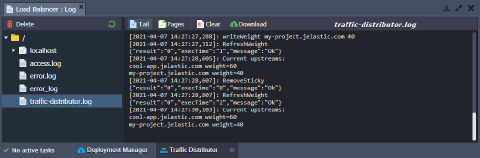 You can access this log file manually at any time.
So, using the described steps, you can apply changes to Traffic Distributor and easily track them via logs.