
WebSockets Support for Java
This guide is maintained for Ruk-Com PaaS. Screens and options may vary by platform version and account permissions.
Confirm the environment, region and account permissions, and back up current settings before changing a production system.
The WebSocket protocol was implemented to replace the existing bi-directional communication mechanisms that uses HTTP as a transport layer, as HTTP was not initially meant to be used for these purposes. This new technology ensures establishment of a single full-duplex TCP connection between client and server, where messages are instantly transmitted with little overhead, both upstream and downstream at once. At the same time, WebSockets technology is designed to work over the standard HTTP ports (80 and 443) and to support HTTP proxies and intermediaries, representing a trade-off between efficiency and reliability
The platform provides you with an advanced and complemented WebSockets support by means of integrating this technology to the Shared Load Balancer and NGINX balancer node, so you can use it even without external IP address attached to your server. The easiest way to configure the WebSockets support for your application is to place an NGINX balancer in front of it - the detailed workflow can be seen here.
Nevertheless, if this method contradicts your requirements, the WebSockets protocol usage is also supported by all the Java application servers, provided at the platform. Herewith, implementation of WebSockets for Java is commonly performed through configuring your application itself and does not require any special server configurations, thus you are only limited by your current programming skills, persistence and imagination.
The only exception is GlassFish, as it requires some server-side configurations for the WebSockets support activation. So, let’s find out how this can be done - just follow the simple instruction below.
Create an Environment and Deploy a Project
-
Log into the platform dashboard with your login and password..
-
Click New environment at the top-left section of the dashboard.
 3. In the opened environment topology window, switch to the Java tab and select GlassFish as your application server. Then set resources limits for it with the help of cloudlet sliders in the Vertical scaling wizard section, type your environment name (for example, java-websockets) and click Create.
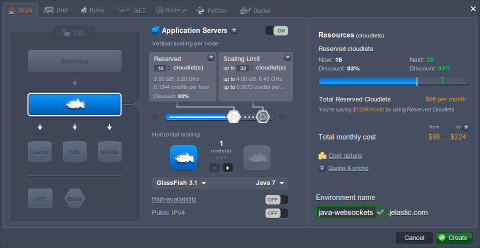 4. In a few minutes your environment with the GlassFish server will be created and will appear at the dashboard.
 5. Now, you can deploy your application, which requires the WebSockets protocol support, to your environment. This can be done via local archive/URL, or, if you prefer to use the remote VCS repository, simply add the Maven node to your environment topology and follow this guide.
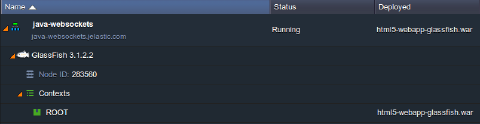
As a result, your deployed application will be listed in the appropriate panel column:
Enable GlassFish WebSockets Support
The next step you need to do is to activate the WebSockets support for your GlassFish application server. This should be performed through its Administration Console, so the required steps are the following:
- Navigate to the GlassFish admin panel, which can be accessed through the dashboard (by clicking the Additionally button for this server in your environment and choosing the Admin panel > Login option in the appeared list) or direct link (which the platform sent you via email after the environment creation).
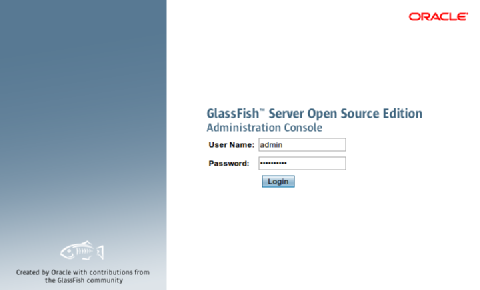
 2. In the newly opened browser tab, specify the credentials you’ve received in the corresponding email and proceed with the Login button.
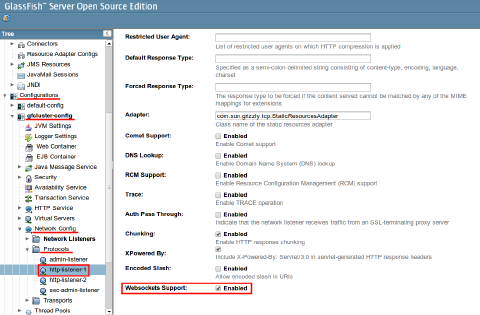
 3. Once entered, navigate to the Configurations > gfcluster-config > Network Config > Protocols > http-listener-1 section within the left-hand menu. Then switch to the HTTP tab and tick the checkbox for the WebSockets Support option at the bottom of the page.
Don’t forget to Save the new settings!
 4. Return to your dashboard panel and Restart GlassFish to apply the changes.
 As all the configurations are done now, you can Open your application in Browser and ensure that it works fine. Enjoy!