Jetty Security
This guide is maintained for Ruk-Com PaaS. Screens and options may vary by platform version and account permissions.
Confirm the environment, region and account permissions, and back up current settings before changing a production system.
This document will help you configure security realms for your Jetty application server to enhance the protection of your application. Correctly configured realms provide the ability to set the authentication and access control for your Jetty web application.
Realm is a login service that is available to all web applications on a server if it is defined in a Jetty config file. Each realm consists of a range of users and has its unique name. Every specified user has authentication information and a set of associated roles. One or many different realms can be configured depending on your needs.
Below, we’ll provide an example of how to configure access control for your Jetty application server in Ruk-Com PaaS:
Authentication
To configure the authentication request in front of your Jetty application server, follow the next instructions:
- Click the Config button next to your Jetty application server in the platform dashboard.
 2. Go to the /opt/jetty/etc directory and create the
 realm.properties file there.
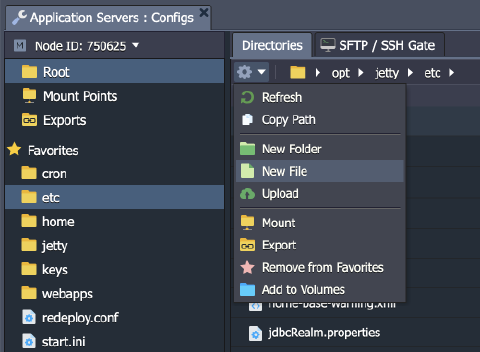 3. This file provides information about the users and their roles, which will be used for authentication. Specify the users and their roles in the following format:
Copy
# {user}:{password},{role1},{role2},{role3}
test: password, admin
 In the example above, we created a test user with the admin role. You can add as many users as you need, just don’t forget to Save the file after editing.
- Next, create the
jetty-realm.xmlfile in the same /opt/jetty/etc directory. It will contain the information about the realm.
xml Copy
<?xml version="1.0"?>
<!DOCTYPE Configure PUBLIC "-//Jetty//Configure//EN" "http://jetty.org/configure_10_0.dtd">

<Configure id="Server" class="org.eclipse.jetty.server.Server">
  <Call id="ResourceFactory" class="org.eclipse.jetty.util.resource.ResourceFactory" name="of">
    <Arg><Ref refid="Server" /></Arg>
    <Call id="realmResource" name="newResource">
      <Arg><Property name="jetty.demo.realm" default="etc/realm.properties" /></Arg>
    </Call>
  </Call>

  <Call name="addBean">
    <Arg>
      <New class="org.eclipse.jetty.security.HashLoginService">
        <Set name="name">MyRealm</Set>
        <Set name="config"><Ref refid="realmResource"/></Set>
      </New>
    </Arg>
  </Call>
</Configure>
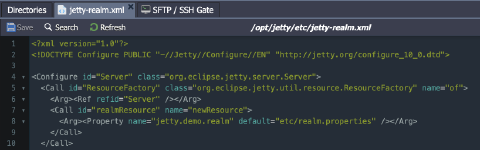 5. Save the changes and find the
 webdefault-ee10.xml file also in the same directory. This file contains the default security settings for your Jetty server. You need to add the following lines at the end of the file, just before the closing </web-app> tag:
xml Copy
<security-constraint>
    <web-resource-collection>
      <web-resource-name>Secure Area</web-resource-name>
      <url-pattern>/*</url-pattern>
    </web-resource-collection>
    <auth-constraint>
      <role-name>admin</role-name>
    </auth-constraint>
  </security-constraint>
  <login-config>
    <auth-method>BASIC</auth-method>
    <realm-name>MyRealm</realm-name>
  </login-config>
  <security-role>
    <role-name>admin</role-name>
  </security-role>
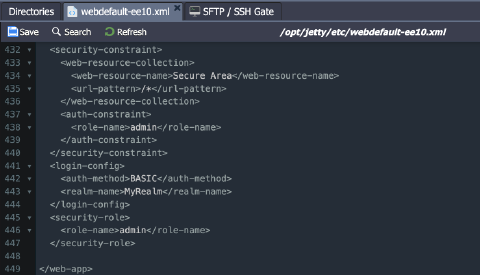 6. Click Save and go to the /opt/jetty/modules/ directory. Here, you need to locate the
 server.mod file and add the realm config from earlier to the [xml] section.
Copy
etc/jetty-realm.xml
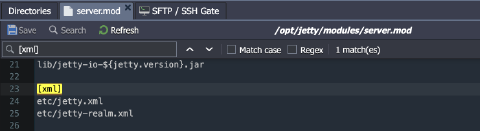 7. Don’t forget to Save the file and click the Restart button for your Jetty server to apply the changes.
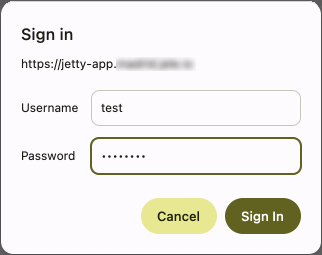
 8. To ensure everything works fine, try opening your application (the Open in Browser button next to your Jetty environment). You should see the authentication request window:
Firewall Access Restrictions
Another way to secure your Jetty application is to manage access to it based on the client’s IP address. This can be done by configuring the firewall rules for your Jetty server.
Ruk-Com PaaS provides a built-in firewall that allows you to make all the necessary adjustments to flexibly control access to your application.
Note: You need to add a public IP address to your Jetty server for the firewall rules to be applied.
For example, if you want to deny access to your Jetty application for a specific IP address, follow the next steps:
- Click the Config button next to your Jetty environment and go to the Firewall section.
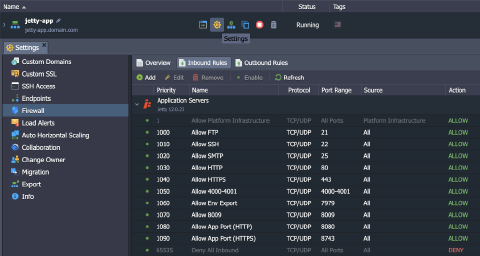 2. Switch to the Inbound Rules tab and click the Add button to create a new rule. To deny a connection from a particular IP, fill in the fields as follows:
- Nodes - choose Jetty server
- Name - input any desired rule name
- Protocol - select the TCP required protocol
- Port Range - deny access to all ports by leaving this field blank
- Source - choose the Custom IP Address(es) option and type the necessary IP in the appeared IP Address Range field
- Priority - set the appropriate priority for this rule (e.g., 900 to be applied before the default ones)
- Action - select the Deny option
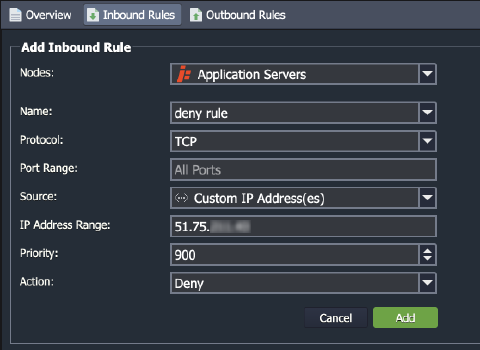 Click Add to save and automatically apply your rule.
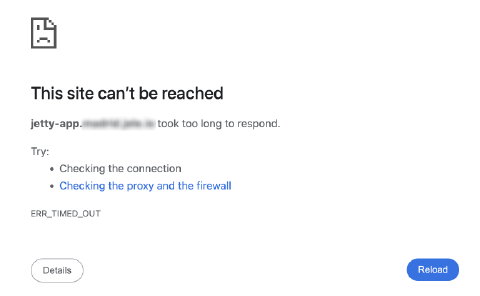
- Now, if you try to access your Jetty application from the denied IP address, you will receive an error message stating that the site cannot be reached.