
Custom Error Page Settings
This guide is maintained for Ruk-Com PaaS. Screens and options may vary by platform version and account permissions.
Confirm the environment, region and account permissions, and back up current settings before changing a production system.
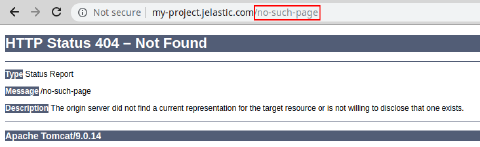
When an error occurs within a particular environment (e.g., when trying to access non-existing page), a default error page for the server is opened. For example:
 You can substitute this error page with a custom one to provide end-users with more specific instructions and leave email to contact you. Below, we’ll show how to configure a custom error page using the NGINX load balancer added to your environment:
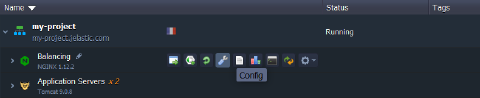
- Go to your platform dashboard, find the NGINX load balancer in your environment and click the Config button next to it.
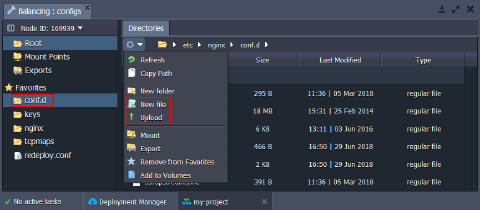
 2. In the opened configuration manager tab navigate to the /etc/nginx/conf.d folder and create or upload your custom error page.
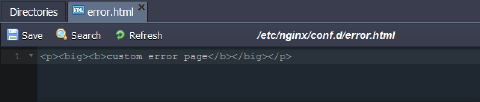
 3. For this tutorial we’ll use the following error.html file:
 4. Then navigate to the /etc/nginx directory and copy content of the nginx-Ruk-Com PaaS.conf file and paste it into the nginx.conf, replacing the include /etc/nginx/nginx-Ruk-Com PaaS.conf; line (circled in the image below).
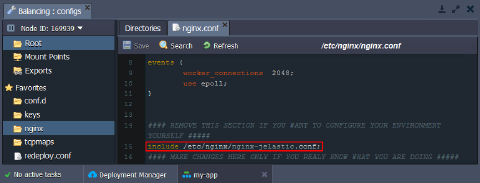 Now, you are able to specify all the required configurations.
- Find the server section of the pasted configs and substitute the default error_page settings with the following strings:
nginx Copy
error_page 403 404 500 502 503 504 /error.html;
proxy_intercept_errors on;
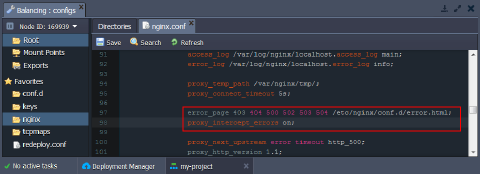 6. Next, scroll a little bit lower and adjust the error page parameters within location subsections:
nginx Copy
location /error.html {
    root   /etc/nginx/conf.d;
    internal;
}

location / {
    if ($cookie_SRVGROUP ~ group|common) {
        proxy_pass http://$cookie_SRVGROUP;
        error_page 403 404 500 502 503 504 = /error.html;
    }
    if ($cookie_SRVGROUP !~ group|common) {
        add_header Set-Cookie "SRVGROUP=$group; path=/";
    }
    proxy_pass http://default_upstream;
    add_header Set-Cookie "SRVGROUP=$group; path=/";
}

location @rescue {
    proxy_pass http://$cookie_SRVGROUP;
    error_page   500 502 503 504 = error.html;
}

location @recycle {
    proxy_pass http://default_upstream;
    add_header Set-Cookie "SRVGROUP=$group; path=/";
}
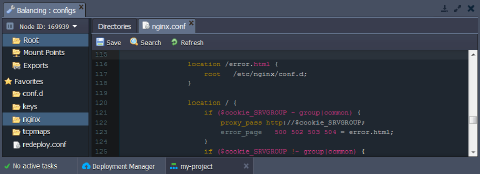 7. In case of using SSL for your website (i.e., for connections over HTTPS), some additional configurations are required (otherwise go to the 9th step of this guide). Add the following lines to the servers section of the /etc/nginx/conf.d/ssl.conf file:
nginx Copy
proxy_intercept_errors on;
location /error.html {
                    root   /etc/nginx/conf.d;
 }
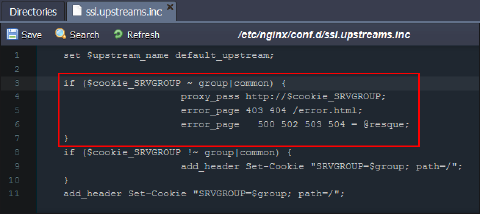
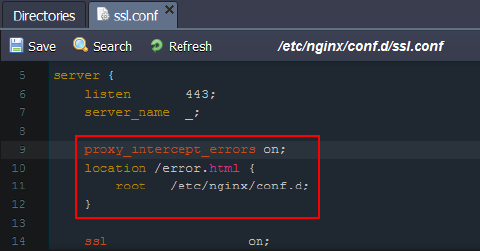 8. Also, you need to adjust the /etc/nginx/conf.d/ssl.upstreams.inc file. Find the next condition and change it as follows:
nginx Copy
if ($cookie_SRVGROUP ~ group|common) {
                   proxy_pass http://$cookie_SRVGROUP;
                   error_page 403 404 /error.html;
                   error_page   500 502 503 504 = @resque;
}
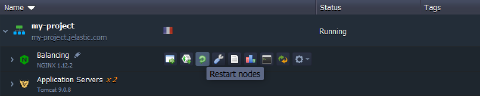
 9. Don’t forget to Restart NGINX server to apply all changes.
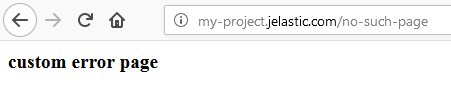
 10. That’s it! Try to access any non-existing page within your domain.
Note: If the server with pre-configured custom error pages or the whole environment is not reachable, a platform-wide default error page will be displayed, e.g.:
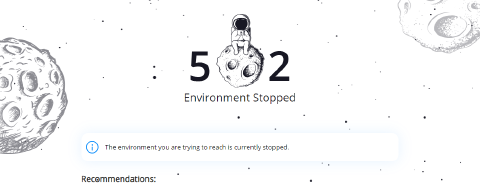 You cannot modify such notifications for your environments.