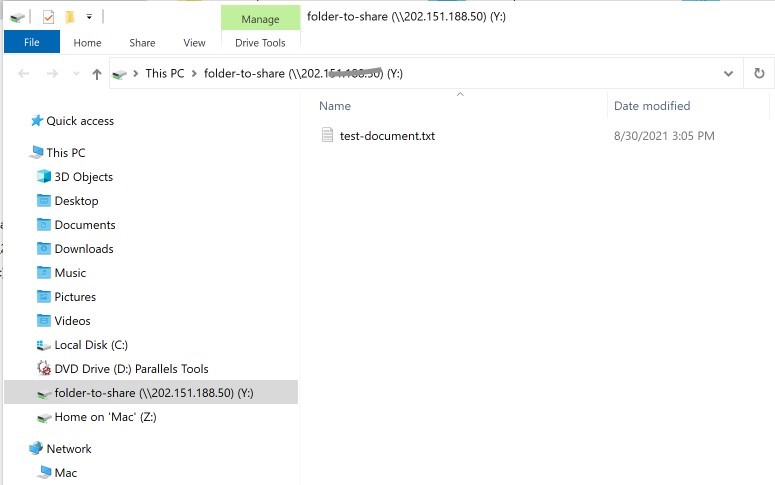
Make a Share Folder on Windows Server
This guide is maintained for Ruk-Com PaaS. Screens and options may vary by platform version and account permissions.
Confirm the environment, region and account permissions, and back up current settings before changing a production system.
Objective
This guide explains how to use Make a Share Folder on Windows Server on Ruk-Com Cloud PaaS, with ordered procedures and practical verification points.
Before you begin
- Sign in with an account permitted to manage the relevant environment.
- Confirm the target environment, region and resources before saving changes.
- Create a backup or rollback plan before changing a production system.
1. Add public IP to node VM.
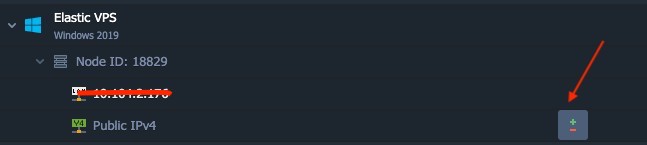
NoteAdding a public IP costs additional fees.
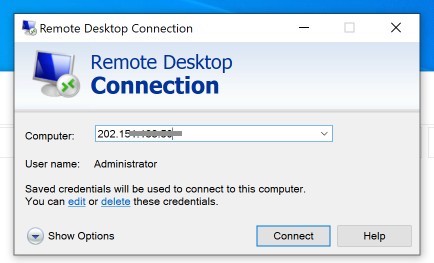
2. Connect to the Windows VM using the Remote Desktop program using the IP Address.
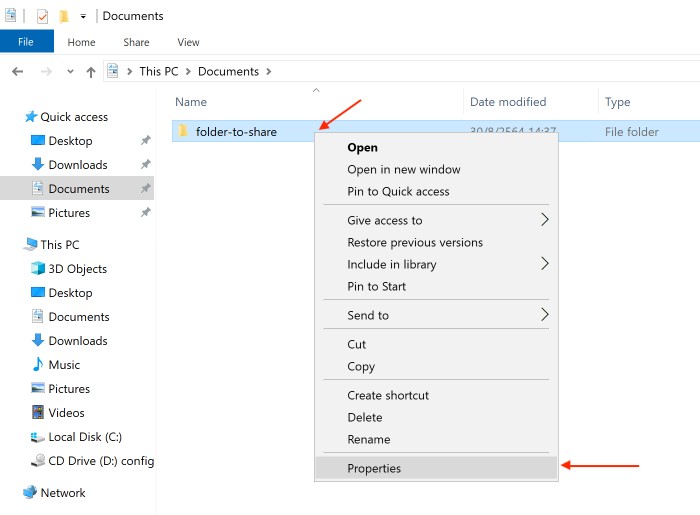
3. Right-click the folder you want to share, selectProperties(If you don't have it yet, create a folder first.)
4. Click on the Sharing tab, press the Advanced Sharing button.
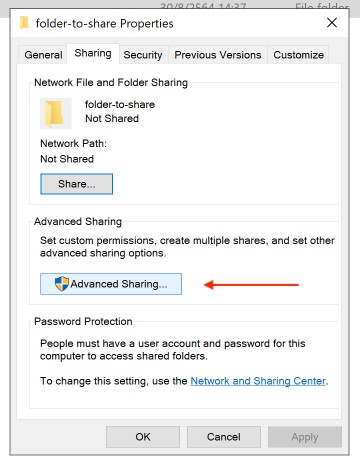
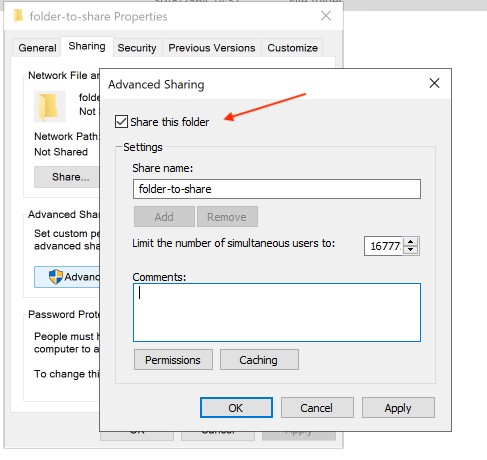
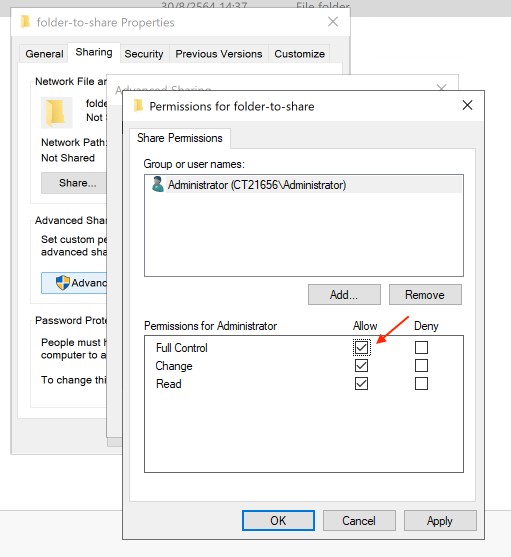
5. Place a check mark on Share this folder and press the Permissions button.
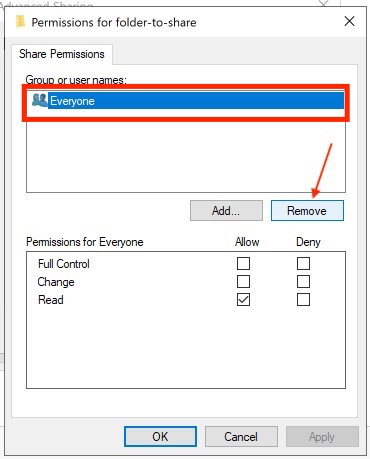
6. Select Everyone and press the Remove button.
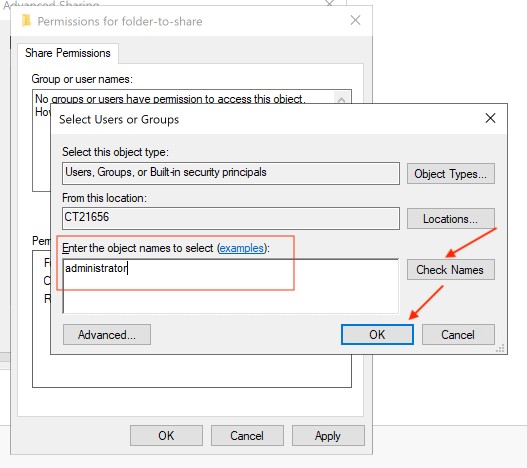
7. Then press the Add button and enter administrator in the Enter the object names to select box, then press the Check Names button, then press the OK button.
8. Check the Allow check mark in the Full Control section, then press OK. This will complete the setup of the Windows Server VM.
Note:The following steps will be for setting up your local PC.
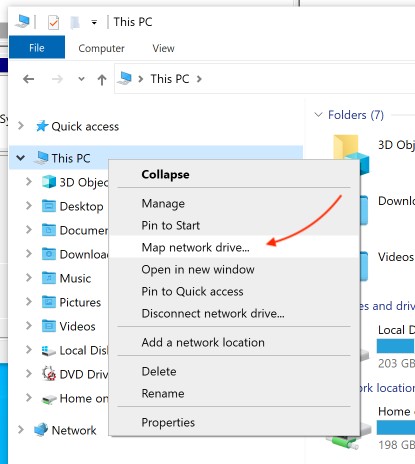
9. Next step, return to the local machine, right-click on This PC, select Map network drive.
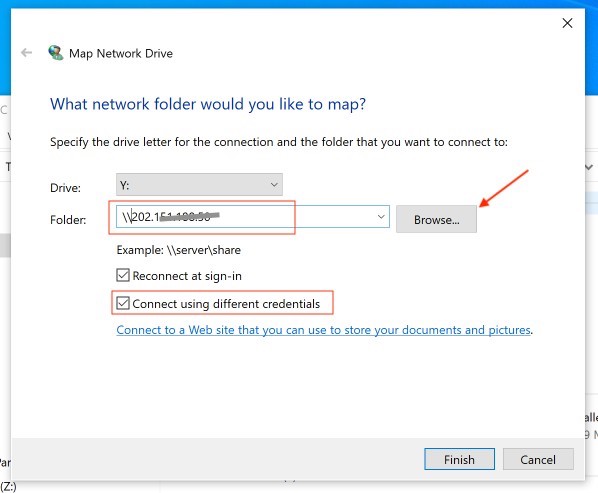
10. Enter the IP address of the Windows VM and press the Browse button.
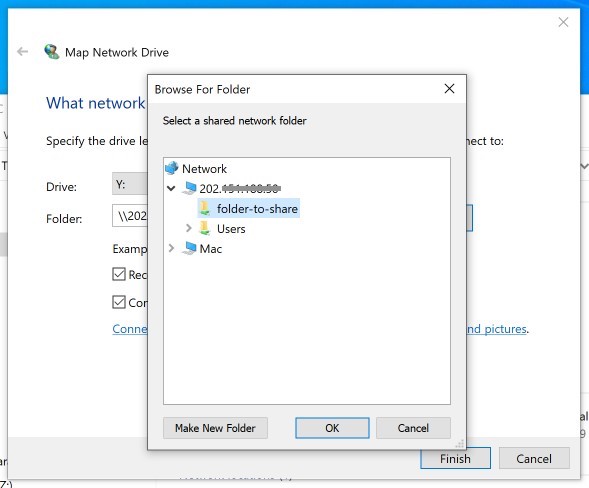
11. Select the folder that is shared on the Windows VM.
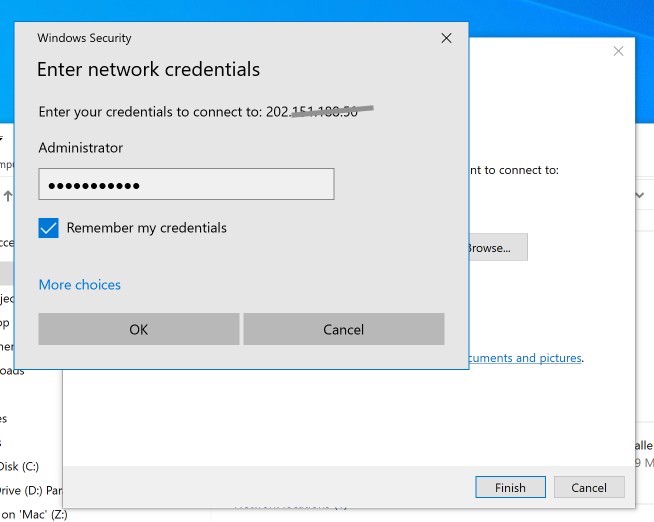
12. Enter the password received via e-mail when creating the environment, then press OK.
13. Done! You will now be able to share files to Windows Server VMs.