
Access via SSH Gate
This guide is maintained for Ruk-Com PaaS. Screens and options may vary by platform version and account permissions.
Confirm the environment, region and account permissions, and back up current settings before changing a production system.
Objective
This guide explains how to use Access via SSH Gate on Ruk-Com Cloud PaaS, with ordered procedures and practical verification points.
Before you begin
- Sign in with an account permitted to manage the relevant environment.
- Confirm the target environment, region and resources before saving changes.
- Create a backup or rollback plan before changing a production system.
Connection via Ruk-Com Cloud SSH Gate
If you want to connect to the system viaRuk-Com Cloud SSH GateOn your own machine (e.g. via Terminal or SSH Client), the following basic setup is required:
- wp:list-item
- Create an SSH Key PairUse the ssh-keygen command or your preferred key generator. /wp:list-item wp:list-item
- Login to the Ruk-Com Cloud dashboard. /wp:list-item wp:list-item
- go to menuSETTINGSThen add the key in the SSH Keys section.Add Public KeyGo to your account
? Please read the step-by-step setup instructions for accurate key adding.

when windowUser SettingsOpen it and click the tab.SSH Keys > SSH ConnectionHere you can view the information required for account access, including SSH connection information.
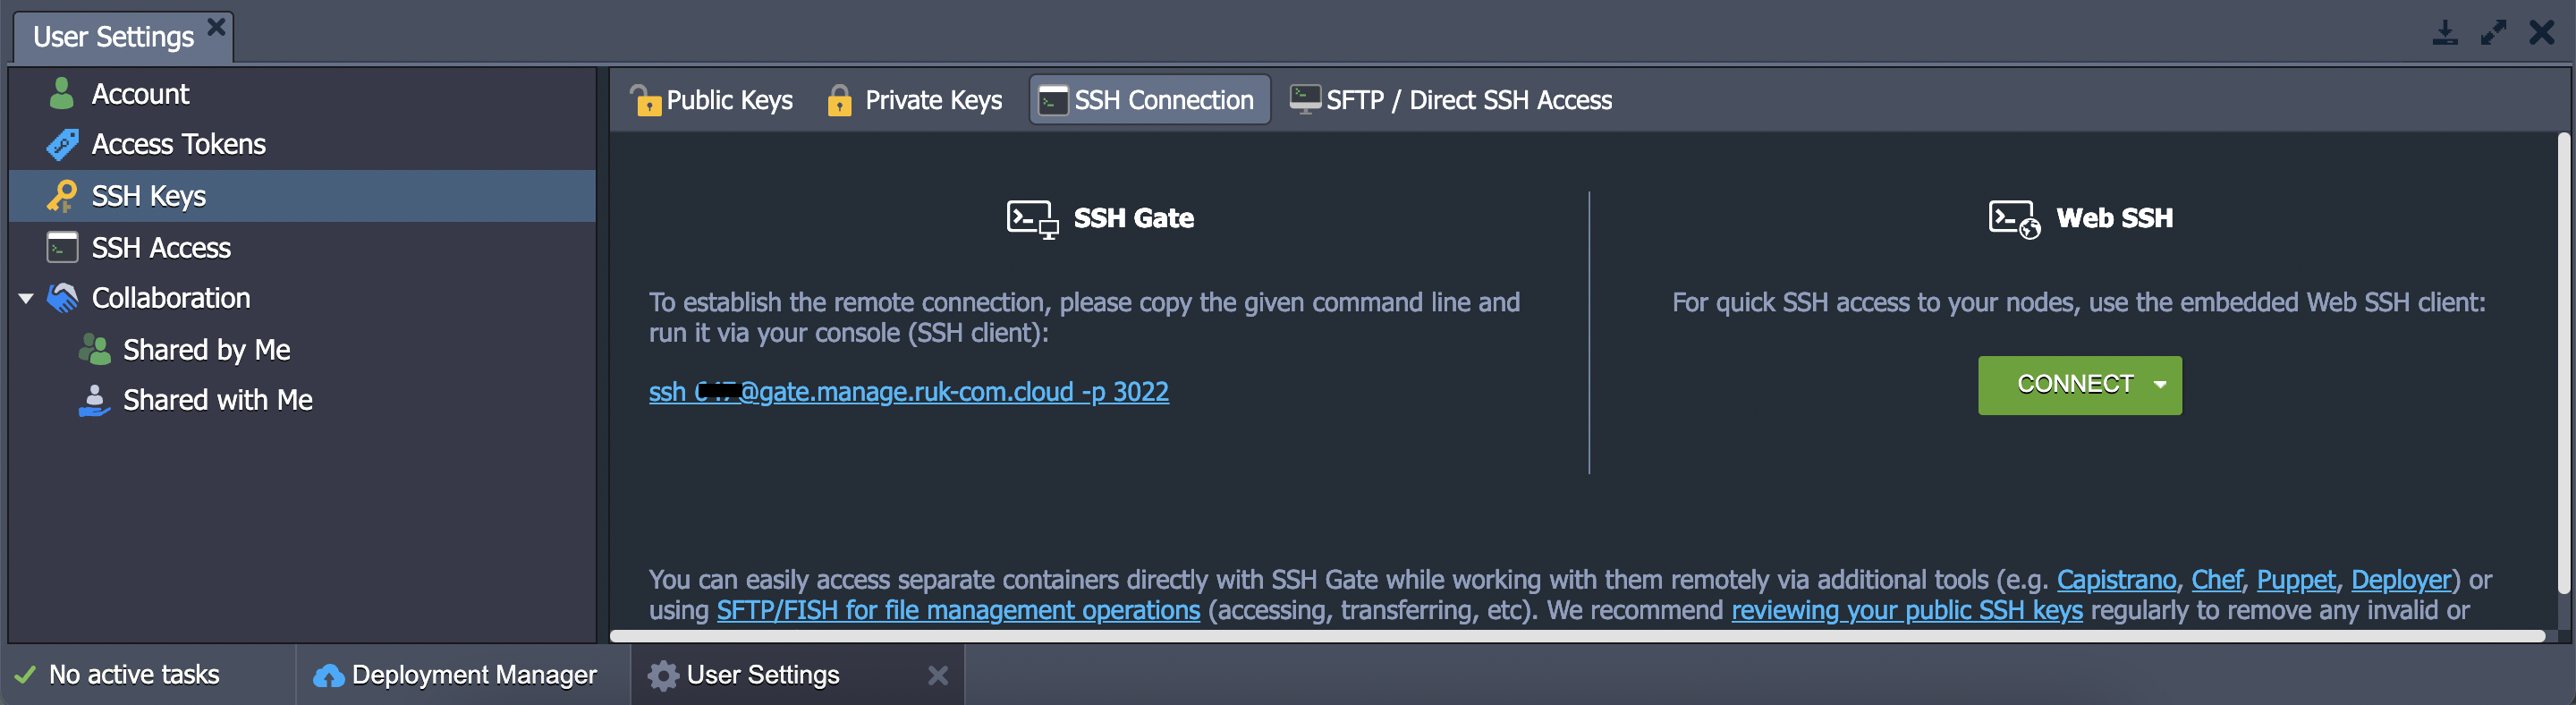
Tips:Web SSH Right You can create a Web SSH connection to any node directly in the browser.
You can now access your entire Ruk-Com Cloud account or specific container with your local SSH client.
SSH access depends on your operating system. You can follow these steps:
- wp:list-item
- Linux/MacOS/FreeBSD /wp:list-item
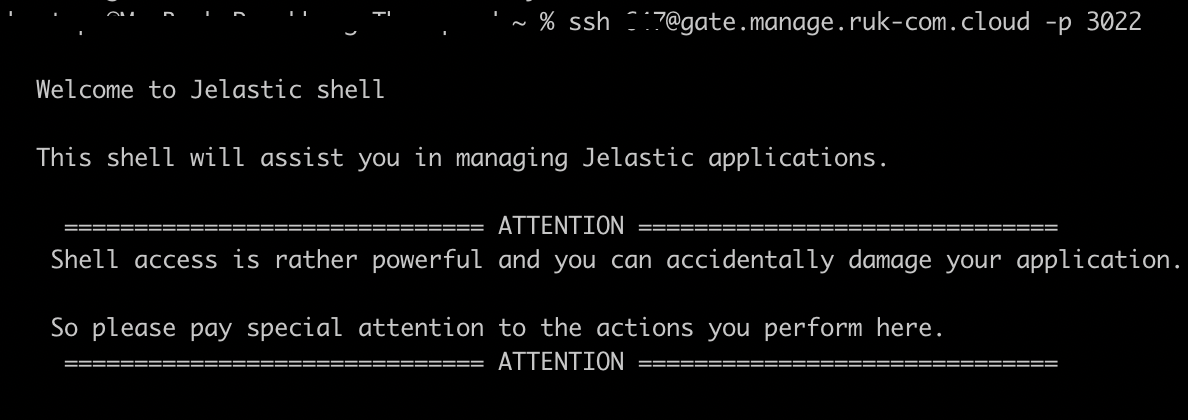
After you have successfully added the SSH Public Key to your account and obtained the SSH connection string from the dashboard (e.g. ssh [email protected] -p 2222)
You can easily connect like this:
- wp:list-item
- Windows /wp:list-item
Download and run your SSH client (for example:Putty)
Go to the Session tab in the menu on the left and enter the Host Name (or IP address) and Port to connect to SSH.
More:To add a private SSH key with PuTTY, download and run the tool.Pageantand click the add key button and select the appropriate key file.
1. After you have successfully connected to the system through SSH Gate, the system will display a list of Environment groups and Ungrouped Environments. for your account Each entry is numbered / For bulk environments, the number of containers is given in parentheses.
Select the Environment you want to access by typing the number of the desired entry and pressing Enter.
Example:
Enter [0-4] : 4
You will then be taken to the container in the selected environment.
Note:Only the environment in which it is currently running can be accessed (Running)
2. After you select the environment you want to access via SSH Gate, the system will display List of all containers within that environment, separated by layer of each service such as Application Server, Database, Load Balancer, etc.
Identification of the master node (Master Node)- Container with status asMain nodewill be indicated by a symbol[M]
Additionally, each container contains nodeid, LAN IP, WAN IP and Alias information. To access the desired node just enter the number.
You can jump directly to the desired container by selecting the desired environment and node by specifying the container ID. (It can be viewed on the dashboard next to the relevant node)
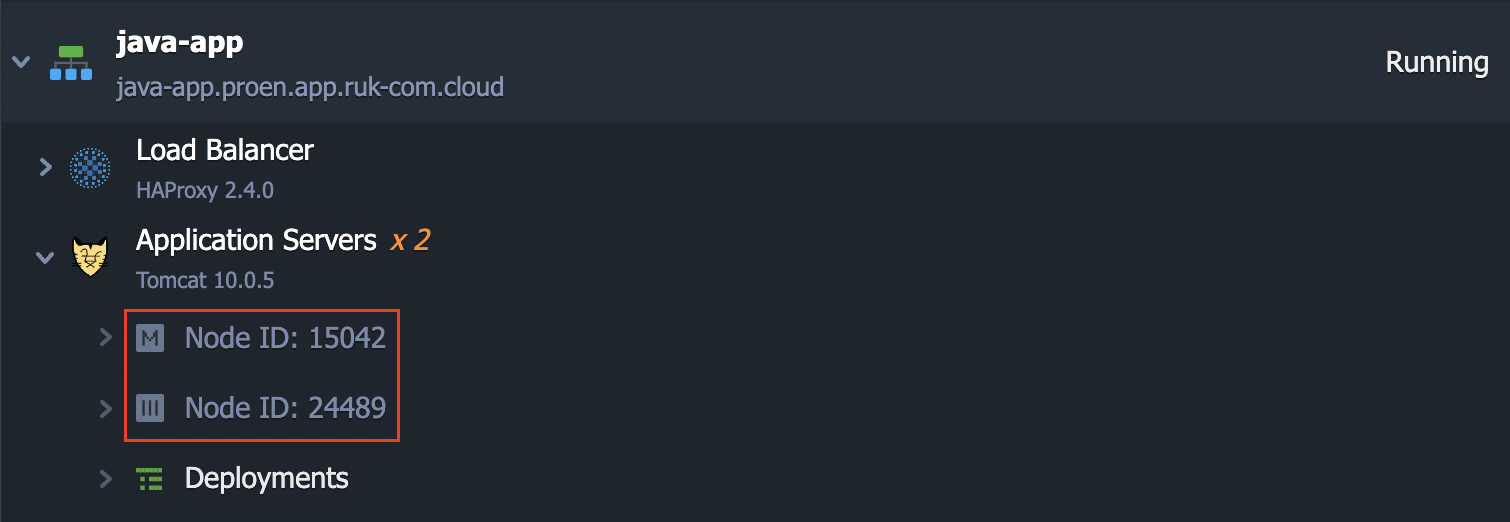
For example, accessing the Tomcat Container shown in the image above. You should add15042-in front of the connection string in the following way:
ssh [email protected] -p 3022This section may be useful for automating scripts or for setting up Application configuration (e.g. Capistrano)