
Job Scheduling Using Quartz
This guide is maintained for Ruk-Com PaaS. Screens and options may vary by platform version and account permissions.
Confirm the environment, region and account permissions, and back up current settings before changing a production system.
Objective
This guide explains how to use Job Scheduling Using Quartz on Ruk-Com Cloud PaaS, with ordered procedures and practical verification points.
Before you begin
- Sign in with an account permitted to manage the relevant environment.
- Confirm the target environment, region and resources before saving changes.
- Create a backup or rollback plan before changing a production system.
QuartzIt is a full-featured, open-source job scheduling service that can be integrated or used with any Java application, from the smallest stand-alone application to the largest e-commerce system. Quartz can be used to create simple or complex schedules for executing tens, hundreds, or even tens of thousands of jobs; A job that has a standard Java job definition as a component can include almost any operation you program it to do.
If your application has tasks that need to occur at any given time or if your system has recurring maintenance tasks, Quartz may be your ideal solution.
Let's see how Quartz works in the cloud.
Creating the Environment
1. Login to Ruk-Com Cloud Dashboard.
2. Click the New Environment button.

3. Select Tomcat as the application server and set the cloudlet limits, then enter the environment name, for example:quartzand clickCreate
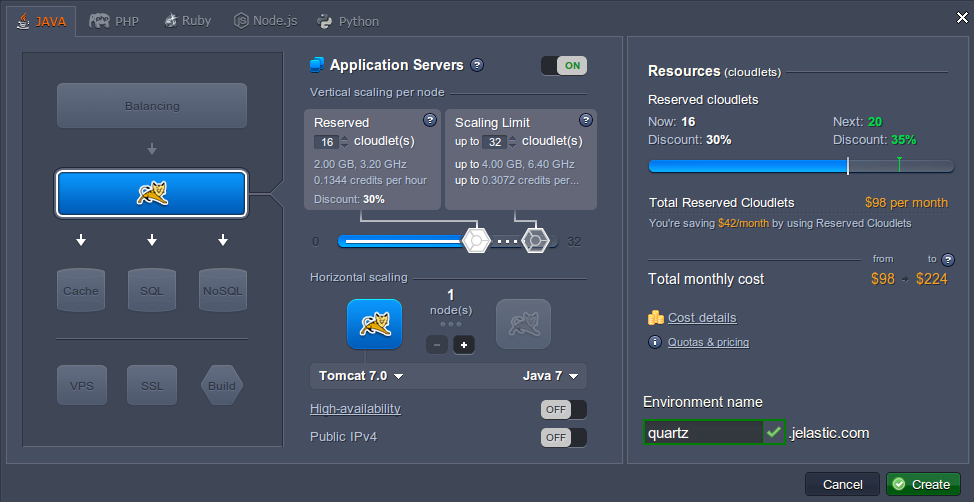
Wait a moment to create your environment.
Creating an application
1. Create your web application (in our case using the Maven application) and add the pom.xml file to integrate the Quartz libraries into your project.
<!-- Quartz API -->
    <dependency>
        <groupId>opensymphony</groupId>
        <artifactId>quartz</artifactId>
        <version>1.6.3</version>
    </dependency>
    <dependency>
        <groupId>commons-collections</groupId>
        <artifactId>commons-collections</artifactId>
        <version>3.2.1</version>
    </dependency>
    <dependency>
        <groupId>org.apache.directory.studio</groupId>
        <artifactId>org.apache.commons.logging</artifactId>
        <version>1.1.1</version>
    </dependency>
2. Create your project
3. Create a new Java class which will execute your task and here is an example showing the server time:
package com;
import java.util.Date;
import org.quartz.Job;
import org.quartz.JobExecutionContext;
import org.quartz.JobExecutionException;

public class HelloJob implements Job
{
    public void execute(JobExecutionContext context)
    throws JobExecutionException {

        System.out.println("Server Time: " + new Date());
    }
}
4. Create a new Servlet (you can easily use other logic) and specify a Quartz trigger to schedule events at which Quartz will run your job. In our case we have created QuartzServlet.java which contains commands (savings executed in the HelloJob class) that are executed every minute.
package com;
import java.io.IOException;
import java.io.PrintWriter;
import java.text.ParseException;
import java.util.logging.Level;
import java.util.logging.Logger;
import javax.servlet.ServletException;
import javax.servlet.http.HttpServlet;
import javax.servlet.http.HttpServletRequest;
import javax.servlet.http.HttpServletResponse;
import org.quartz.CronTrigger;
import org.quartz.JobDetail;
import org.quartz.Scheduler;
import org.quartz.SchedulerException;
import org.quartz.impl.StdSchedulerFactory;

public class QuartzServlet extends HttpServlet {

    protected void processRequest(HttpServletRequest request, HttpServletResponse response)
            throws ServletException, IOException {
        response.setContentType("text/html;charset=UTF-8");
        PrintWriter out = response.getWriter();
        try {

            JobDetail job = new JobDetail();
            job.setName("dummyJobName");
            job.setJobClass(HelloJob.class);

            CronTrigger trigger = new CronTrigger();
            trigger.setName("TriggerName");
            trigger.setCronExpression("0 */1 * * * ?");

            Scheduler scheduler = new StdSchedulerFactory().getScheduler();
            scheduler.start();
            scheduler.scheduleJob(job, trigger);

        } catch (SchedulerException ex) {
            Logger.getLogger(QuartzServlet.class.getName()).log(Level.SEVERE, null, ex);
        } catch (ParseException ex) {
            Logger.getLogger(QuartzServlet.class.getName()).log(Level.SEVERE, null, ex);
        } finally {
            out.close();
        }
    }
    protected void doGet(HttpServletRequest request, HttpServletResponse response)
            throws ServletException, IOException {
        processRequest(request, response);
    }
    protected void doPost(HttpServletRequest request, HttpServletResponse response)
            throws ServletException, IOException {
        processRequest(request, response);
    }
    public String getServletInfo() {
        return "Short description";
    }
}
5. Create your project as a file.WAR
Deploy Application
1. Return to the Ruk-Com Cloud Dashboard page and upload the WAR file you just created.
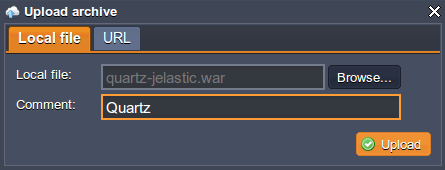
2. Deploy your application to the previously created environment.
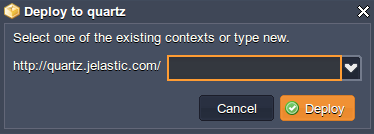
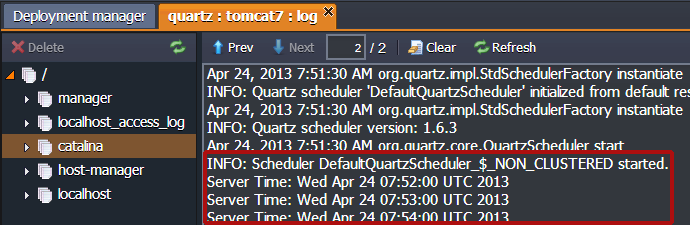
3. Open your app in your browser and check the results. In our case, go to quartz context (http://{env_name}.{hoster_domain}/quartz according to Servlet mapping “QuartzServlet”) and check the application logs.
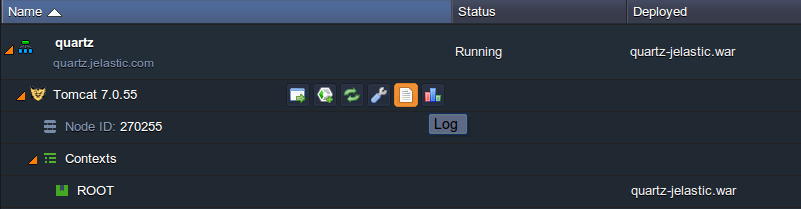
You will see that scheduling tasks using Quartz works like a charm.
We hope this guide on deploying Quartz was helpful for you.