Storing and Deploying Apps via Gitblit
This guide has been reviewed and reformatted for Ruk-Com Cloud PaaS. Screens may vary slightly by platform version.
Click or tap a screenshot to view it at its original size.
Objective
This guide explains how to use Storing and Deploying Apps via Gitblit on Ruk-Com Cloud PaaS, with ordered procedures and practical verification points.
Before you begin
- Sign in with an account permitted to manage the relevant environment.
- Confirm the target environment, region and resources before saving changes.
- Create a backup or rollback plan before changing a production system.

GitBlitIt is one of the most popular tools for managing, observing, and servicing your repositories within Git, which is the ubiquitous VCS (version control system) for software development. GitBlit is primarily designed for small workgroups working with centralized repositories and supports a number of features such as access control. Displaying the contents of a web repository Managing multiple repositories Ability to integrate with other Git management solutions, etc.
So, let's take a look at how hosting Gitblit at Ruk-Com Cloud makes managing your app easier. You can get a ready-to-use Gitblit instance pre-configured and running within minutes using the one-click installation widget:
Just clickGet it hosted nowThen type your email to start Gitblit and you can proceed directly to the manual section.Creating a repositoryBy skipping the manual installation step.
Tips:List of all applications that can be installed with one click. They can be found on our Marketplace page or within the relevant section of the dashboard.
If you want to control the entire process You can deploy it manually by following the step-by-step instructions below:
Creating the Environment
1. Login to Ruk-Com Cloud Dashboard with your credentials and click the button.New EnvironmentThis will open the Environment Wizard frame.

2. Select the Language tab.Javaand selectTomcat 7It's an application server.
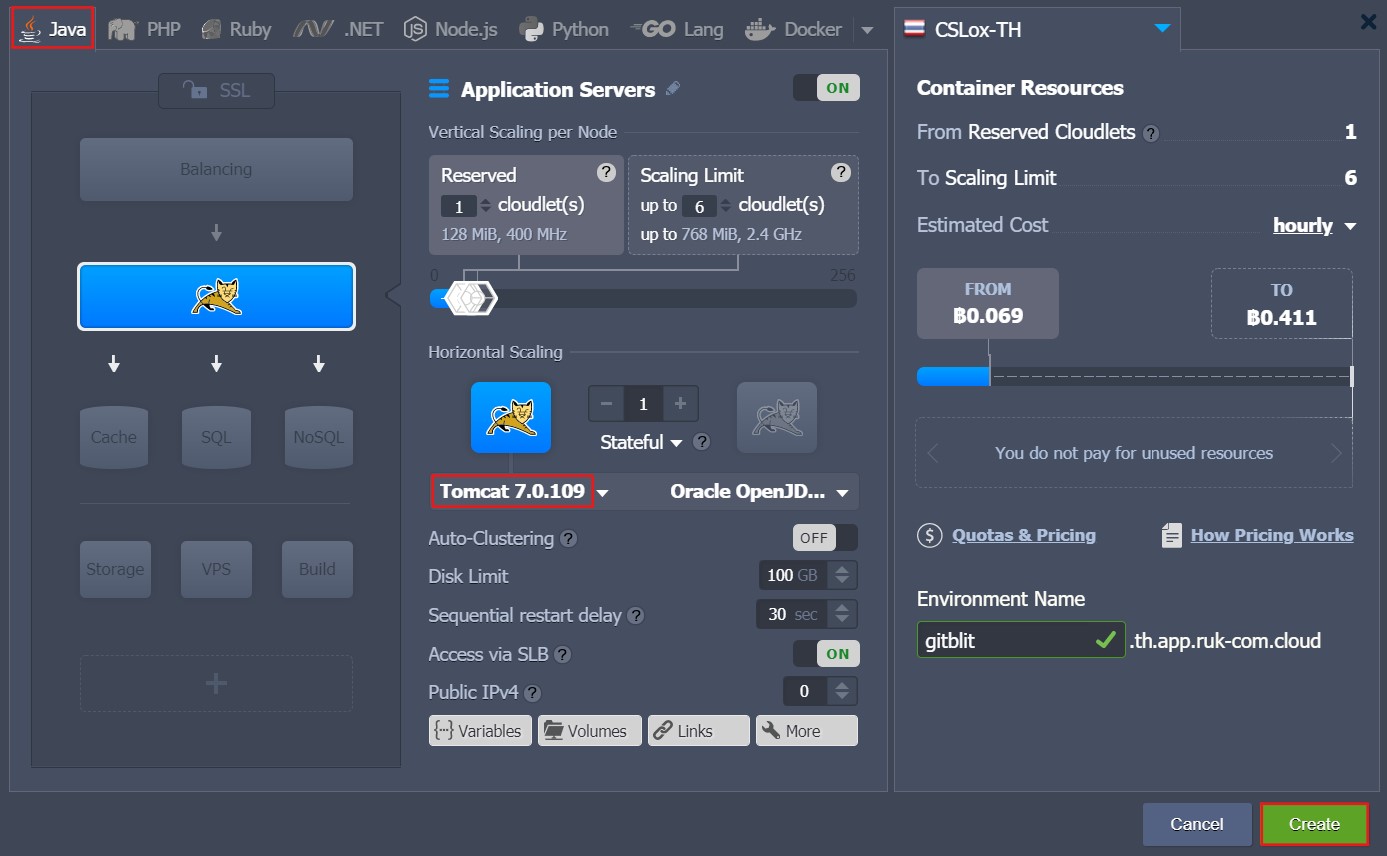
Set the remaining configs according to your needs. Then name the environment (e.g. gitblit) and click the button.Createto start the process
Wait a moment. The created environment will appear on the dashboard.
Deploy Gitblit
1. Go to the websiteGitblitand download the latest release of the archive..war(The appropriate link is in the image below)
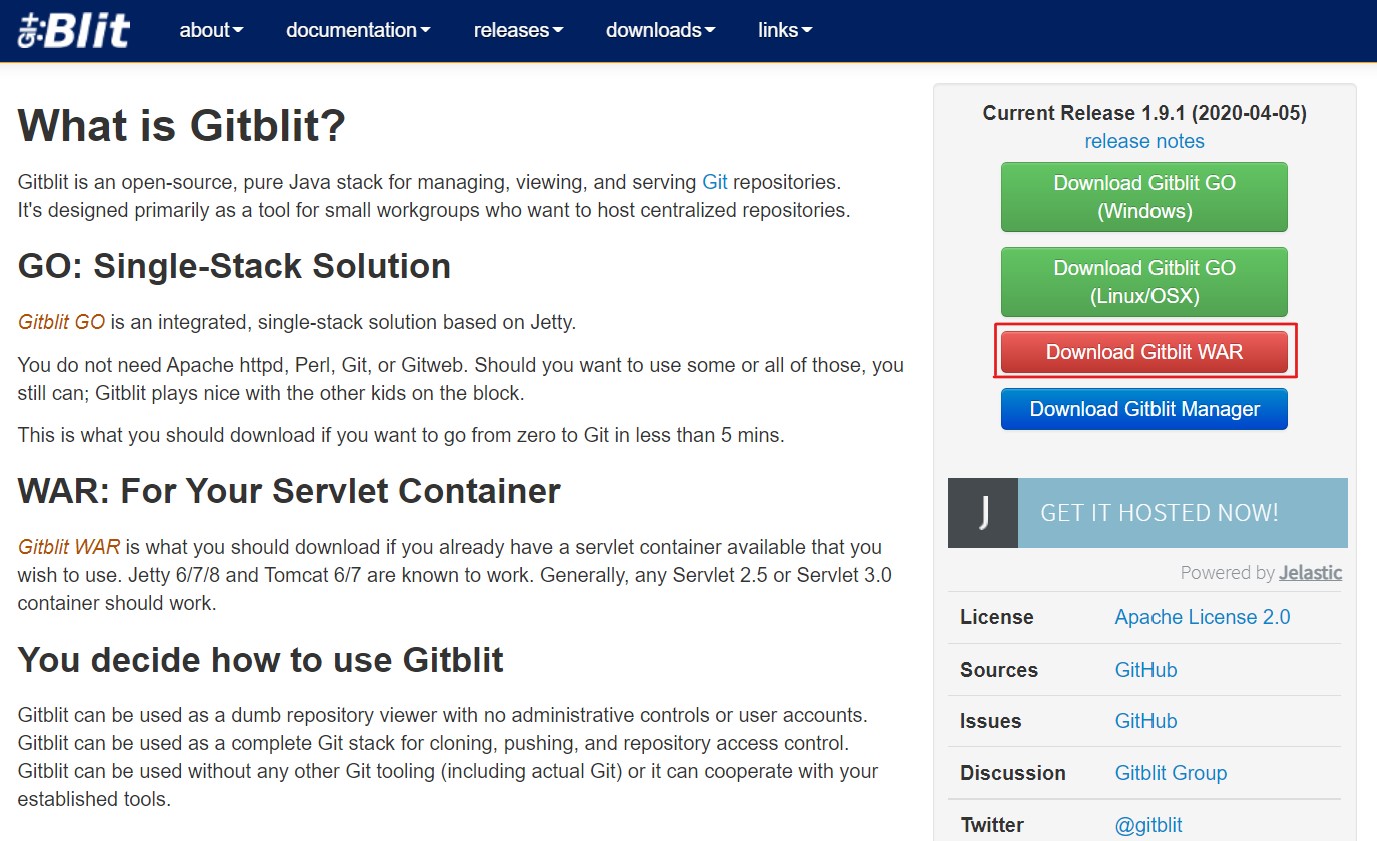
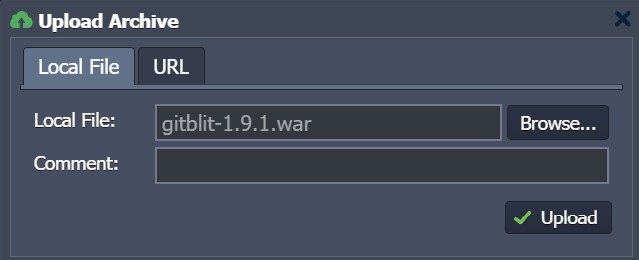
2. Return to the Ruk-Com Cloud Dashboard and useDeployment ManagerTo upload the archive you just downloaded, select the tab.Local fileClickBrowseand select the Gitblit file.warInside your device
3. After the package appears atDeployment ManagerDeploy it to your environment.
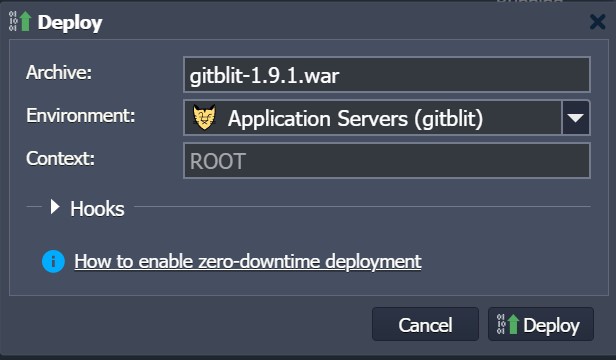
Within the opened frame, you may specify the desired Context by entering data in the field or leave it blank to deploy your application with the default context.ROOT
4. When the operation is completed. You can click the buttonOpen in browserThis is to ensure that your application actually works.

Creating a Gitblit Repository
1. To start working with Gitblit, you must log in to the main page with your admin credentials.
Tips:We recommend changing your password to a custom one as soon as possible for security purposes.
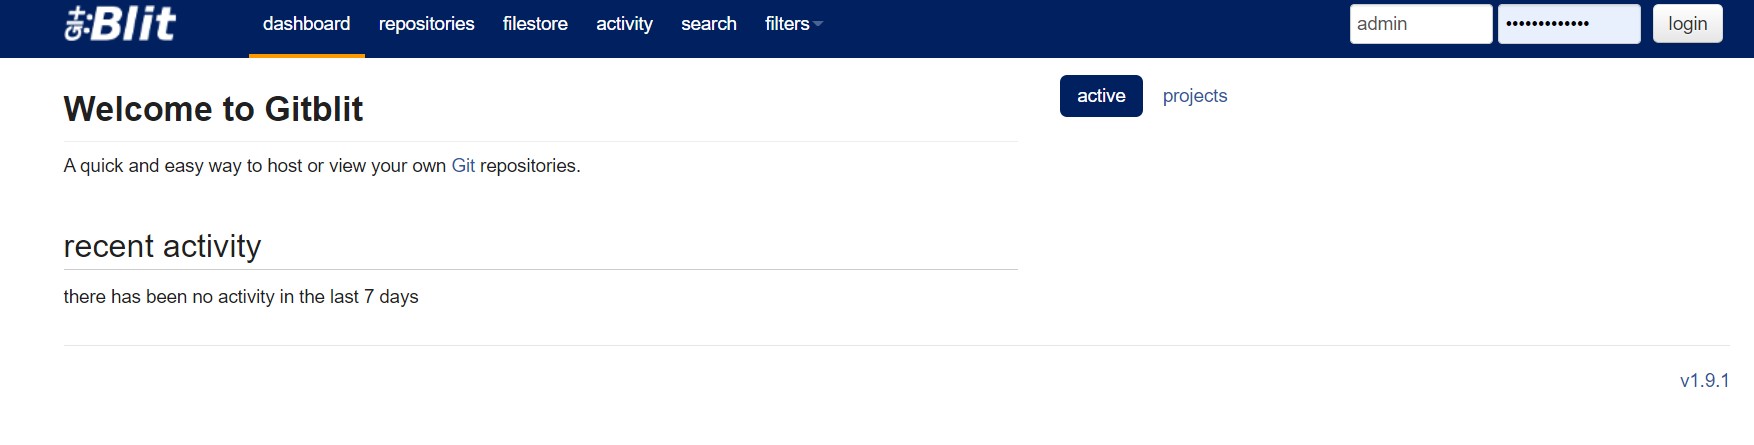
2. Once logged in, switch to the top repositories tab. On this page you will see a list of your repos (if any) and will be able to manage them.
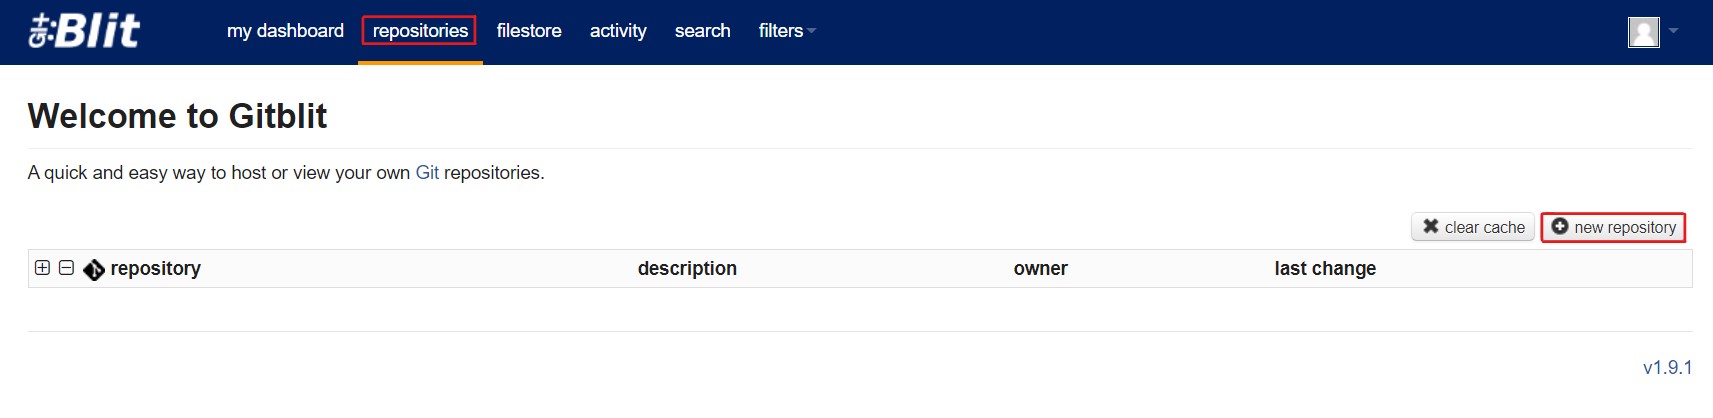
Start creating a new repository by clicking the button.new repositoryright side
3. Name your new repo (e.g. GitBlitRepo) to modify all remaining configurations according to your needs. (or leave it at default)
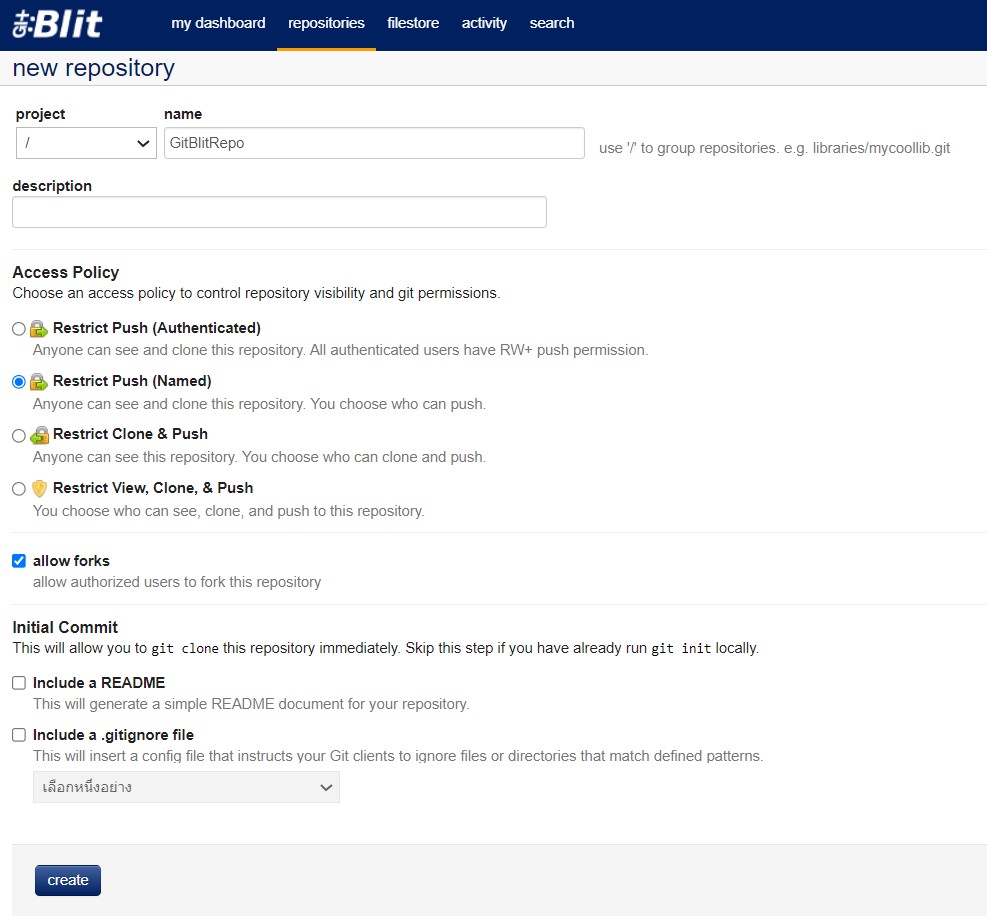
ClickCreateat the bottom once the configuration is complete.
4. Wait a moment for your empty storage to appear.
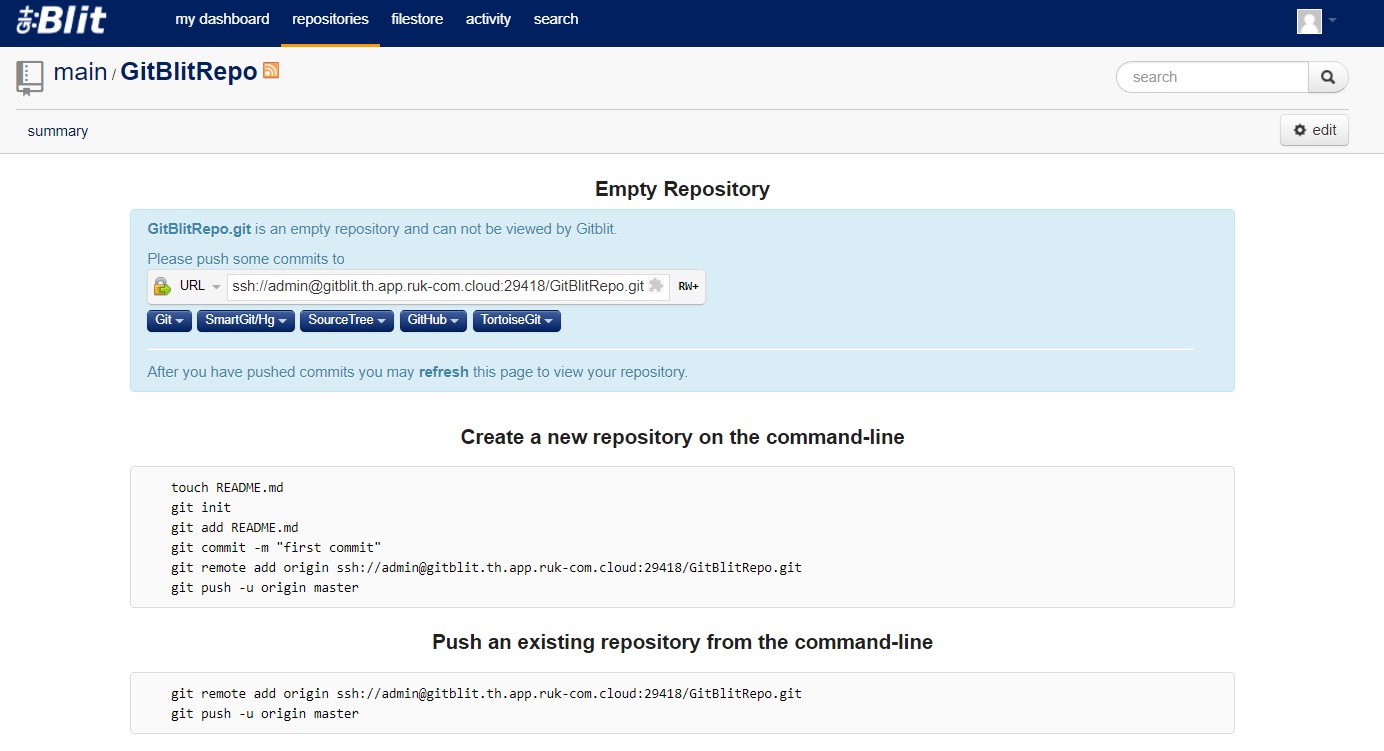
5. You should now Push your project to this repo by following the simple steps below:
- The first step is to start your local storage (i.e. create a folder to store your project files locally):
git init- Defines the files that should be included in your project. (In this example we will add a README file)
git add README.md- Save changes to the local repo with a commit message (i.e. mark it as the first commit).
git commit -m "first commit"- Specify the previously created GitBlit repository as a remote for your local Git repo.
where: - {name}- Setting a name for your remote repository
- {repo_url}- The link to your GItblit repository is in the drop-down list at the top from the previous step. The appropriate http:// link can be copied with the button on the right. As shown in the picture below:
git remote add {name} {repo_url}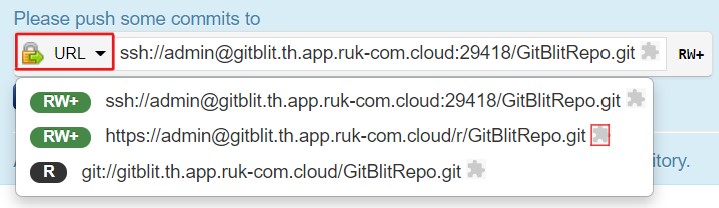
- Finally, push your local project to the Gitblit repository:
where: - {name}- The name of the remote Gitblit repository your project should be copied to is specified as above.
- {branch}- Project branches that should be updated with this new information.
git push -u {name} {branch}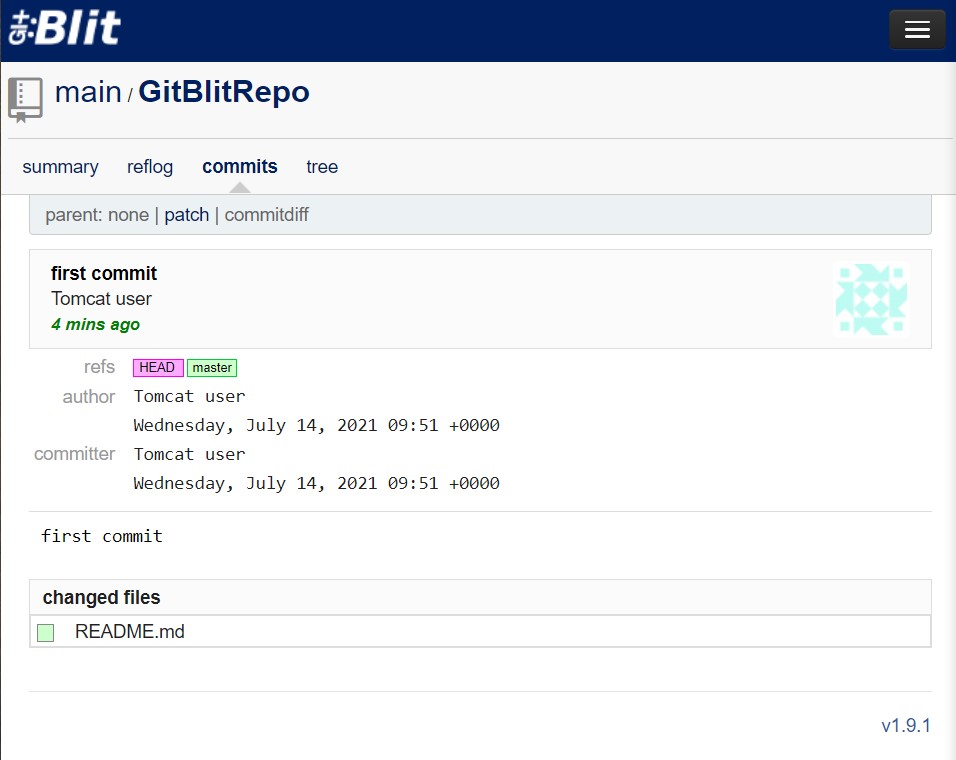
After this process is complete, refresh the Gitblit page to see your repository with all of its data. (Here you can switch to the commit section to view information after the changes have been applied), such as the author, time, and date of the commit. list of changed files, etc.)
Deploy Project via Gitblit
How to deploy your project from Gitblit repository in Ruk-Com Cloud
1. First, create a separate environment for hosting the application. Consider the case where there is a project.JavaIn addition to adding nodes to the application server, you will need to use a build tool (such asMaven)
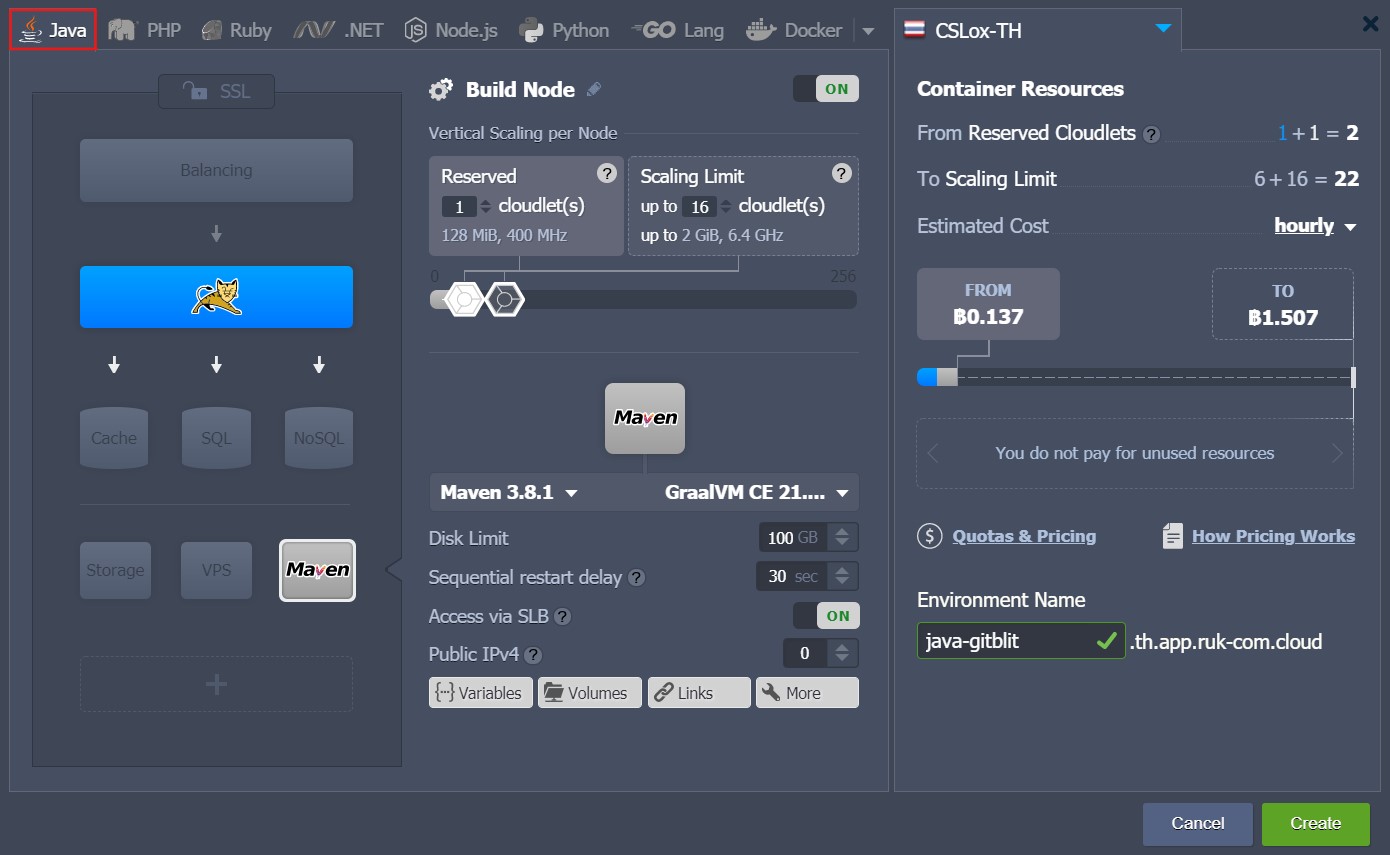
Note:Here only a special Maven node is required for Java projects, while the rest of the engines are automatically executed while adding projects to the application server. Appropriate additional details on how to accomplish this:
–Maven for Deploy via Git/SVN
–Deploy PHP Projects via Git/SVN
–Deploy Ruby Project via Git/SVN
–Deploy Python Projects via Git/SVN
–Deploy Node.js Project via Git/SVN
2. Click the buttonAdd projectnext to the Maven node after the environment has been successfully created.
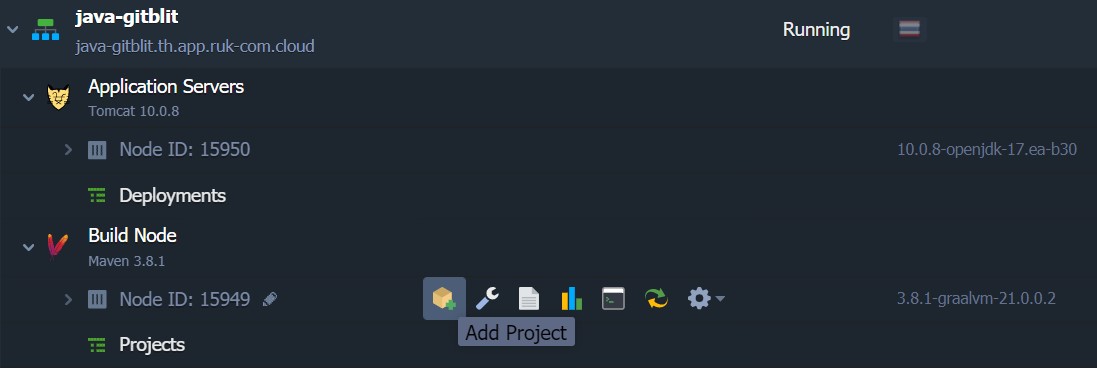
3. Inside the frameAdd Projectthat appears, select the tabGitand fill in the required fields:
- putNameProjects (for Maven only)
- Click the Repository dropdown and press the button.Add New Repositoryto specifyURLandBranchof the repository that you previously created.
- in the channelUse AuthenticationFill in the following fields.
- Loginused to enter your repo
- PasswordFor entering the system specified above
- Choose a nameEnvironmentFrom the dropdown menu
- putContextwhere you want to deploy the project
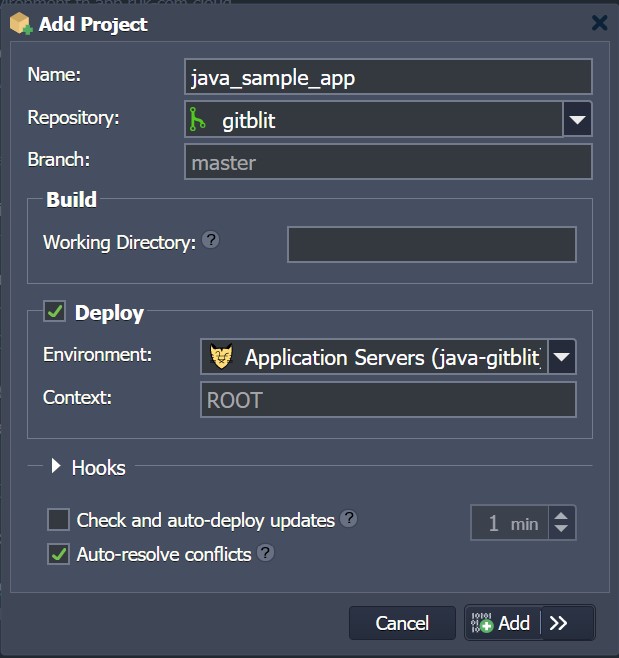
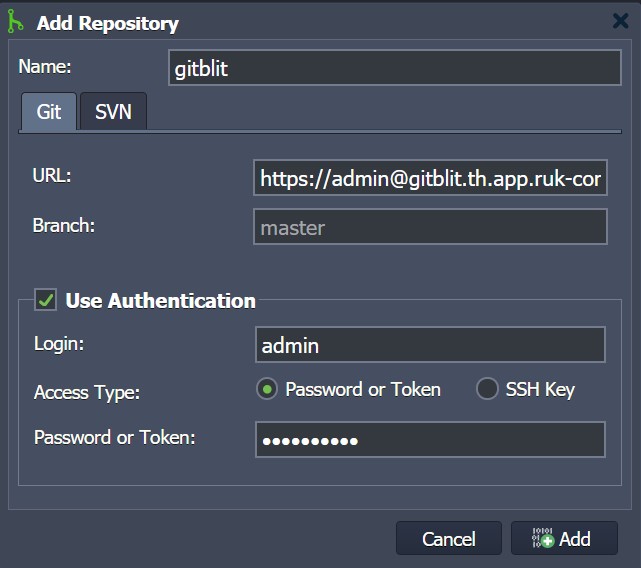
4. Click Options.Build and deploynext to the added project.
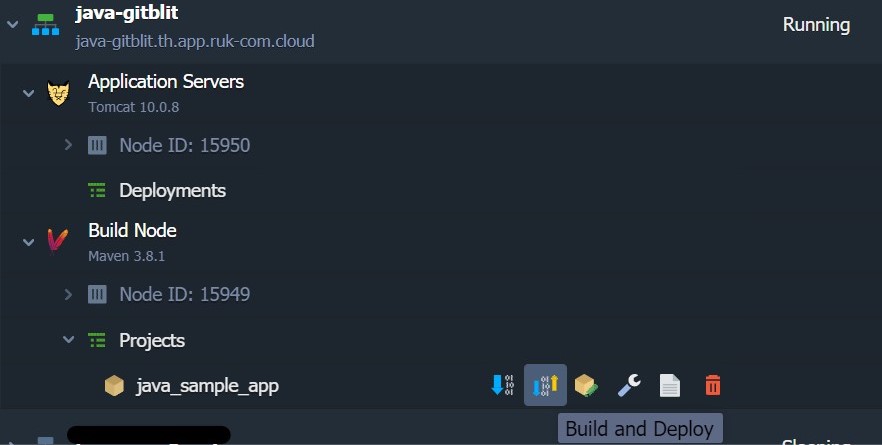
5. Once your application is deployed, you can open it (by pressing theOpen in Browserthat environment) and make sure everything works fine.
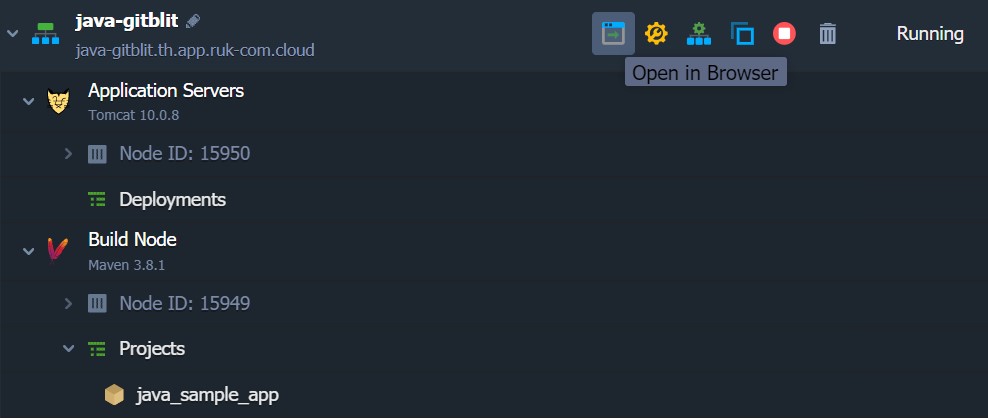
Tips:Subsequently, all redeployed changes in the remote repository can be easily deployed to your hosted app with a single click - select the Build and deploy button (or update from GIT if working with another engine) next to your project and wait for the redeploy to complete.