How to install Hasura GraphQL Engine
This guide has been reviewed and reformatted for Ruk-Com Cloud PaaS. Screens may vary slightly by platform version.
Click or tap a screenshot to view it at its original size.
Objective
This guide explains how to use How to install Hasura GraphQL Engine on Ruk-Com Cloud PaaS, with ordered procedures and practical verification points.
Before you begin
- Sign in with an account permitted to manage the relevant environment.
- Confirm the target environment, region and resources before saving changes.
- Create a backup or rollback plan before changing a production system.
 HasuraIt's an open source engine that uses GraphQL query language for APIs, helping you create connections, manage and configure event triggers for PostgreSQL databases in minutes.
In this chapter we will show two examples of installing the Hasura GraphQL engine at the Ruk-Com PaaS.
- Automatic Deployment with Local PostgreSQL Database
- Manual Deployment with External PostgreSQL Database
Automatic Deployment with PostgreSQL Database
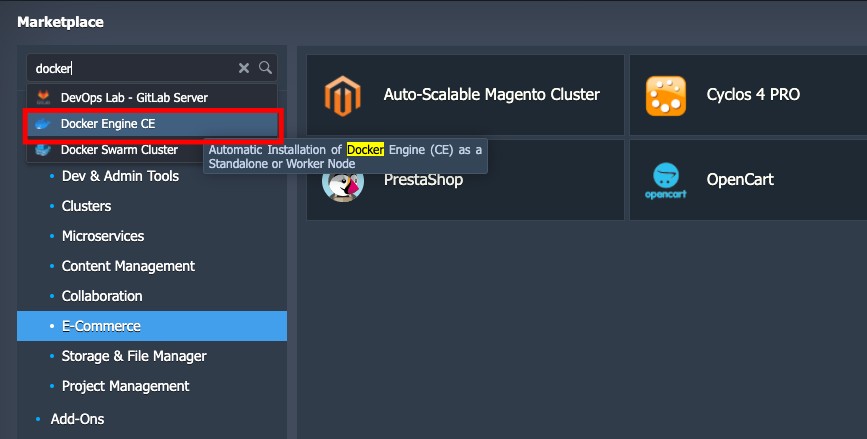
1. Log in to your dashboard and click the # Marketplace link in the top left corner.

2. Find the Docker Engine CE package and start the installation.
3. To automatically create Hasura and PostgreSQL databases in the same container, select Deploy containers from compose.yml and specify the default configuration from the repository.Hasura on Docker
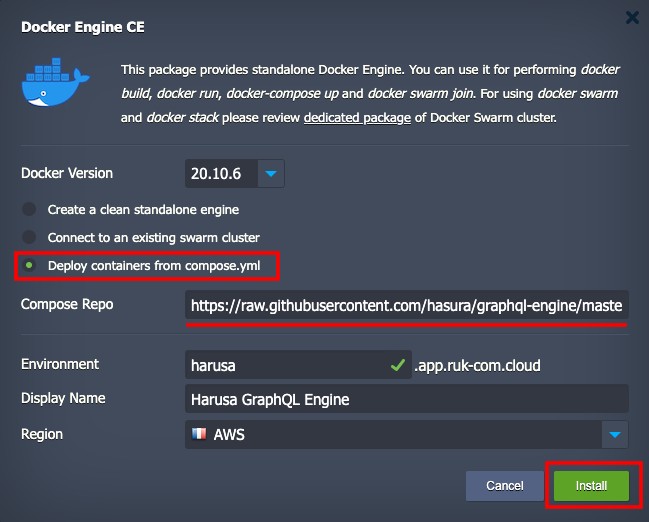
NoteInstallation requirespublic IPThis is a paid option for billing users only.
Configure the remaining Environment fields.Display Name,Region(if any) according to your needs and clickInstall
4. After the installation is successful, you can access the Hasura console to make sure everything is working properly. http://{envDomain}:8080/console
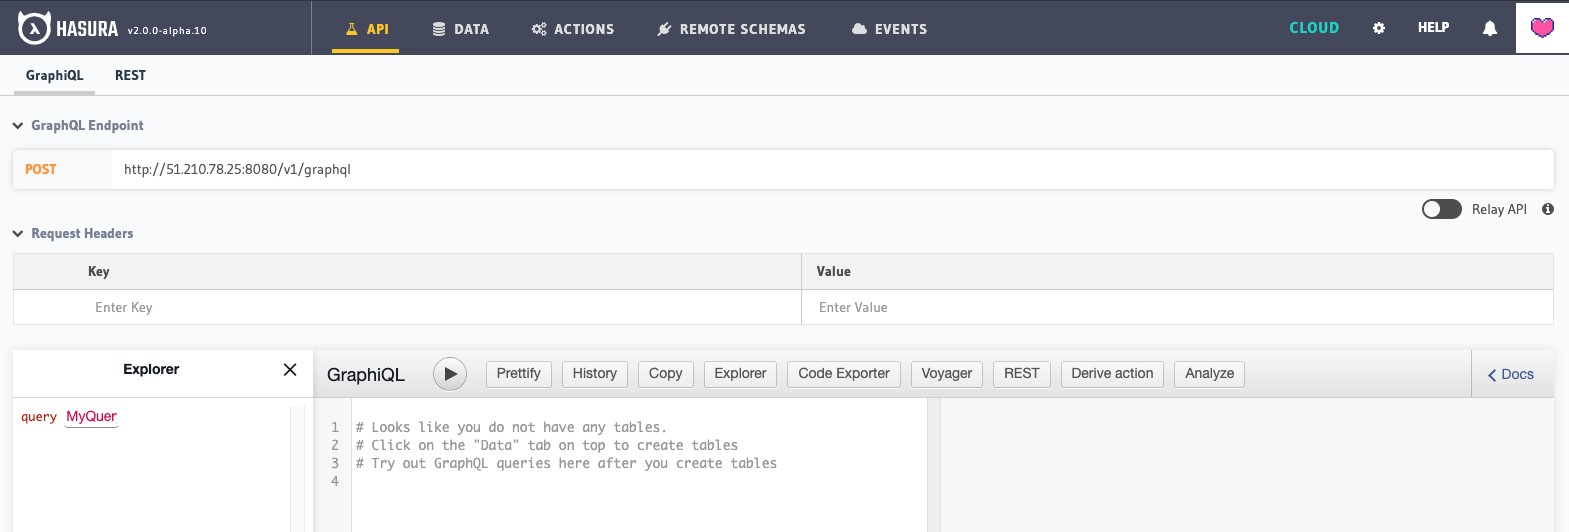
You can now provide data for your database via the same name tab at the top and try using GraphQL queries later.
Deploying Hasura to external PostgreSQL
In case you already have a database, you can connect to it.Hasura GraphQL engineYes
1. Press the Create a clean standalone engine option from the Docker Engine CE window viaRuk-Com Cloud Marketplace.
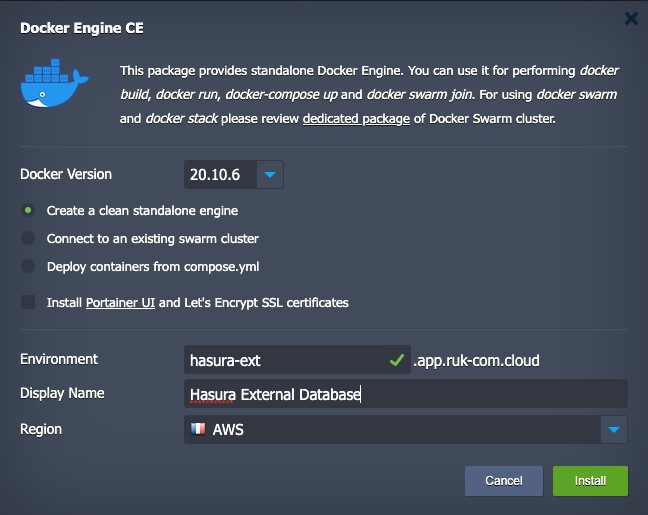
2. After creating, connect to the container viaWeb SSHand create a file with the following content (e.g. nano docker-run.sh)):
docker run -d --restart=always -p 80:8080 \
-e HASURA_GRAPHQL_DATABASE_URL=postgres://{username}:{password}@{host}/{dbname} \
-e HASURA_GRAPHQL_ENABLE_CONSOLE=true \
-e HASURA_GRAPHQL_ADMIN_SECRET=myadminsecretkey \
hasura/graphql-engine:v1.0.0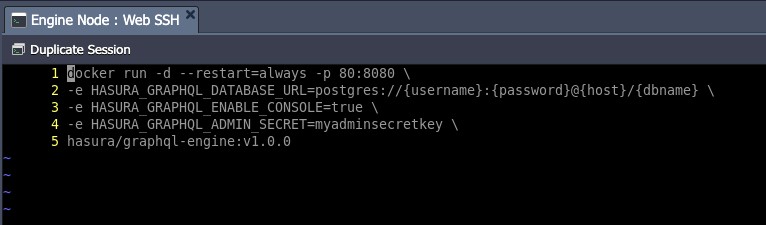
For detailed information about the docker run command, see the official documentation. In our case, the parameters are as follows.
- d - Run the Service in the background (deamon)
- –restart=always - to always start the daemon (e.g. after restarting the container)
- -p 80:8080 - Configure port redirection from port 80 of the Docker Engine container to 8080 one of the Hasura images running inside it.
- -e – Set Env variables (see link #full listfor more details)
- HASURA_GRAPHQL_DATABASE_URL - Connection link to your PostgreSQL database with URL-encoded special characters (if at Ruk-Com, required details can be found in the email after PostgreSQL creation).
- HASURA_GRAPHQL_ENABLE_CONSOLE - Enable Hasura console.
- HASURA_GRAPHQL_ADMIN_SECRET – configure the admin secret key to access the console, in our case it is myadminsecretkey - hasura/graphql-engine:v1.0.0 - Docker image to install
3. Make this file executable and run it to create a Hasura Docker container.
chmod +x docker-run.sh
sh docker-run.sh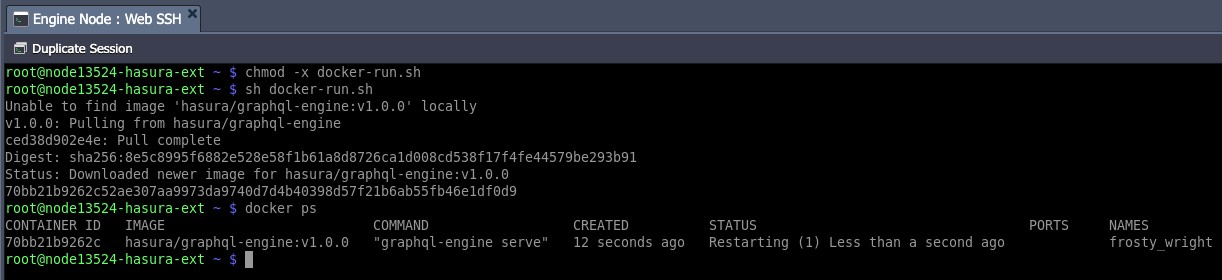
You can additionally run the docker ps command to ensure that the Hasura service is ready to run.
4. In our case, the console application is on port 80, so you can click Open in Browser next to your Env for automatic redirection. Otherwise, the required ports should also be added to the Env URL.
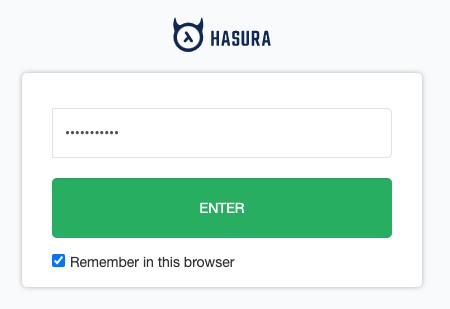
According to our settings, the admin secret key should be specified to access the console. (In our case, it's myadminsecretkey)
5. You can now start working with your database through the GraphQL API, for example from the GraphiQL tab.
Note
If a table already exists, that should be tracked by Hasura. Go to the Data tab and allow access to the required data.
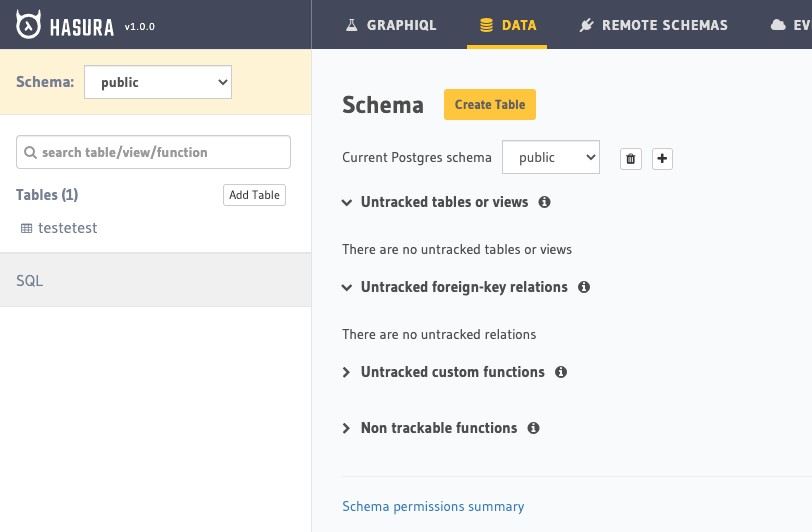
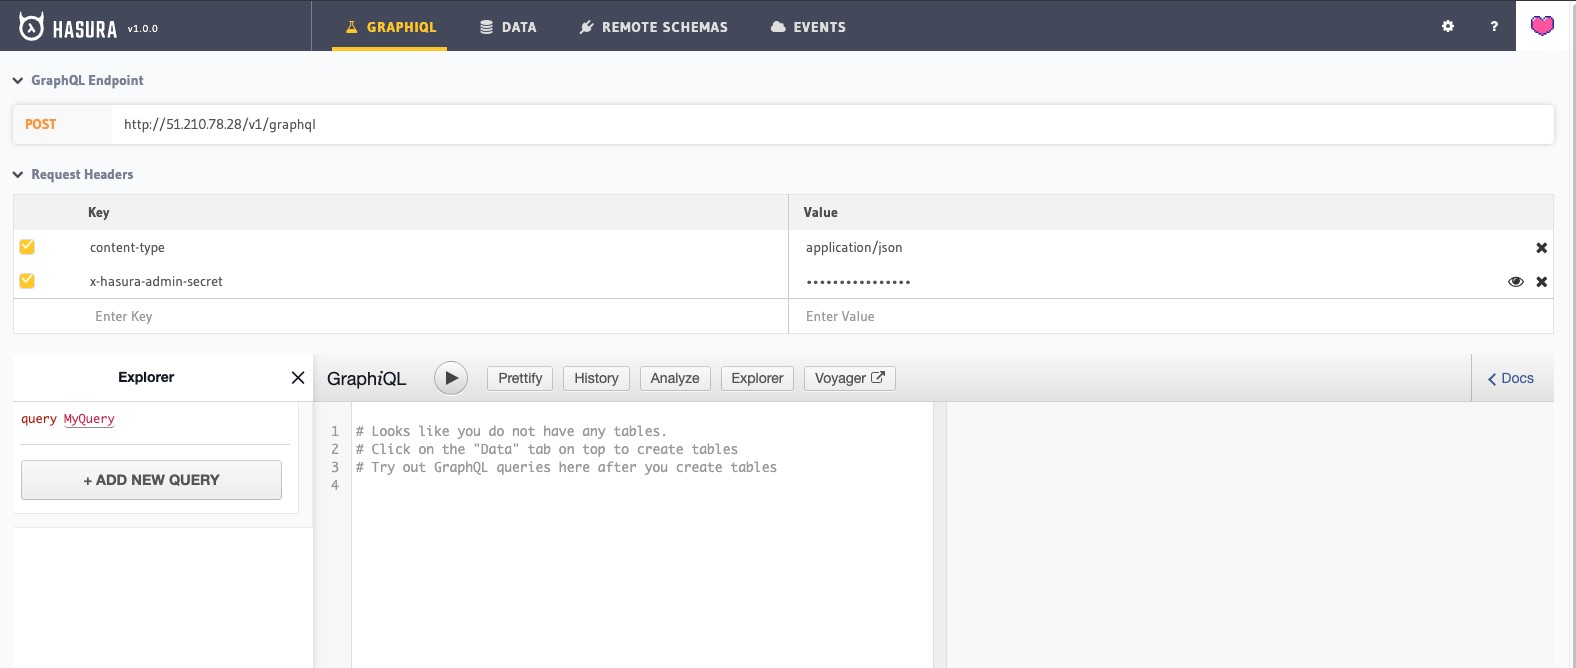
Or you can use the GraphQL Endpoint (listed at the top of the page) to make your POST requests to the database via the desired tool or script.