
คู่มือ Multiple Domains for PHP สำหรับ การตั้งค่า Application
คู่มือนี้เรียบเรียงสำหรับ Ruk-Com PaaS หน้าจอและตัวเลือกอาจแตกต่างตามเวอร์ชันและสิทธิ์ของบัญชี
ตรวจสอบ Environment, Region, สิทธิ์บัญชี และสำรองค่าปัจจุบันก่อนดำเนินการกับระบบจริง
คำสั่ง ชื่อเมนู Parameter และค่าตัวอย่างในกรอบ Code คงรูปแบบตามระบบเพื่อให้คัดลอกและตรวจสอบได้ถูกต้อง
การใช้หลาย Domain ช่วยให้คุณสามารถเพิ่มการใช้งานประสิทธิภาพและความสามารถในการปรับขนาดของ Application PHP ของคุณได้และแน่นอนว่าช่วยประหยัดเงินของคุณโดยไม่จำเป็นต้องตั้งค่า Instance แยกต่างหาก
มาดูวิธีเรียกใช้หลาย Domain บน Application Server PHP เพื่อให้ Application PHP ของคุณปรับขนาดได้และมีประสิทธิภาพยิ่งขึ้น
-
เข้าสู่ระบบบัญชี PaaS
-
คลิกสร้าง Environmentที่มุมซ้ายบนของ Dashboard
-
ในตัวช่วยสร้างที่เปิดอยู่ให้ไปที่แท็บ PHP เลือก Application Server และระบุจำนวน Resource ที่ Application ของคุณต้องการหลังจากนั้นให้ป้อนชื่อ Environment แล้วคลิกสร้างปุ่ม.
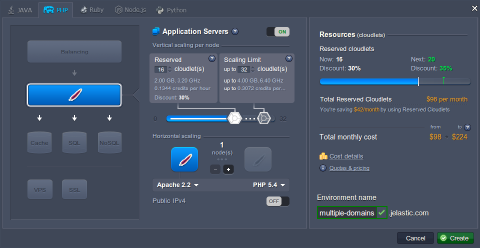 ภายในไม่กี่วินาที Environment ของคุณจะปรากฏบน DashboardPlatform
 4. คุณต้องมีชื่อใน DNS ซึ่งแก้ไขเป็นที่อยู่ IP ของคุณดังนั้นซื้อชื่อ Domain สำหรับ Environment ของคุณสามารถทำได้สองวิธี: โดยการเพิ่มระเบียน CNAME หรือโดยการตั้งค่า A Records คุณสามารถอ่านเพิ่มเติมได้ที่นี่.
- หลังจากนั้นให้คลิกที่การตั้งค่าปุ่มสำหรับ Environment ของคุณและผูก Domain ของคุณเป็นตัวอย่างที่เราใช้ URL ต่อไปนี้:mydomain.comและmyseconddomain.com.
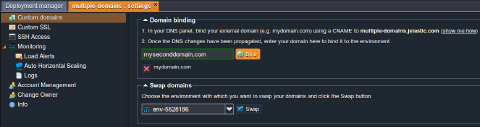
บันทึก:ในกรณีนี้เราใส่รายการลงในไฟล์ Host ของเราสำหรับการทดสอบในเครื่องและรายการจะทำงานจากเครื่องที่มีรายการ Host เหล่านั้นเท่านั้น
- ตอนนี้คุณสามารถอัพโหลดได้แล้วซิปแพคเกจกับแอปของคุณไปยัง Deployment Manager และ Deploy กับ Environment ที่คุณสร้างไว้ก่อนหน้านี้
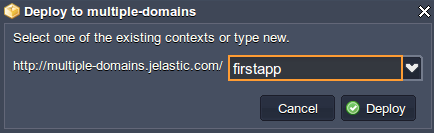
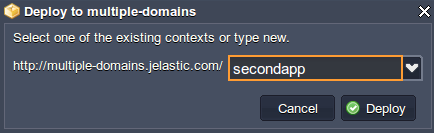 7. เมื่อ Application ของคุณใช้งานได้สำเร็จคุณจะต้องระบุการกำหนดค่า Host เสมือนของคุณ
- สำหรับอาปาเช่
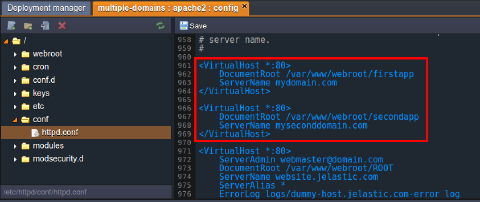
คลิกการกำหนดค่าถัดจาก Server Apache และเปิดไฟล์httpd.confไฟล์ (ในการประชุมDirectory) ชุดHost เสมือนParameter สำหรับชื่อ Domain สองชื่อแยกกันโดยการระบุเส้นทางไปยังบริบทที่ Deploy และชื่อของ Domain:
คัดลอกอาปาเช่
Listen 80
<VirtualHost *:80>
    DocumentRoot /var/www/webroot/firstapp
    ServerName mydomain.com
    ...
</VirtualHost>
<VirtualHost *:80>
    DocumentRoot /var/www/webroot/secondapp
    ServerName myseconddomain.com
    ...
</VirtualHost>
 *สำหรับ NGINX
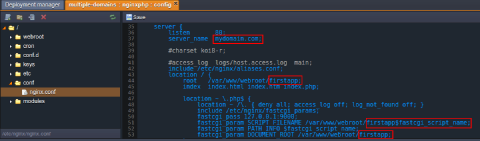
คลิกการกำหนดค่าถัดจาก Server NGINX และเปิดไฟล์nginx.confไฟล์ในการประชุมDirectory
ระบุการตั้งค่าของคุณในServerปิดกั้น
- server_name (Domain ของคุณ)
- ROOT (บริบทที่คุณระบุขณะ Deploy)
โปรดทราบว่าคุณต้องมีแยกต่างหากServerบล็อกด้วยการตั้งค่าของตัวเองสำหรับแต่ละ Domain ที่คุณผูกไว้
สำเนา nginx
server {
        listen       80;
        server_name  localhost;

include /etc/nginx/aliases.conf;
        location / {
            root   /var/www/webroot/ROOT;
            index  index.html index.htm index.php;

            location ~ \.php$ {
                location ~ /\. { deny all; access_log off; log_not_found off; }
            include /etc/nginx/fastcgi_params;
            fastcgi_pass 127.0.0.1:9000;
            fastcgi_param SCRIPT_FILENAME /var/www/webroot/ROOT$fastcgi_script_name;
            fastcgi_param PATH_INFO $fastcgi_script_name;
            fastcgi_param DOCUMENT_ROOT /var/www/webroot/ROOT;
            }

        }
        index  index.php index.html index.htm;

error_page   500 502 503 504  /50x.html;
        location = /50x.html {
            root   html;
        }

location ~ /\. { deny all; access_log off; log_not_found off; }

location ~ \.php$ {
        location ~ /\. { deny all; access_log off; log_not_found off; }
            include /etc/nginx/fastcgi_params;
            fastcgi_pass 127.0.0.1:9000;
            fastcgi_param SCRIPT_FILENAME /var/www/webroot$fastcgi_script_name;
            fastcgi_param PATH_INFO $fastcgi_script_name;
            fastcgi_param DOCUMENT_ROOT /var/www/webroot;
        }

    }
ในกรณีของเราการตั้งค่าจะเป็นดังนี้:
สำเนา nginx
server {
        listen       80;
        server_name  mydomain.com;

    include /etc/nginx/aliases.conf;
        location / {
            root   /var/www/webroot/firstapp;
            index  index.html index.htm index.php;

            location ~ \.php$ {
                location ~ /\. { deny all; access_log off; log_not_found off; }
            include /etc/nginx/fastcgi_params;
            fastcgi_pass 127.0.0.1:9000;
            fastcgi_param SCRIPT_FILENAME /var/www/webroot/firstapp$fastcgi_script_name;
            fastcgi_param PATH_INFO $fastcgi_script_name;
            fastcgi_param DOCUMENT_ROOT /var/www/webroot/firstapp;
            }

        }
        index  index.php index.html index.htm;

        error_page   500 502 503 504  /50x.html;
        location = /50x.html {
            root   html;
        }

            location ~ /\. { deny all; access_log off; log_not_found off; }

        location ~ \.php$ {
        location ~ /\. { deny all; access_log off; log_not_found off; }
            include /etc/nginx/fastcgi_params;
            fastcgi_pass 127.0.0.1:9000;
            fastcgi_param SCRIPT_FILENAME /var/www/webroot$fastcgi_script_name;
            fastcgi_param PATH_INFO $fastcgi_script_name;
            fastcgi_param DOCUMENT_ROOT /var/www/webroot;
        }

    }

server {
        listen       80;
        server_name  myseconddomain.com;

            include /etc/nginx/aliases.conf;
        location / {
            root   /var/www/webroot/secondapp;
            index  index.html index.htm index.php;

            location ~ \.php$ {
                location ~ /\. { deny all; access_log off; log_not_found off; }
            include /etc/nginx/fastcgi_params;
            fastcgi_pass 127.0.0.1:9000;
            fastcgi_param SCRIPT_FILENAME /var/www/webroot/secondapp$fastcgi_script_name;
            fastcgi_param PATH_INFO $fastcgi_script_name;
            fastcgi_param DOCUMENT_ROOT /var/www/webroot/secondapp;
            }

        }
        index  index.php index.html index.htm;

        error_page   500 502 503 504  /50x.html;
        location = /50x.html {
            root   html;
        }

    location ~ /\. { deny all; access_log off; log_not_found off; }

    location ~ \.php$ {
        location ~ /\. { deny all; access_log off; log_not_found off; }
            include /etc/nginx/fastcgi_params;
            fastcgi_pass 127.0.0.1:9000;
            fastcgi_param SCRIPT_FILENAME /var/www/webroot$fastcgi_script_name;
            fastcgi_param PATH_INFO $fastcgi_script_name;
            fastcgi_param DOCUMENT_ROOT /var/www/webroot;
        }

    }
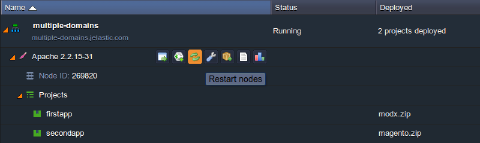
 8. อย่าลืมบันทึกการเปลี่ยนแปลงและRestartApplication Server เพื่อใช้การตั้งค่าใหม่
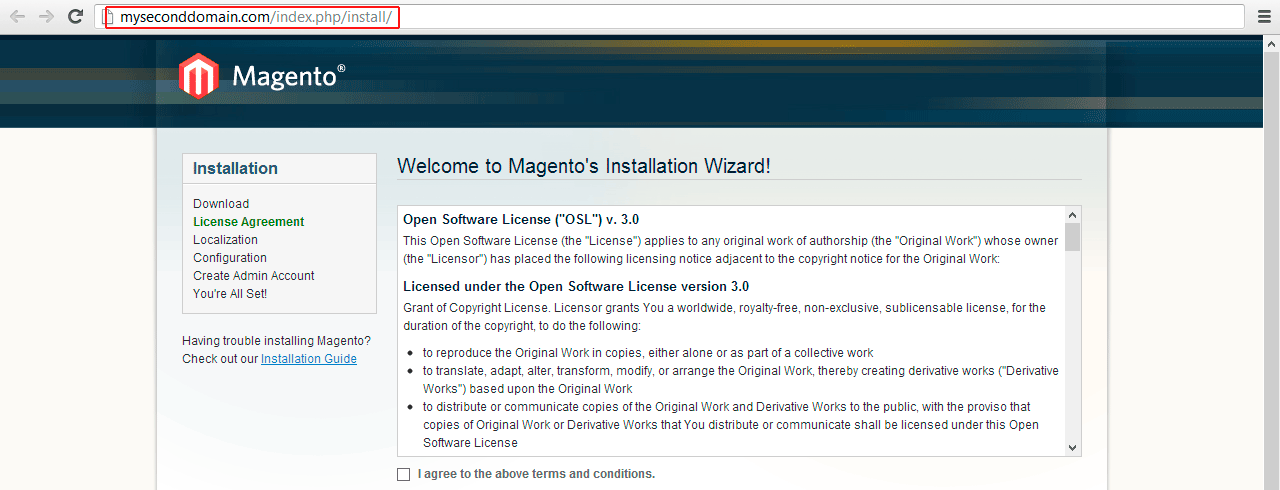
 9. ตอนนี้คุณสามารถตรวจสอบผลลัพธ์เพื่อให้แน่ใจว่าทุกอย่างทำงานได้อย่างถูกต้อง
หวังว่าคำแนะนำนี้จะเป็นประโยชน์สำหรับคุณชื่อ Domain เป็นส่วนสำคัญของข้อมูลประจำตัวออนไลน์ของคุณดังนั้นอย่าลืมปกป้องพวกเขาด้วย PaaS ใช้เวลาเพียงไม่กี่นาทีสนุก!